EasyManua.ls Logo

HAMPTON BAY SKU 433-659 User Manual

HAMPTON BAY SKU 433-659
12 pages
To Next Page IconTo Next Page
Page #1 background imageLoading...
Page #1 background image
Page
1
I
N
S
T
R
U
C
TI
O
N
A
N
U
AL
1LTExteriorWall LanternwithPhotocell
HomeDepotSKU 240-336 (UPC 725916814205)(blackfixture)
Home DepotSKU 240-339 (UPC 725916814212)(whitefixture)
HomeDepotSKU 433-659 (UPC 6940500311234) (bronzefixture)
Page 24
S
O
L
U
T
I
O
N
S
D
E
D
E
P
A
NN
A
G
E:
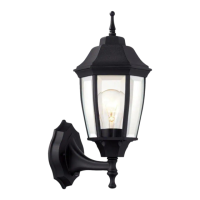
ENTRETIENDU PRODUIT:
1. Nettoyezl'ext rieur duluminaireavec un chiffonpropreetsec ou l g rementhumidifi
(utilisezde l'eaupropre,pasdesolvant)pouressuyerleverreetlasurface.
2. Avant denettoyer l'int rieurduluminaire, dconnectez l'alimentationdecelui-cien
teignantledisjoncteurouenenlevantlefusibleducoffret fusible.Puis,gr ce un
chiffon propresecou l grement humidifi (utilisezdel'eaupropre,pasdesolvant),
essuyez l'int rieurduverreetlasurfaceinterne duluminaire.
3. Nepasutiliserdenettoyantchimiques,desolvantsou d'abrasifs durs.Utilisez seulement
un chiffon douxetsec pour d poussi rer ou essuyer.
GARANTIELIMIT E
Lefabricantgarantitce luminairecontretout d fautdemat riaux,defabricationpourune p riodedetrois (3)
ans partirdeladate d'achat.Cettegaranties'appliqueseulement l'acheteur d'origine et seulementpour un
usagenormal duproduit.Si leproduitest d fectueux,l'uniqueobligationdufabricant,etvotreseulrecours, est
la r parationouleremplacementduproduit ladiscr tiondufabricant, condition que le produitn'estpassubi
demauvaisusage,d'abus, d'accident,de modifications,d'alt rations,de n gligences ou demauvaiseutilisation.
Cette garantie nes'appliquepas tout produit mal install , r gl ouutilis d'une fa onautrequecelle d crite
danslesinstructionsaccompagnant le produit.Cettegarantie nes'appliquepas unmauvais fonctionnementdu
produit r sultantd'unaccident,mauvaiseutilisation,abus, n gligence, alt ration, ou installation d fectueuse,ou
toutautremauvais fonctionnement non caus par un d fautdemat riauxoudefabrication.Cette garantie ne
s'appliquepas lacosm tiquedetoute partieduproduittel quesasurfaceet/oula d coloration, ceci tant
consid r comme uneusurenormale. Le fabricantne garantitpaset d clinetouteautregarantie,expresse
ouimplicite,ycomprisles garanties de convenance unautreusage sp cifique noninclus ci dedans. Le
fabricant d cline touteresponsabilit etneserapas tretenuresponsablepourtoutdommageouperte
indirecteouaccessoire, incluant,maissans trelimit ,lesfraisengag sdansleremplacementoula
r parationduditproduit.
Probl me Cause Possible Mesure Corrective
1. L'ampouleestgrill e. 1.Remplacez l'ampoule.
2. Lecourantestcoup . 2. V rifiezsilecourant est
soustension.
3.Mauvaiseconnexiondefil.3. V rifiezle c blage.
4.Interrupteurmural
d fectueux.
4.Testezouremplacez
l'interrupteur.
L'ampoulenes'allume
pas.
5.CullulePhoto 5.Sila journ e,couvrez
CullulePhoto aveclamain
ouduruban lectrique.
Lefusiblesaute ou le
disjoncteurdisjoncte lors
del'allumage.
Mauvaiseconnexiondes
c bles ou mise terre
d fectueuse.
V rifiezlesconnexionsdes
c bles.

Questions and Answers:

HAMPTON BAY SKU 433-659 Specifications

General IconGeneral
BrandHAMPTON BAY
ModelSKU 433-659
CategoryLight Fixture
LanguageEnglish

Summary

Troubleshooting Guide

Light Does Not Turn On

Troubleshoot issues when the light bulb does not illuminate.

Fuse or Breaker Trips

Address problems with blown fuses or tripped breakers during illumination.

Product Maintenance

Exterior Cleaning

Clean the fixture exterior with a clean, dry, or slightly damp cloth.

Interior Cleaning

Clean the fixture interior by disconnecting power and using a damp cloth.

Cleaning Precautions

Avoid chemical cleaners, solvents, or harsh abrasives; use a soft cloth.

Limited Warranty Information

Product Features

Energy Saving Operation

Fixture conserves energy by automatically turning on at dusk and off at dawn.

Bulb Compatibility

Engineered for 100W incandescent or equivalent compact fluorescent bulbs.

Security Lighting

Dusk-to-dawn feature automatically illuminates for added home security.

Customer Support

Installation Overview

Included Parts for Installation

Installation Instructions

Mounting Plate and Nipple Setup

Attach mounting nipples to the mounting plate and then to the outlet box.

Electrical Wiring Connections

Connect ground, neutral, and hot wires using wire connectors.

Fixture Mounting to Wall

Pass mounting screws through the wall plate and secure the fixture.

Weather Sealing

Seal the upper portion of the wall plate to prevent water ingress.

Power Restoration and Testing

Restore power and test the fixture; cover photocell to simulate dusk.

Important Cautions

Power Disconnection

Disconnect power at the circuit breaker or fuse box before installation.

Qualified Electrician

Consult a qualified electrician for any electrical questions or concerns.

Customer Support Contact

Contact customer service for non-electrical questions or missing parts.

Proof of Purchase

Keep receipt and instructions as proof of purchase for warranty.

Tools Required for Assembly

Assembly Steps

Unpack and Layout Parts

Carefully unpack the fixture and lay out all parts on a clean surface.

Install Light Bulb

Install up to a 100W incandescent or equivalent compact fluorescent bulb.

Attach Harp and Nipple

Place nipple onto harp, secure with hex nut, then attach to fixture.

Secure Top Cover

Place top cover and washer over nipple, secure with finial.

Troubleshooting

Bulb Illumination Issues

Check bulb, power supply, wiring, switch, and photocell for illumination faults.

Circuit Interruption

Check wire connections if fuse blows or breaker trips when bulb is illuminated.

Product Maintenance

External Fixture Cleaning

Use a dry or slightly damp clean cloth for exterior cleaning.

Internal Fixture Cleaning

Disconnect power, then clean interior glass and surface with a damp cloth.

Cleaning Agent Restriction

Do not use chemical cleaners, solvents, or harsh abrasives; use a soft cloth.

Limited Warranty

Related product manuals