8.
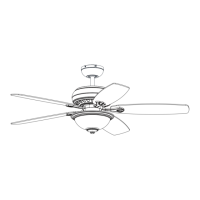
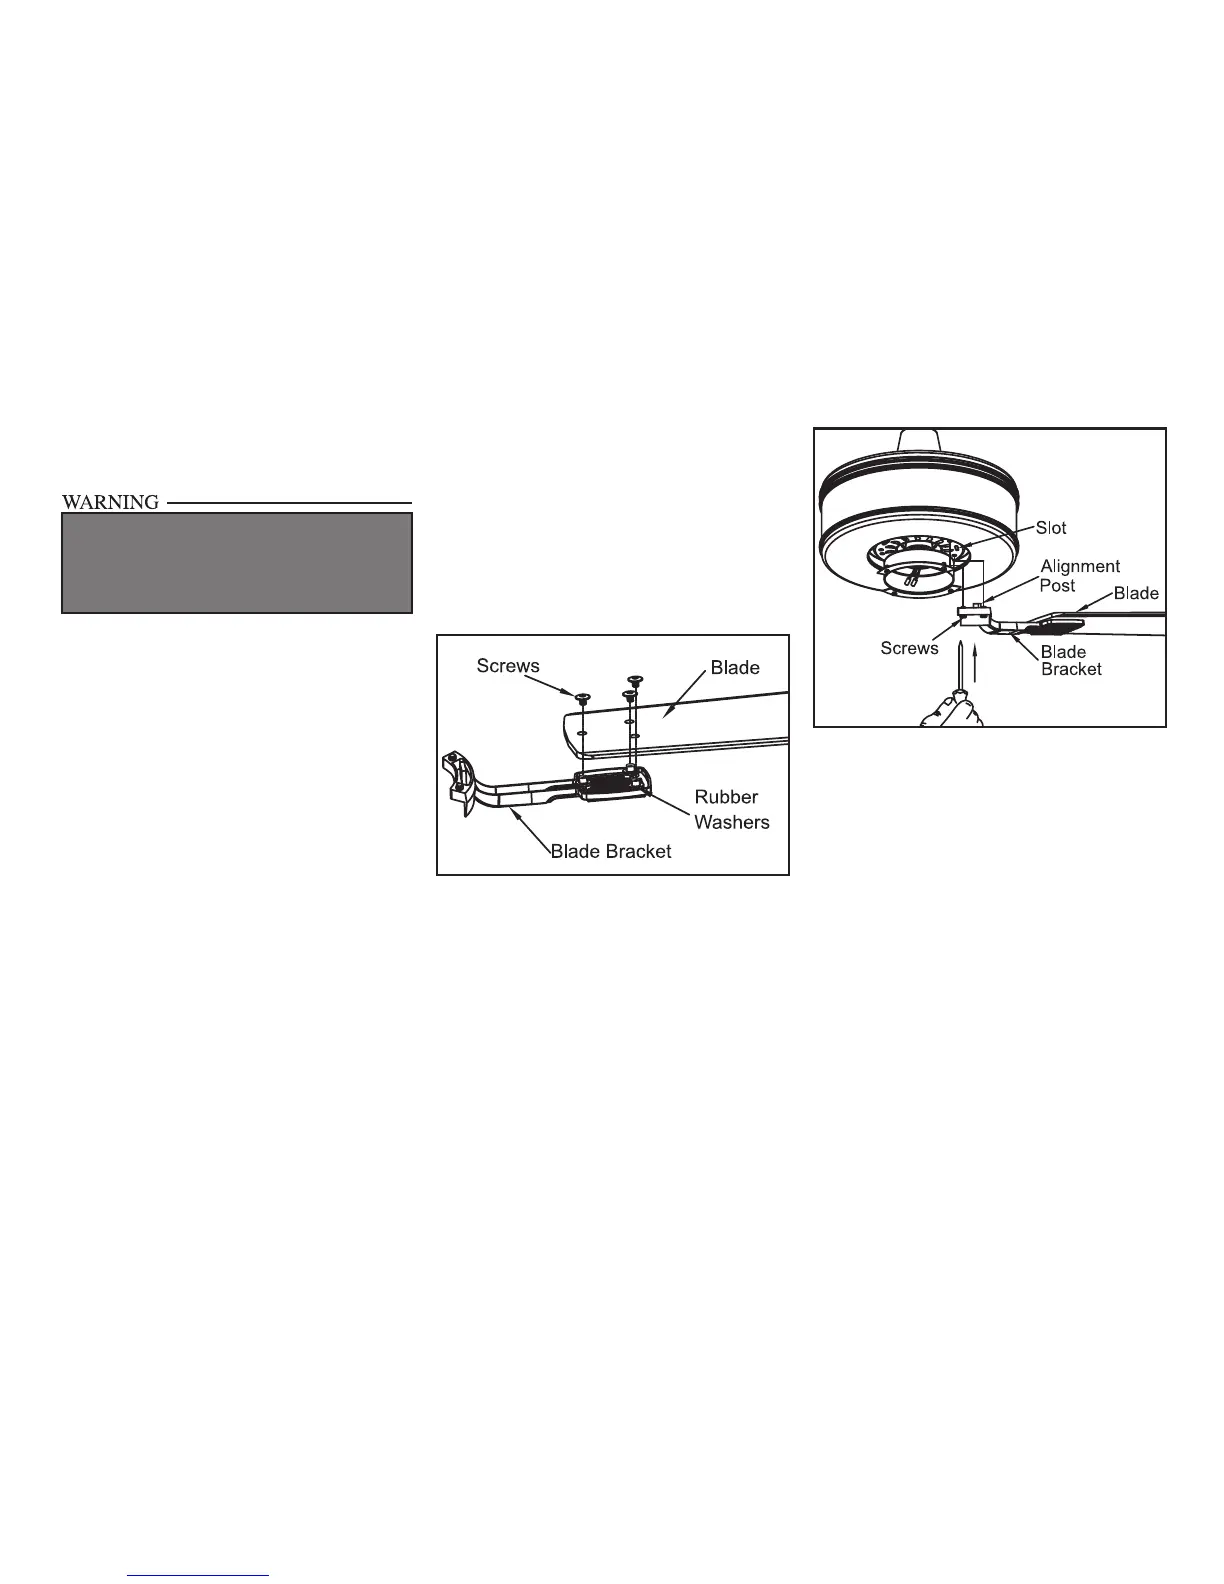
Figure 13
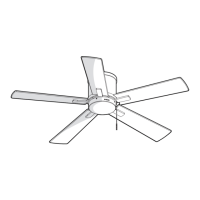
Figure 14
LOCKING SLOTS OF CEILING CANOPY ARE
PROVIDED ONLY AS AN AID TO MOUNTING.
DO NOT LEAVE FAN ASSEMBLY UNATTENDED
UNTIL ALL FOUR CANOPY SCREWS ARE EN-
GAGED AND FIRMLY TIGHTENED.
slots and turn clockwise to lock in place.
Immediately tighten the two mounting
screws rmly.
2. Install the remaining two mounting screws
into the holes in the canopy and tighten
rmly.
3. Install the decorative canopy ring by align-
ing the ring’s slots with the screws in the
canopy. Rotate the ring counter-clockwise
to lock in place.
4. You may now proceed to attaching the fan
blades.
Attaching the
Fan Blades
NOTE: Your fan blades are reversible. Select
the blade side nish that best accentuates your
decor.
1. Attach blade to bracket using the screws
as shown in gure 13. Start a screw into
the bracket. Repeat for the two remaining
screws.
2. Tighten each screw securely.
3. Fasten the blade assembly to the motor by
inserting the alignment post into the slot on
the bottom of the motor and tightening the
blade bracket screws. Please note that the
motor screws are pre-installed into the blade
bracket (Figure 14).
4. Repeat steps 1-3 for the remaining blades.