12
To ensure maximum performance, check the voltage at the point of
supply to verify that it is sufficient. It is recommended that you install a
1 Amp circuit breaker between the pump and the power supply. This
will give additional protection to the internal circuit and provide a
convenient way to disconnect the power supply prior to servicing the
pump, if needed.
Injection Point
• Choose an injection point that allows you to mount the injection
valve assembly vertically.
• The spring in the injection valve assembly (HI721004) adds
approximately 1.5 bar of back pressure. If pumping into a
high back pressure, the spring should be removed.
Other Considerations
• If you are mounting the system to a wall, column, etc., be sure
it is strong enough to support the weight of the entire system.
• The ambient temperature of the pump, when in operation,
should be between 0 and 50°C (32 to 122°F) and should be
protected from direct exposure to outdoor elements (direct sun-
light, rain, extreme temperatures, high humidity, etc.).
• Generally speaking, the shorter the suction distance, the more
efficient the pump operates.
• The pump should be placed in a conventional location that will
allow easy access to the control and connections. It should be
placed so that regular visual inspections of the connections and
hoses are facilitated.
Vertical Surface Mounting
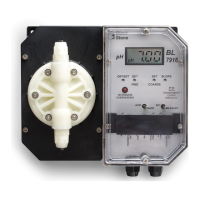
Once you have selected the best installation site, simply screw or bolt
the unit into a wall or mounting panel above the chemical feed tank.
The 4 mounting screw holes on the pump will accommodate up to a 5
mm (3/16") screw or bolt (remember to use heavy screws or bolts to
secure the system). Be sure you do not over tighten and cause excessive
stress on the mounting holes.
Make sure to leave a slight overhang in front to allow for the
connection cable.
Power Supply
Connect the power cord to the female socket of the pump and by doing
so also grounding it. The power socket contains a 250V fuse. Since
there is no on/off switch, it is suggested to install an outside switch.
 Loading...
