Dear Customer,
Thank you for choosing a Hanna Instruments product. Please read this
instruction manual carefully before using the tester. For more information
about Hanna Instruments and our products, visit www.hannainst.com or
e-mail us at sales@hannainst.com.
For technical support, contact your local Hanna Instruments Office or e-mail
us at tech@hannainst.com.
Preliminary Examination
Remove the tester and accessories from the packing material and examine it
carefully. If you require any further information, please contact Hanna Instruments
technical support team at tech@hannainst.com.
Each HI98108 pHep
+
is delivered in a polypropylene rigid case with a sleeve
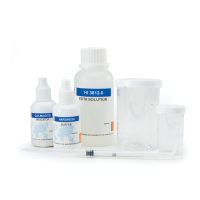
and is supplied with:
• HI70004 pH 4.01 buffer solution, 20 mL sachet
• HI70007 pH 7.01 buffer solution, 20 mL sachet (2 pcs.)
• HI700601 General purpose cleaning solution, 20 mL sachet
• Protective cap
• CR2032 3V Lithium-ion battery
• Instrument quality certificate
• Instruction manual
Note: Save all packing material until you are sure that the tester works
correctly. Any damaged or defective item must be returned in its original
packing material with the supplied accessories.
General Description & Intended Use
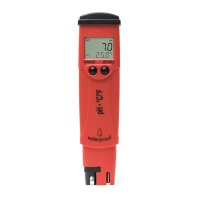
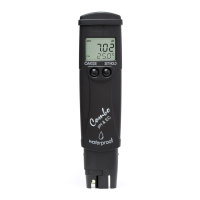
HI98108 pHep
+
is a compact and waterproof pH tester that can be used in
laboratories and industrial applications.
It features a two buttons operation system and is easy to use.
The tester displays a stability tag that will disappear once the reading has
stabilized and a low battery indicator to notify the user in the event that low
battery power could adversely affect readings.
All readings are automatically compensated for temperature variations with a
built-in temperature sensor.
The 2 cm long renewable cloth junction extends the life of the electrode when
compared with normal junction that can clog with use over time.
Temperature Sensor: The exposed temperature sensor facilitates faster and
more accurate temperature measurement.
Specifications
Range
0.00 to 14.00 pH
0.0 to 50.0 °C (32.0 to 122.0 °F)
Resolution 0.01 pH / 0.1 °C / 0.1 °F
Accuracy (@25 °C/77 °F) ±0.10 pH / ±0.5 °C / ±1.0 °F
Calibration Automatic, one, two or three-points
Temperature compensation Automatic, 0 to 50 °C
Battery type CR2032 3V Lithium-ion (included)
Battery life Approx. 800 hours of continuous use
Auto-off 8 minutes, 60 minutes or disabled
Environment 0 to 50 °C (32 to 122 °F); RH 100% max
Dimensions 160 x 40 x 17 mm (6.3 x 1.6 x 0.7“)
Weight (without battery) 65 g (2.3 oz.)
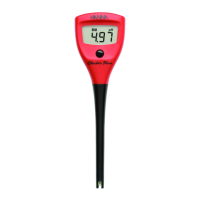
Functional Description & LCD Display
Stability tag
Battery life
percentage indicator
Battery tag
pH electrode
Liquid Crystal Display
CAL button
ON/OFF button
Recommended
immersion level
Temperature
sensor
Preparation
• Remove the protective cap. Do not be alarmed if salt deposits are present.
Rinse the probe with water and blot dry.
• If the glass and / or junction are dry soak the electrode (bottom 3 cm / 1.2 “)
in storage solution for a minimum of 30 minutes. Rinse with water and blot dry.
• Calibrate the electrode before using. For best results is recommended to
calibrate periodically.
Storage
• To ensure a quick response, the glass tip and the junction should be kept moist.
• Refill the protective cap with a few drops of storage solution when not in use.
Do not store the electrode in distilled or deionized water.
Operation
Turning the Tester ON / OFF
Press the ON/OFF button. All LCD segments will be displayed for a few
seconds followed by battery life percentage indicator and stability tag. The
tester enters measurement mode.
To turn the tester off, from measurement mode, press ON/OFF button.
“OFF” will be displayed on the second LCD line and the tester will turn off.
Calibration Mode
To enter calibration mode, press CAL button and the tester displays “CAL”
message indicating that the instrument is ready for measurement.
Setup
Setup menu allows the selection of temperature unit and auto-off time.
The default settings are: “°C“ for temperature unit and “8 minutes“ for auto-off
time.
To change the default settings, when in measurement mode, remove the battery
cover and press the Setup button in the battery compartment, on the side of
the battery.
Setup button
Press the ON/OFF button to move through setup parameters. Press the CAL
button to change the settings.
When in setup mode with “SEt” message displayed, use CAL button to switch
between “°C” and “°F”.
When in setup mode with “AOFF” displayed, use CAL button to switch between
auto-off time settings: 8 minutes, 60 minutes or “---“ (disabled).
Press ON/OFF button to return to the measurement screen.
Calibration & Measurement
It is recommended to calibrate the tester frequently, especially if high accuracy
is required. More frequent calibrations may be required depending on the type
of sample being tested.
The tester should be recalibrated: at least once a month or after testing
aggressive samples.
Note: For improved accuracy, follow procedure below, paying attention
to recommended sequential order of pH buffer solutions: pH 7.01. 4.01
and 10.01.
Calibration
From measurement mode, press CAL button and “CAL” is displayed.
One-Point Calibration
1. Place the tip of the electrode in pH calibration solution.
2. The tester automatically recognizes pH 7.01, 4.01 and 10.01 buffer values
and “rEC” message is displayed. When the reading is stable, the stability
icon will disappear.
3. When calibrating with pH 7.01 buffer, after calibration point has been
accepted, press CAL button to save the one-point calibration. “Stor” will
be displayed when the calibration is saved. The tester will then return to
measurement mode.
4. When calibrating with pH 4.01 or 10.01 buffer, the buffer value will be
recognized automatically and displayed. The tester will ask to use pH 7.01
buffer. Press CAL to save current calibration. “Stor” will be displayed and
the tester returns to measurement mode.
Two-Point Calibration
1. Follow the first 2 steps from One-Point Calibration, using pH 7.01 buffer.
2. After the first buffer is recognized, place the tip of the electrode in pH 4.01 or
pH 10.01 buffer.
3. When the buffer is recognized, the stability tag will disappear. Press CAL
button to save the calibration. “Stor” will be displayed when the calibration
is saved. The tester will return to measurement mode.
Three-Point Calibration
1. Follow the first 2 steps from Two-Point Calibration using pH 7.01 and 4.01
buffers.
2. Place the tip of the electrode in pH 10.01 buffer. When the reading is
stable, the stability tag will disappear. “Stor” will be displayed when the
calibration is saved. The tester will return to measurement mode.
Note: Calibrated buffer will be displayed with “CAL” tag next to it.
Clear Calibration
To clear the user calibration and restore the tester to factory default, from
calibration mode, press ON/OFF button. The LCD will show “CLr”, indicating
user calibration has been cleared.
Measurement
• Place the electrode in the sample and stir gently. When the reading is stabile,
and the stability indicator has disappeared, the measured pH value will be
displayed on the first LCD line and the temperature on the second LCD line.
 Loading...