EasyManua.ls Logo

HANNspree HG392PCB - User Manual

HANNspree HG392PCB
23 pages
Print Icon
To Next Page IconTo Next Page
Loading...
HG392PCB (HSG1449)
LCD Monitor
Question and Answer IconNeed help?

Do you have a question about the HANNspree HG392PCB and is the answer not in the manual?

Overview

This document is a user's manual for the Hannspree HG392PCB (HSG1449) LCD Monitor.

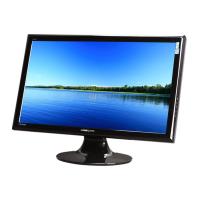
The Hannspree HG392PCB (HSG1449) is a 97.8cm / 38.5" Wide Screen TFT Color LCD Monitor designed to provide a crisp, clear display with an ergonomic and space-saving, compact case design. It is compliant with EMC directive 2014/30/EU for Electromagnetic Compatibility and 2014/35/EU and 93/68/EEC for Low Voltage directive. The monitor incorporates High-Definition Multimedia Interface (HDMI™) technology, with HDMI and HDMI High-Definition Multimedia Interface, and the HDMI Logo being trademarks or registered trademarks of HDMI Licensing LLC.

Safety and Precautions:

Users are advised to read the manual thoroughly before operation and retain it for future reference. Modifications not expressly approved by the manufacturer could void the user's authority to operate the equipment. Shielded interface cables and AC power cords must be used to comply with emission limits. The manufacturer is not responsible for radio or TV interference caused by unauthorized modifications. Only manufacturer-specified attachments/accessories should be used. To prevent fire or shock hazards, the monitor should not be exposed to rain or moisture, and the cabinet should not be opened due to dangerously high internal voltages. Servicing should be referred to qualified personnel.

The monitor should not be used near water (bathtub, washbowl, kitchen sink, laundry tub, swimming pool, or wet basement) and should not be placed on an unstable cart, stand, or table. If mounting on a wall or shelf, a manufacturer-approved mounting kit and instructions must be followed. Ventilation slots and openings must not be blocked or covered to prevent overheating. The monitor should not be placed on a bed, sofa, rug, or similar surface, near radiators or heat registers, or in a bookcase or cabinet without proper ventilation. It should be operated only from the power source indicated on the label. Unplugging the unit during lightning storms or prolonged disuse protects it from power surges. Power strips and extension cords should not be overloaded to prevent fire or electric shock. No objects should be pushed into cabinet slots, and liquids should not be spilled on the monitor. Users should not attempt to service the monitor themselves. The wall socket should be easily accessible.

Special Notes on LCD Monitors:

Some symptoms are normal for LCD monitors and do not indicate a problem. These include screen flicker during initial use (resolved by turning the power switch off and on), slightly uneven brightness depending on the desktop pattern, and the presence of blemishes (missing pixels or constantly lit pixels) of 0.01% or less, as the LCD screen has 99.99% or more effective pixels. Afterimages may remain if the same image is displayed for hours, which will recover slowly by changing the image or turning off the power switch for hours. If the screen flashes erratically or backlighting fails, contact a dealer or service center; do not attempt self-repair.

Recycling Information:

Hannspree emphasizes environmental protection and encourages appropriate treatment and recycling of industrial technology devices at the end-of-life. The devices contain recyclable materials that can be re-decomposed and re-integrated into new products. Other materials may be hazardous. Users are encouraged to contact the provided information for recycling. More information is available at http://www.hannspree.eu/.

Installation Instructions:

The monitor comes with a base bracket that aligns with a slot on the machine and buckles down. To remove the stand plate, press the button and then remove the stand plate. Screws are used for both installation and removal of the base.

Power Source:

The monitor has an internal universal power supply, operating on 100/120V AC or 220/240V AC. No user adjustment is required. Ensure the power cord is the correct type for your area. Connect one end of the AC power cord to the monitor's AC-input socket and the other to a wall outlet.

Adjusting Display Height and Viewing Angle:

For optimal viewing, adjust the monitor's angle to your preference. Hold the stand to prevent toppling. The monitor can be adjusted vertically from -5° to 15° and horizontally from -15° to 15°. Do not touch the LCD screen when changing the angle to avoid damage. Be careful not to place fingers or hands near the hinges to prevent pinching.

Setting the Monitor on the Wall:

To wall mount, first disconnect all cables. Place the monitor face down on a soft, flat surface. Move the quick release button upward to remove the base assembly, then remove the screws and gently remove the stand base. Purchase a VESA compatible wall bracket (VESA 100×100, 4 holes, M6, 10mm, 23kg). Fix the bracket firmly on the wall and secure the monitor using the four mount holes on the back. Read the wall bracket instructions carefully. The mounting holes are 100mm horizontally and vertically. The required screws are metric M6, 10mm length. The monitor stand base can be screwed on a table or hard surface. Only use with UL listed wall mount brackets. Wall mounting requires special skill and should be performed by qualified service personnel. Hannspree is not responsible for improper mounting or resulting accidents/injuries.

Making Connections:

Ensure the monitor is off before making connections.

  1. DP Connection: Connect one end of the DP cable to the back of the monitor and the other end to the computer's DP port.
  2. HDMI Connection (Optional): Connect one end of the HDMI cable to the back of the monitor and the other end to the computer's HDMI port.
  3. HDMI to DVI Connection (Optional): Connect one end of the HDMI to DVI cable to the back of the monitor and the other end to the computer's DVI port.
  4. Audio Connection: Connect the audio cable between the monitor's audio input and the PC's audio output (green port).
  5. Power Connection: Plug one end of the AC power cord to the LCD monitor's AC input socket and the other end to a wall outlet.
  6. Turn on the monitor and computer. To make connections, remove the I/O small back cover. The monitor has ports for Power AC Input, HDMI Input (HDMI 1 and HDMI 2), DP Input (DP 1 and DP 2), and Audio Out.

Operating Instructions:

Press the power button to turn the monitor on or off. Other control buttons are on the front panel.

  • Power Button: Switches monitor ON/OFF.
  • Power Indicator: Blue for Power On mode, Red for Power Saving mode.
  • MENU / ENTER: Turns OSD menu on/off or enters the previous menu.
  • Adjust ▲▼: Adjusts Brightness and volume when OSD is off. Navigates through adjustment icons when OSD is ON or adjusts a function when activated.
  • [◄ ►] Button (Digital Input Models): Press to enter Source selections (DP, HDMI, etc.). This function is only available in models with digital inputs. Used as a "confirmation" function during start-up.

Maintenance Notes:

Do not install the monitor near heat sources, in direct sunlight, or in dusty/vibrating/shock-prone locations. Save the original shipping box and packing materials for future shipping. Repackage the monitor as it was originally packed for maximum protection. Clean periodically with a soft cloth; stubborn stains can be removed with a mild detergent solution. Avoid strong solvents like thinner, benzene, or abrasive cleaners. Always unplug the monitor before cleaning.

How to Adjust Settings (OSD Menu):

  • INPUT SOURCE:
    • AUTO SOURCE: Activates automatic signal search.
    • DP: Selects DP source.
    • HDMI: Selects HDMI source.
  • BRIGHTNESS/CONTRAST:
    • BRIGHTNESS: Adjusts display brightness.
    • CONTRAST: Adjusts display contrast.
    • ACTIVE CONTRAST: Optimal setting for high contrast images/videos; automatically detects dark/light areas and enhances contrast.
  • COLOR SETTING:
    • GAMMA: Sets display gamma (Off/1.8/2.0/2.2/2.4/2.6).
    • PICTURE MODE: Selects picture mode (PC/ECO/Movie/Game).
    • COLOR TEMPERATURE: Adjusts color temperature (Normal/Warm/Cool).
    • USER: Adjusts Red, Green, and Blue levels.
    • HUE: Adjusts display hue.
    • SATURATION: Adjusts display saturation.
    • LOW BLUE LIGHT: Adjusts low blue light of the display.
  • PICTURE QUALITY SETTING:
    • SHARPNESS: Adjusts display sharpness.
    • RESPONSE TIME: Sets display response time (Off/High/Middle/Low).
    • SUPER RESOLUTION: Selects super resolution (Off/High/Middle/Low).
    • BLACK LEVEL: Adjusts black level.
  • DISPLAY:
    • ASPECT RATIO: Sets screen aspect ratio (Wide Screen/4:3/1:1/Auto).
  • AUDIO:
    • MUTE: Switches mute function On or Off (availability depends on model). Adjusting volume while muted cancels mute.
    • VOLUME: Changes volume level (applies to models with incorporated audio). High volume carries risk of hearing damage.
    • AUDIO SOURCE: Selects audio source between DP or HDMI when transferring via PIP/PBP (for DP/HDMI Input only).
  • MULTI-WINDOW:
    • MULTI-WINDOW: Switches PIP/PBP function.
    • SUB WIN2 INPUT: Changes input source of PIP/PBP (DP or HDMI 2.0).
    • PIP SIZE: Changes window size (Small/Medium/Large).
    • PIP POSITION: Changes window position (Top Left/Bottom Left/Top Right/Bottom Right).
    • SWAP: Changes 1st and 2nd window.
  • OSD:
    • LANGUAGE: Changes OSD language (reference only, depends on selected model).
    • H-POSITION: Adjusts horizontal position of OSD.
    • V-POSITION: Adjusts vertical position of OSD.
    • TRANSPARENCY: Adjusts OSD transparency.
    • OSD TIME OUT: Sets OSD time out from 5 to 60 seconds.
    • OSD ROTATION: Rotates OSD window (Normal/90/180/270).
  • OTHER:
    • DP VERSION: Switches DP1 or DP2 function.
    • ADAPTIVE-SYNC: Changes ADAPTIVE-SYNC function.
    • HDR: Changes HDR function.
    • CROSS: Changes CROSS function.
    • DDC/CI: Switches DDC/CI function On or Off (dual input mode optional).
    • RESET: Resets monitor to default settings, erasing current settings.

Plug & Play DDC2B Feature:

The monitor is equipped with VESA DDC2B capabilities, allowing it to inform the host system of its identity and display capabilities. DDC2B is a bidirectional data channel based on the I²C protocol, enabling the host to request EDID information. The monitor will appear non-functional without a video input signal.

Technical Support (FAQ) - General Problems:

  • Power LED is not on: Check if the power switch is ON and the power cord is connected.
  • No Plug & Play: Check if the PC system and video card are Plug & Play compatible. Inspect HDMI or DP connector pins for bends.
  • Display too dark or too bright: Adjust Contrast and Brightness Controls.
  • Picture bounces or wave pattern: Move electrical devices causing interference.
  • Power LED ON (Blue) but no video/picture: Check if computer power switch is ON, video card is seated snugly, monitor's video cable is properly connected and pins are not bent. Verify computer operation by hitting CAPS LOCK key.
  • Missing primary colors (RED, GREEN, or BLUE): Inspect monitor's video cable and pins for bends.
  • Screen image not centered or sized properly: Adjust pixel frequency CLOCK and PHASE.
  • Picture has color defects (White not white): Adjust RGB color or select color temperature.
  • Screen resolution needs adjustment: In Windows 7/8/10, right-click desktop, select Properties>Settings>Screen Resolution, and adjust the slider.
  • No sound from built-in speaker: Ensure PC audio output cable is connected to monitor's LINE IN (or AUDIO IN) port. Verify sound volume adjustment. Check if System > Silence option in monitor menu is ON. If transferring via HDMI with no sound, select AUDIO INPUT as a PC option and ensure PC audio output cable is connected to monitor's LINE IN port (or AUDIO IN port).

If display problems occur, ensure your PC (hardware) and video card support Windows 7/8/10. Install the latest Windows 7/8/10 video card driver. Try using the recommended display resolution; if it doesn't work, try the second recommended resolution. Hannspree provides a support and service website for further assistance: http://www.hannspree.eu/en/monitors. Windows is a registered trademark of Microsoft Corporation.

Factory Preset Timing Table:

The manual provides a detailed table of supported modes, resolutions, horizontal frequencies (KHz), and vertical frequencies (Hz) for various display sizes, including:

  • 720×400 @70Hz (31.469 KHz, 70.087 Hz)
  • 640×480 @60Hz to @75Hz
  • 800×600 @56Hz to @75Hz
  • 832×624 @74.6Hz
  • 1024×768 @60Hz to @75Hz
  • 1280×1024 @75Hz
  • 1152×870 @75Hz
  • 1280x800 @60Hz
  • 1600×1200 @60Hz
  • 1280×720 @60Hz
  • 1280×1024 @60Hz
  • 1920×1440 @60Hz
  • 1600×900 @60Hz
  • 1680×1050 @60Hz
  • 1920×1080 @60Hz
  • 640x480p @60Hz
  • 720×480p @60Hz
  • 720×576p @50Hz
  • 720×576p @50Hz
  • 1280×720p @50Hz
  • 1280×720p @60Hz
  • 1920×1080p @50Hz
  • 1920×1080p @60Hz
  • 1920×1080p @120Hz
  • 1920×1080p @100Hz
  • 2560×1080p @60Hz
  • 2560×1080p @100Hz
  • 3840×2160p @50Hz
  • 3840×2160p @60Hz
  • 3840×2160p @30Hz
  • 1720×1440p @60Hz
  • 2560×1440p @60Hz

Video Mode Table:

Includes resolutions for various video modes:

  • 640×480p @60Hz
  • 720×480i @60Hz
  • 720×480p @60Hz
  • 720×576i @50Hz
  • 720×576p @50Hz
  • 1280×720p @60Hz
  • 1920×1080i @50Hz
  • 1920×1080i @60Hz
  • 1920×1080p @50Hz
  • 1920×1080p @60Hz
  • 2560×1080p @50Hz
  • 2560×1080p @60Hz The monitor can be lighted under interlace signal mode, but image quality is not guaranteed.

Specifications:

  • LCD Panel:
    • Driving system: TFT Color LCD
    • Size: 97.8cm / 38.5" Diagonal
    • Pixel pitch: 0.3333mm(H) × 0.3333mm(V)
  • Video:
    • H-Frequency: 30KHz – 265KHz
    • V-Frequency: 56Hz – 165Hz
  • Display Colors: 16.7M Colors
  • Max. Resolution: 2560 x 1440 @165Hz
  • Plug & Play: VESA DDC2B™
  • Power consumption:
    • ON Mode: 65W (Typical)
    • Power Saving Mode: ≤ 0.5W
    • OFF Mode: ≤ 0.3W
  • Audio output: Rated Power 2.0 W rms (Per channel)
  • Input Terminal: DP 1.4 x 2, HDMI 2.0 x 2, AUDIO OUT
  • Maximum Screen Size: Hor.: 852.48mm, Ver.: 479.52mm
  • Power Source: AC 100-240V ~2.2A 50/60Hz
  • Environmental Considerations:
    • Operating Temp: 5° to 35°C
    • Storage Temp.: -20° to 60°C
    • Operating Humidity: 10% to 85%
  • Dimensions: 879.24 (W)×284.77(H)×645.09(D) mm / 34.6"(W)×11.2 "(H)×25.2"(D)
  • Weight (NW): 11.8 kg (25.99 lb)

Note: Specifications are subject to actual product specification and change without prior notice. Maximum resolution depends on the display card supporting. Refer to http://www.hannspree.eu/en/monitors for related FAQ.

HANNspree HG392PCB Specifications

General IconGeneral
BrandHANNspree
ModelHG392PCB
CategoryMonitor
LanguageEnglish

Related product manuals