Do you have a question about the Harbor Freight Tools BIG TOP 92928 and is the answer not in the manual?
Anchor canopy in windy areas and prevent snow accumulation to avoid collapse.
Have an assistant available for help in case of an accident.
Maintain a clean workspace to prevent injuries from clutter.
Ensure children are not in or around the work area or canopy.
Store tools in a dry, locked location out of reach of children.
Wear appropriate clothing, footwear, and secure long hair.
Always wear ANSI approved impact safety goggles.
Do not overreach; keep proper footing and balance at all times.
Remain alert, use common sense, and do not assemble when tired.
Inspect all parts for damage before use; repair or replace as needed.
Use only identical parts when servicing to maintain warranty.
Do not assemble if judgment or reflexes are impaired by alcohol or drugs.
Remove tarp in heavy snow or high winds to prevent damage.
Check that all parts are included when unpacking the product.
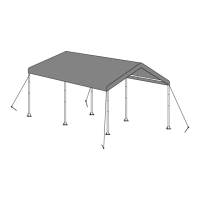
Place 17 Steel Tubes on the ground as illustrated for frame assembly.
Connect 3-way and 4-way tube fittings using self-tapping screws.
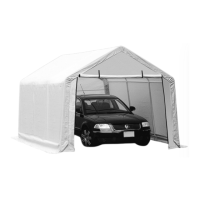
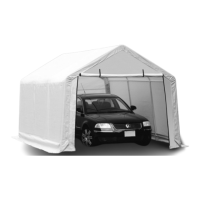
Drape tarp over frame and secure corners using ball tie downs.
Fasten the ball tie downs through the remaining metal eyelets.
Slide four steel tubes into the roof fittings and secure with screws.
Insert nylon bases onto each vertical leg.
Secure each nylon base to the ground using provided stakes.
Tighten all self-tapping screws securely and use T-Stakes.
Periodically clean the tarp using mild soap and water.
Periodically oil steel tubes to prevent rusting.
Reference list of all parts included in the package.
| SKU | 92928 |
|---|---|
| Brand | Harbor Freight Tools |
| Color | Blue |
| Material | Polyester |
| Water Resistance | Water-resistant |
| UV Protection | Yes |
| Frame Material | Steel |
| Dimensions | 10 ft. x 10 ft. |
| Weight | Approx. 34 lbs |
| Setup Time | Minutes |
| Included Accessories | Carry bag, stakes, ropes |