Page 25;&(%$*4.8"4,7%<'*#$"&8#=%/7*,#*%4,77%>?@@@?@AA?BCDC1Item 58703
EF;6GHIJ6KFGLIMNFLMG6MFMO6 FEE6NPQH
;&79"83%$.*%G(,"7*(
GI%JK6!6MG%E6KLIWE%LMgWKH%;KIN%QIEE%I;%OIMGKIQ-%
J&#"$"&8%G(,"7*(%&8%27,$=%7*V*7=%.,(9%#'(2,4*%,89%4.&4[%+&$.%G"(*#%+*2&(*%2&79"830'82&79"831
1. 8QVFUHZDQGUHPRYHWKHWZRVHWVRI%ROWV0[
and Nuts M10 from the center Cross Members.
2. Unscrew and remove the four sets of
&DUULDJH%ROWV0[DQG1XWV0IURP
the Left and Right Spring Hangers.
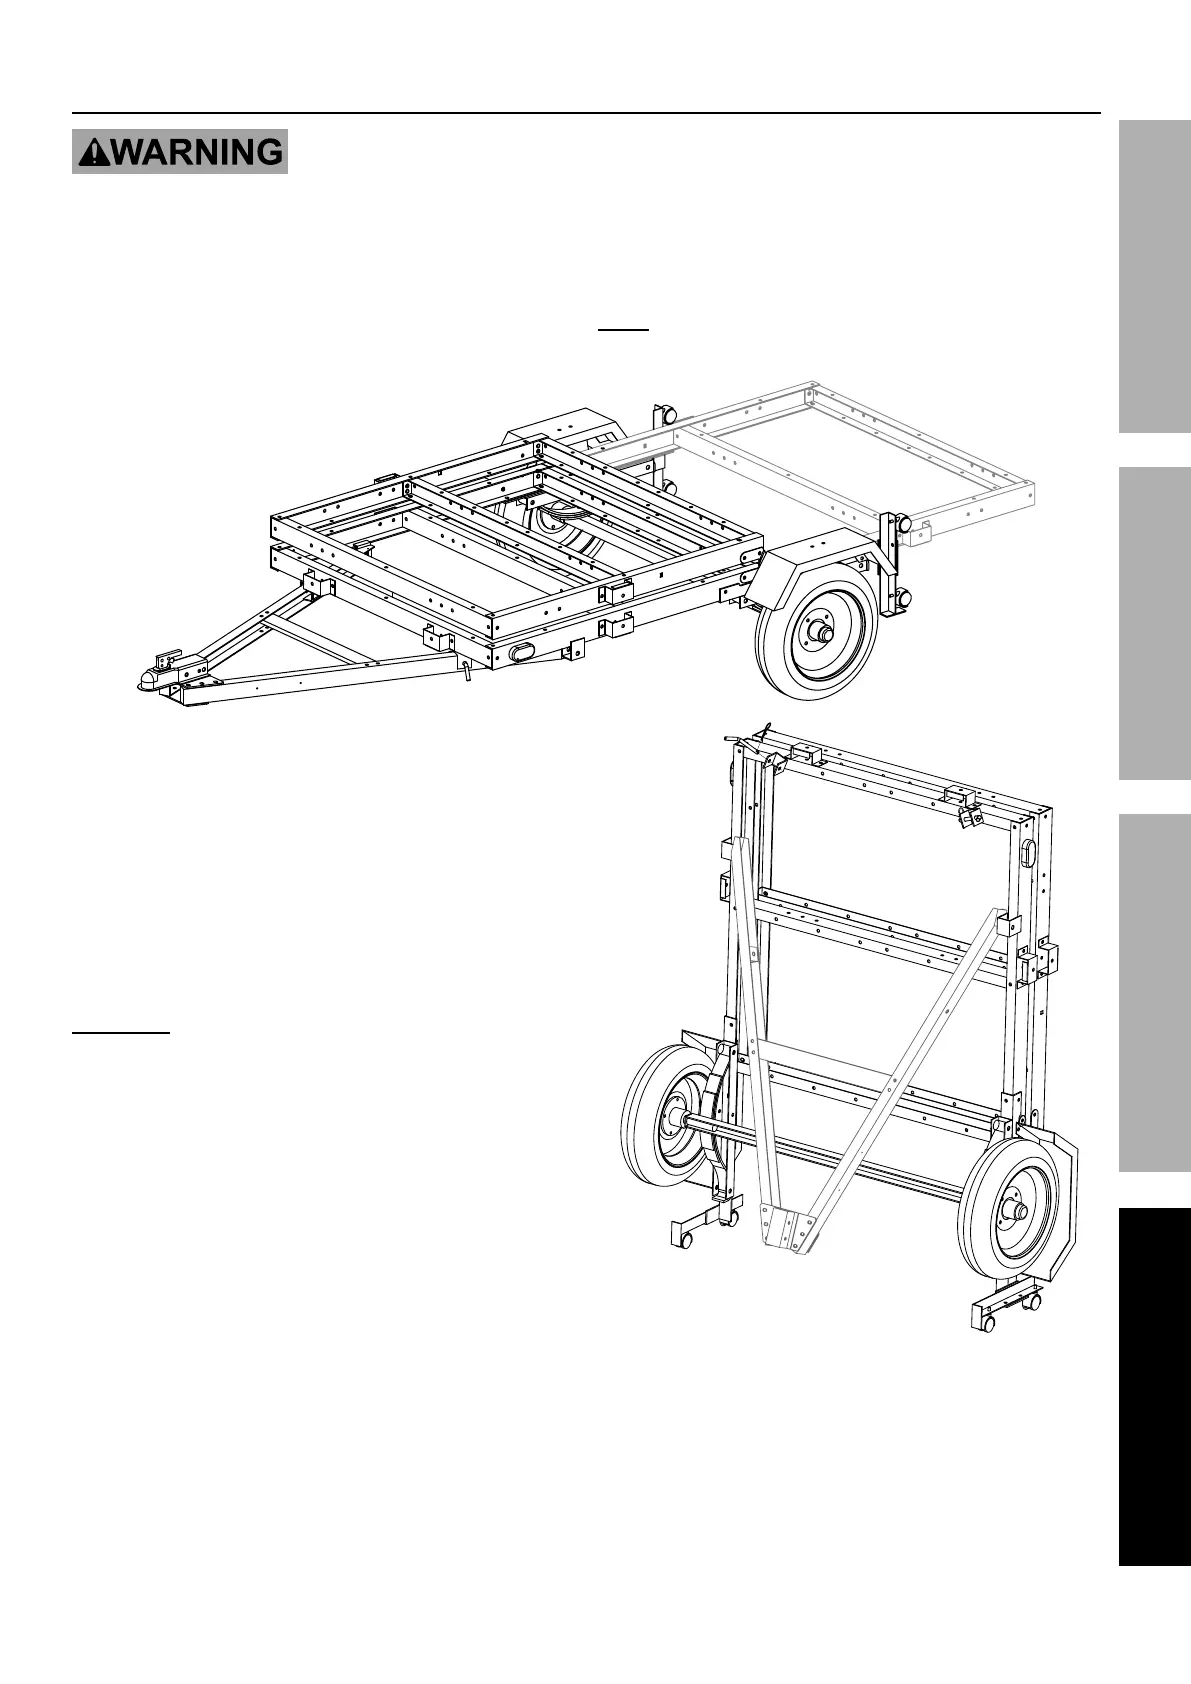
3. With assistance, fold the rear section of the
Trailer over the front section of the Trailer.%%
M&$*- When folding or unfolding the Trailer
be careful not to pinch the tail light wiring in
the Trailer frame at the folding point.
4. E*4'(*%$.*%(*,(%#*4$"&8%,89%2(&8$%#*4$"&8%
$&3*$.*(%)"$.%(&/*%_8&$%"847'9*9`1%%
T"#$("+'$*%$.*%(&/*%,(&'89%,77%#"9*#%&2%
$.*%(*,(%,89%2(&8$%#*4$"&8%$&%.&79%$.*5%
$&3*$.*(%)."7*%$.*%G(,"7*(%"#%2&79*9%'/1
5. With assistance, remove wheel chocks and carefully
tilt the Trailer onto its Casters. When tilting the
Trailer, always apply pressure on the middle section
(where the rear and front section are secured
together).
T&%8&$%5,8*'V*(%$.*%G(,"7*(%)"$.%$.*%G&)%P,(#1
OFWGLIMf R."7*%$"7$"83%,89%$(,8#/&($"83%$.*%G(,"7*(=%
2(*<'*8$7U%"8#/*4$%$.*%O,#$*(#k%"2%$.*%O,#$*(#%,(*%
9,5,3*9%&(%9*2&(5*9=%"55*9",$*7U%#$&/%5&V"83%
$.*%G(,"7*(1%%I87U%$(,8#/&($%$.*%2&79*9%G(,"7*(%#.&($%
9"#$,84*#%&8%,%27,$=%7*V*7%,89%.,(9%#'(2,4*1
6. When transporting the folded Trailer, seek the help
of an assistant to prevent the Trailer from tipping.
7. Store the Trailer against a wall, securing
it to the wall by elastic cords or rope.
8. Then, remove two sets of L Pins and R-Clips
and fold the Trailer Tongue down.%
9. Replace the L Pins and R-Clips after
folding to avoid losing them.
 Loading...