Page 7<&(%$*4.8"4,7%H'*#$"&8#I%/7*,#*%4,77%JKLLLKMLNKNMJL1Item 63793
?@<6AOD@CEA6E@EP6 Q@?CP%R6GSCETR6GSCET%ACU?
?*$%F/%?/&&7%T'8
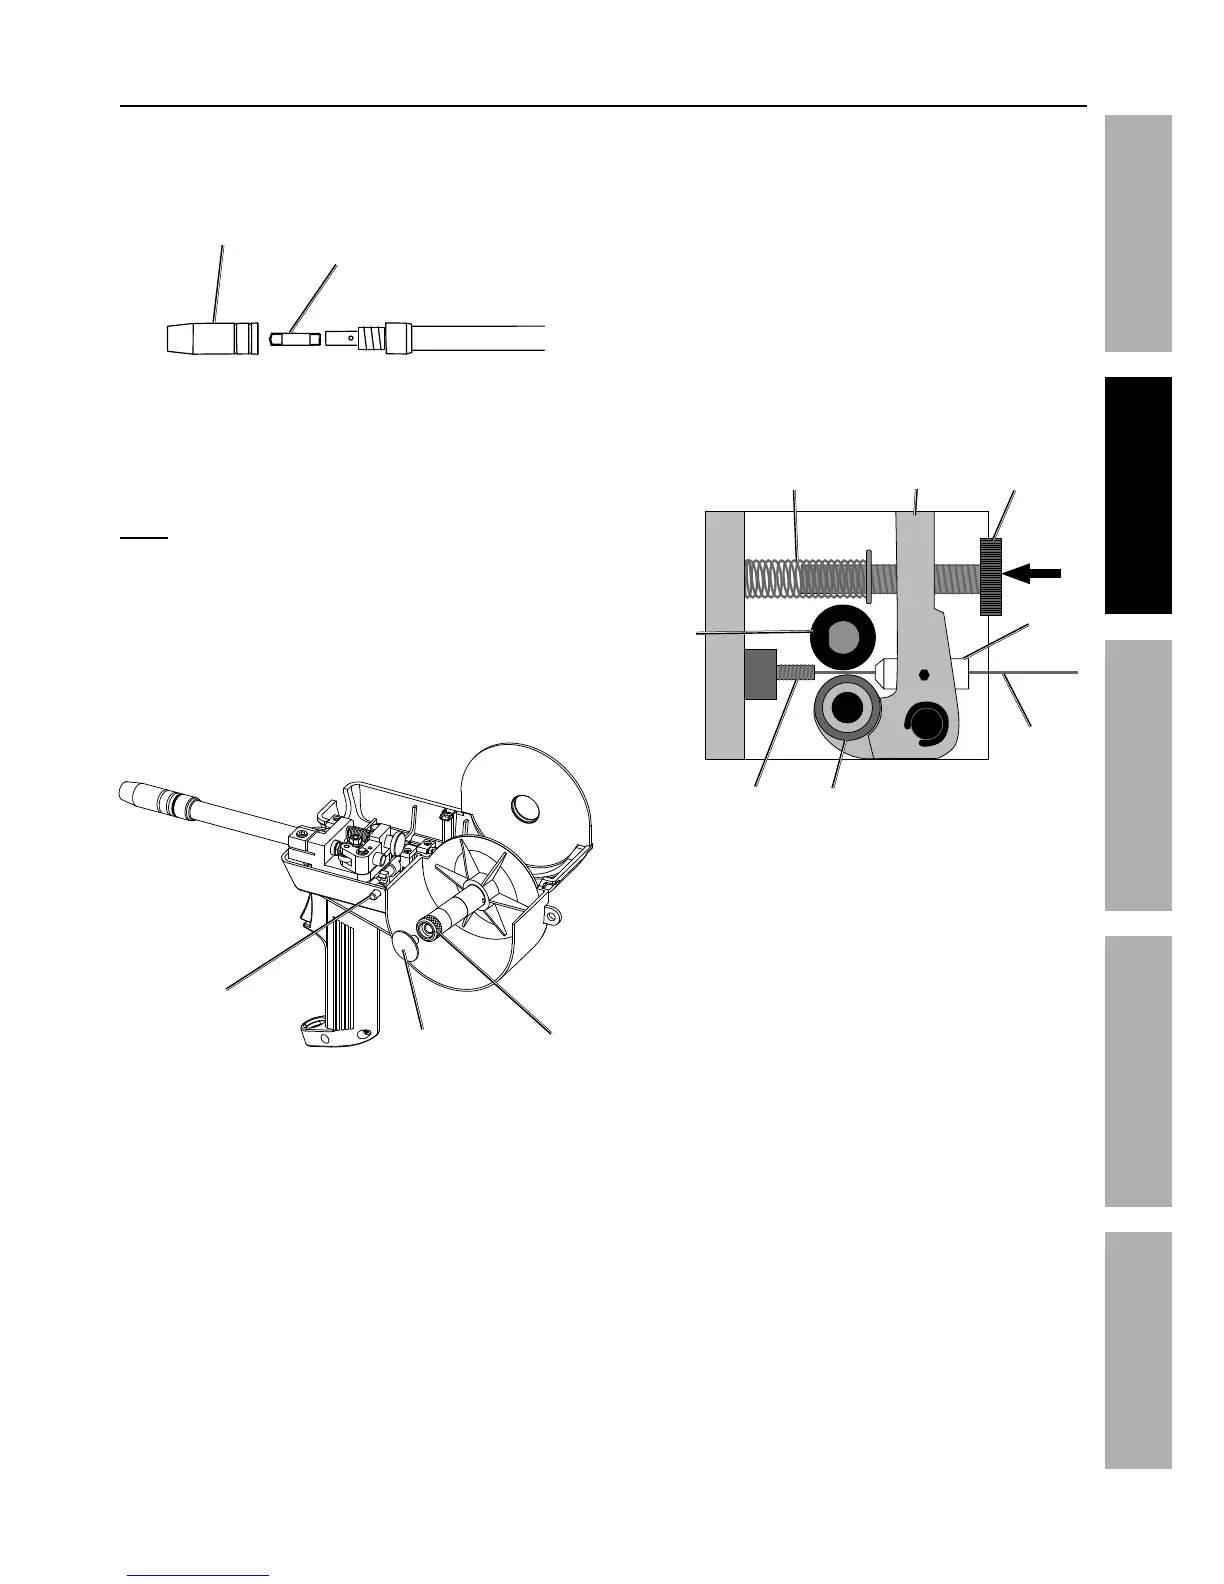
1. Pull the Nozzle to remove it.
2. Unscrew the Contact Tip
counterclockwise and remove.
E&ZZ7*
P&8$,4$%
A"/
3. Press Spool Cover Release Button,
then open Spool Cover.
4. Remove Spool Lock Knob by turning clockwise.
5. Loosen Spool Tension Knob without removing.
E&$*- To prevent unraveling, leave
wire secured to Spool.
6. Install Spool so wire will feed over top of Spool.
7. Tighten Spool Tension Knob until
Spool cannot spin freely.
8. Replace Spool Lock Knob by
turning counterclockwise.
?/&&7%
G&4W%Y8&+
?/&&7%
A*8#"&8%
Y8&+
?/&&7%P&X*(%
;*7*,#*%Q'$$&8
9. Hold end of wire while releasing from
Spool. Cut off any bent wire.
10. Keeping tension on Spool, feed
Wire into Inlet Guide.
11. Loosen Tension Knob.
12. Push on Tension Knob enough to create a
space, between Driver Roller and Tension Roller,
large enough so that Wire will pass through.
13. Push Wire 1/4" into Inlet.
14. Tighten Tension Knob.
A*8#"&8%
Y8&+
A*8#"&8%
@(5
A*8#"&8%
;&77*(
R"(*
C87*$%
T'"9*
S("X*%
;&77*(
C87*$
A*8#"&8%
?/("83
15. Close Spool Cover.
16. Set Spool Gun down on nonconductive,
nonflammable surface away from
any grounded objects.


 To Next Page