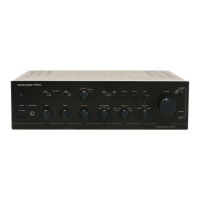
Citation 7.0 Owner’s Manual
Preliminary Draft
Page # 46
Enitre Contents Copyright ©1995 - Harman Kardon Inc.
Automatic Balance Adjust
To have the input balance set automatically, make certain that the indicator between the “Ö“ pointer and the words
“Auto Balance” is a plus sign (“+”). (figure #xx) If it is not, change the setting by pressing “Select”.
This will set the unit so that the input balance is constantly adjusted whenever the input is selected.
Manual Balance Adjust
For situations where a specific input balance channel needs to be set, manual adjustment is needed. Turning the
Automatic input balance circuit off will mean that the system will maintain a specific balance adjustment, and not
change it in accordance with the program material. Consult your dealer or installer if you have a question as to the
necessity for setting the input balance manually.
Before starting a Manual Balance adjust, select the input to be adjusted using the numbered button in the “Source
section of the remote corresponding to the input requested. The input source may also be selected using the “Source
\/” and “Source /\” buttons at the far left side of the front panel.
To properly set the input balance, the surround processing circuits be must turned off. To do this, press “Stereo Only”.
The setting may be confirmed by noting that the red “Stereo” indicator will illuminate on the front panel, and the
surround mode indication in the upper right corner of the video screen will read “SURRND OFF”. If the on screen
display is not at the “Source Edit” menu at this point, press “Source Edit” once or twice, as needed.
Press “Г until the on screen “Ö“ pointer is next to the words “Input CHNL Balance”. (figure #xx) Press “Select” to
move to the next menu.
On the next menu, make certain that the indicator between the “Ö“ pointer and the words “Auto Balance” is a minus
sign (“-”). (figure #xx) If it is not, change the setting by pressing “Select”.
Move the “Ö“ pointer down one line by pressing “Г so that it is pointing to the “Manual Bal Adjust” line. Press “Select”
to move to the next step.
NOTE: At this point you will need to activate the input source machine or put it into play. For the best possible
calibration results, it is best to use a high quality mono recording, or a stereo recording of known high quality. The test
signals on Side Two, Chapter Five of the THX “WOW!” disc may also be used for this purpose.
A slider scale should appear on the screen. (Figure #xx). Use this slider, along with the two digit number shown both
on screen as well as on the front panel as the indication of input adjustment. Use the “Ï“ and “Г buttons to adjust the
input balance to the left or right, as needed until the sound appears to come from the center point between the left and
right speakers when you are sitting at a point directly between the two speakers. A visual indication of correct input
balance is that the green LEDs on the front panel input level display both illuminate on the same line. (Figure #xxa)
[same as above].
When the adjustment is complete, press “Exit/OK” twice to return to the “Source Edit” menu to proceed with an
installation. Press “Exit/OK” one more time to return to normal operation.

 Loading...


