Do you have a question about the Harman Kardon HS 300 and is the answer not in the manual?
Key safety guidelines for product usage and handling, including voltage verification and proper cord management.
Recommendations for placing the unit to ensure proper operation and safety, avoiding heat and moisture.
Instructions on how to clean the unit safely and effectively using a dry or damp cloth.
Procedures for safely disconnecting and moving the audio equipment.
Guidance on unpacking the product and handling packaging materials for storage or recycling.
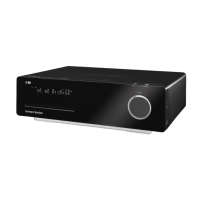
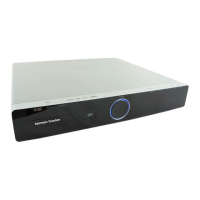
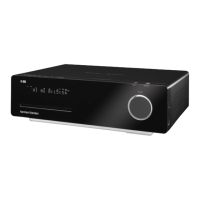
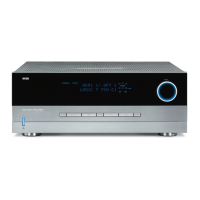
Details on the HS 300's audio capabilities, amplifier power, and D/A conversion.
Explanation of different surround sound modes supported by the system like Dolby Digital and DTS.
List of available audio input connections for external devices like tuners and players.
Description of the various audio and video output connections available from the unit.
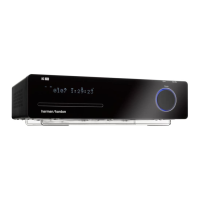
Features designed for user-friendly operation, including graphic interface and color-coded connections.
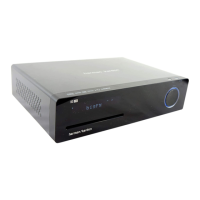
Overview of the integrated DVD player's capabilities and supported disc and file formats.
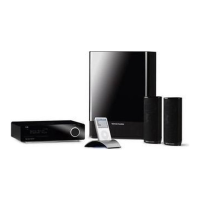
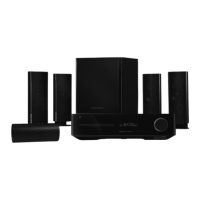
List of items included in the product package, such as remote and antennas.
Control for powering the unit on and off or placing it in standby mode.
LED status indicator for the unit's power and operational mode.
Button to open or close the disc drawer.
Knob or buttons to adjust the audio output volume level.
Front panel display for system messages and status indicators.
Port for connecting headphones for private listening.
Interface for connecting USB storage devices on the front panel.
Terminals for connecting main and surround speakers to the receiver.
Connection for an external powered subwoofer using a line-level signal.
Digital audio/video output for high-quality display connection.
Analog audio inputs for connecting external audio sources like tape decks.
Digital audio inputs for high-quality sound sources like CD or DVD players.
Buttons to select and control different source devices and switch remote modes.
Buttons to adjust the audio output volume level up or down.
Function to temporarily silence audio output for speakers and headphones.
Buttons for controlling playback: play, pause, stop, search, and skip.
Function to enlarge or reduce the displayed video image for closer inspection.
Feature to repeat a selected segment of audio or video continuously.
Functionality to program the remote to control other devices by learning codes.
Overview of components typically found in a standard home theater setup.
Explanation of surround sound principles and speaker setup for immersive audio.
Different algorithms and settings for creating immersive audio experiences.
Overview of various cable types and their purposes for system setup.
How to connect speakers to the receiver using proper polarity.
Specific connection method for the subwoofer, including trigger output.
Details on digital and analog audio connection types and their usage.
Details on digital and analog video connection types and their usage.
Initial step for connecting all speakers to the HS 300, ensuring correct polarity.
Procedure for connecting the subwoofer to the system, including the trigger connection.
Steps for connecting AM and FM antennas for tuner reception.
Guide for connecting additional audio/video devices to the HS 300.
Connecting the HS 300 to a TV or video display using preferred video outputs.
Final step to connect the unit to a power source after all wiring is done.
Instructions for installing batteries in the remote control.
How to configure the remote to control external devices like TVs and VCRs.
Final step to power on the system after installation, from standby mode.
How to navigate and use the HS 300's on-screen menu interface for configuration.
Configuring basic system settings like display language and parental controls.
Adjusting audio settings including language, sound modes, and tone controls.
Setting speaker distances and output levels for optimal surround sound.
Adjusting video output settings like aspect ratio, scan type, and resolution.
Fine-tuning video parameters such as color, contrast, and brightness using test signals.
Selecting and configuring audio inputs for different sources like TV, AUX, and Digital Input.
Procedures for powering the system on from standby mode using the unit or remote.
Methods for adjusting the audio volume level using the front panel or remote.
How to choose and switch between different audio/video inputs and sources.
Detailed guide on operating the integrated DVD/CD player, including handling and loading discs.
Specifics of playing DVD discs, including menus, features, and playback controls.
Specifics of playing CD discs and their playback features, including track selection.
Playing audio and image files from discs or USB devices, including navigation.
Playing Video CD discs and their playback controls, including PBC features.
Creating custom playback sequences for discs, including editing and canceling playlists.
Using the built-in radio tuner to find, preset, and play stations.
Selecting and configuring external source inputs like TV, AUX, and Digital Input.
Operating the HS 300 with connected USB storage devices for media playback.
Advanced programming and usage of the remote control, including macros and punch-through.
Resetting the HS 300 to factory defaults to resolve operational issues.
Description of video image width to height proportion.
Standard for digital audio and video transmission over a single cable.
Video output method providing higher resolution display.
Feature to resume playback from where it was last stopped.
Default and user-configurable settings for the system setup menu.
Default and user-configurable settings for the audio setup menu.
Default and user-configurable settings for the video setup menu.
Configuration of audio modes and inputs for various sources.
Codes used to program the remote for different device types.
| Brand | Harman Kardon |
|---|---|
| Model | HS 300 |
| Category | Home Theater System |
| Language | English |