PAIRING REMOTE
STEP 1
Make sure the baeries work fine.
Replace them when needed.
STEP 2
Plug the power cord to the power source.
The original remote that comes in the box is already paired to the
foundaon. No further acon is required.
In the event that the remote is not paired with the foundaon, follow
the steps below.
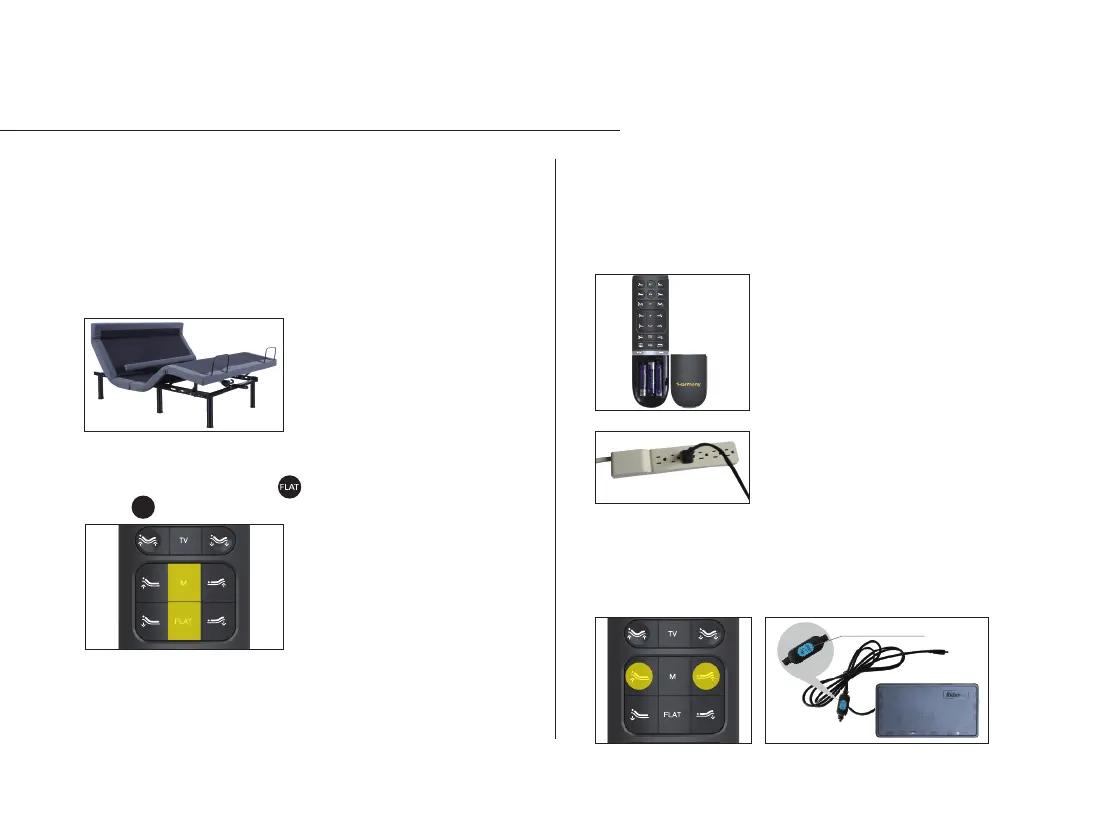
STEP 3
Press and hold head li and foot li simultaneously, then press and hold
the buon on the cord of control box for 3 seconds unl your hear 2
beeps sound, the remote is then paired.
STEP 3
Setting Programmable Positions and Pairing Remote
SETTING PROGRAMMABLE POSITIONS
To adjust the saved posion, repeat steps 1 and 2 and the new
posion will be saved.
STEP 1
Adjust the head and foot to your desired posion.
STEP 2
Press and hold the flat buon first, then press and hold memory
buon for 5 seconds unl you hear 2 beeps sound.
The wireless power bed has a programmable feature that allows
you to save custom posions.
Please read all the instrucons below before seng your custom
presets on the remote.
-12-
Pairing Buon
M