6 – English
DIRECTION OF ROTATION SELECTOR
(FORWARD/REVERSE/CENTER LOCK)
See Figure 2, page 9.
Set the direction of rotation selector in the OFF (center
lock)positiontolocktheswitchtriggerandhelpprevent
accidentalstartingwhennotinuse.
Positionthedirectionofrotationselectortotheleftofthe
switchtriggerforforwardoperation.Positiontheselector
totherightoftheswitchtriggertoreversethedirection.
NOTE: Thetoolwillnotrununlessthedirectionofrotation
selectorispushedfullytotheleftorright.
NOTICE:
To prevent gear damage, always allow the chuck to
cometoacompletestopbeforechangingthedirection
of rotation.
WARNING:
Battery tools are always in operating condition. Lock
the switch when not in use or carrying at your side,
wheninstallingorremovingthebatterypack,andwhen
installing or removing bits.
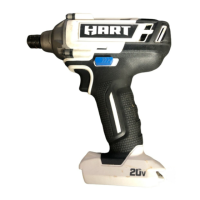
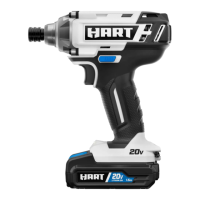
BUILT-IN COUPLER
See Figure 3, page 9.
The tool has a built-in coupler. The coupler has been
designedtoaccept1/4in.hexbits.
NOTE:Useonlyimpactqualitybitswithalockinggroove,
minimumlengthof2in.
INSTALLING/REMOVING BITS
See Figure 3, page 9.
To install bits:
Locktheswitchtriggerbyplacingthedirectionofrotation
selector in center position.
Slidethecouplerforwardandholdinposition.
OPERATION
Insertbitstraightintocoupler.
Slidethecouplerbackslowlyandrelease.
To remove bits:
Locktheswitchtrigger.
Slidethecouplerforwardandholdinposition.
Pullthebitstraightoutofthecoupler.
WARNING:
Makesurethebitissecuredinthecouplerbeforeusing
theimpactdriver.Failuretodosocouldcauseserious
personalinjury.
DRIVING OR REMOVING SCREWS
See Figures 4 - 5, page 9.
WARNING:
Donotdriveascrewwherethereislikelytobehidden
wiringbehindthesurface.Contactwitha“live”wirewill
makeexposedmetalpartsofthetool“live”andshock
theoperator.Ifyoumustdriveascrewwherehiddenwire
maybepresent,alwaysholdtoolbyinsulatedgripping
surfaces (handle) when performing the operation to
preventashocktotheoperator.
NOTICE:
Theimpactdriverisnotdesignedtobeusedasadrill.
Place the direction of rotation selector in the correct
positionfortheoperation.
Holdtheimpactdriverwithonehand.
Placethebitonthescrewheadandslowlydepressthe
switchtrigger.Startthebitslowlyformorecontrol.
Asthescrewisdriven,impactingwillbegin.
NOTE:Ifoperationcreatesconsiderabledust,frequent
vacuumingoftheworkareaisrecommended.
NOTE: MAINTENANCE INFORMATION BEGINS ON PAGE 8 AFTER
FRENCH AND SPANISH LANGUAGE SECTIONS.
ILLUSTRATIONS START ON PAGE 9.
 Loading...