5
3. INSTALLATIONSANLEITUNG3. INSTRUCTIONS FOR INSTALLATION
The electrical connections of the control unit may only
be made by an authorised, professional electrician
and in accordance with the current regulations.
When the installation of the control unit is complete,
the person in charge of the installation must pass
on to the user the instructions for installation and
use that come with the control unit and must give
the user the necessary training for using the heater
and the control unit.
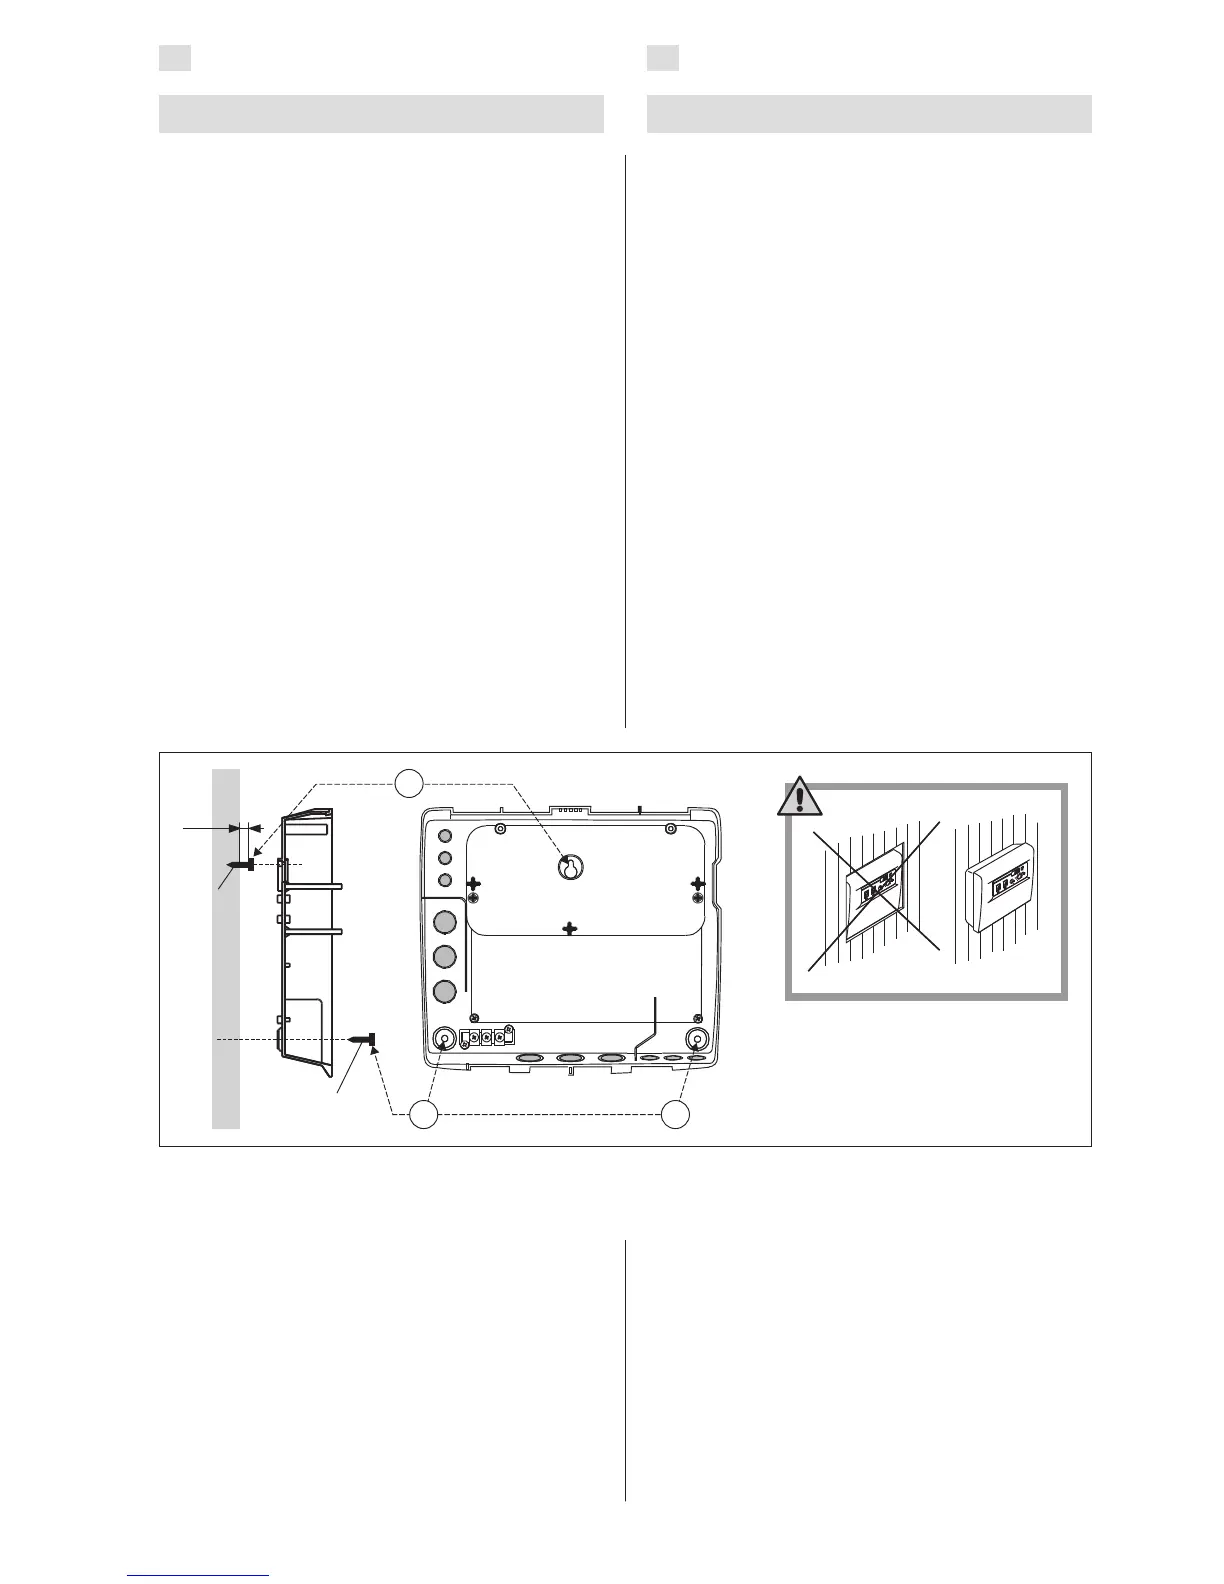
3.1. Removing the Top Plate
The top plate should be removed before mounting
the control unit on the wall. The top plate comes off
by pressing down on the locking strip at the upper
edge of the plate, using a screwdriver, for example.
The hole blanks for the connecting wires in the base
plate should be pierced in the places where the ca-
bles are to be connected. See gure 2.
3.2. Fastening the Device to the Wall
The control unit is installed outside the sauna room
in a dry place (ambient temperature >+0 °C).
Note! The control unit should not be embedded in
the wall structure. See gure 2.
There are holes for three screws in the base plate,
for fastening the unit to the wall. See gure 2.
Die elektrischen Anschlüsse des Steuergeräts dürfen
nur von einem autorisierten, geschulten Elektriker
unter Beachtung der aktuell gültigen Vorschriften
vorgenommen werden. Nach der Installation des
Steuergeräts ist der verantwortliche Monteur ver-
pflichtet, dem Benutzer die mitgelieferte Installati-
ons- und Bedienungsanleitung auszuhändigen und
der Person, die den Ofen und das Steuergerät be-
dient, eine entsprechende Schulung zu geben.
3.1. Lösen des Deckels
Der Deckel wird vor der Installation des Steuerge-
räts an der Wand abgenommen. Der Deckel wird
am oberen Rand gelöst, wenn die den Deckel blok-
kierende Lasche z.B. mit einem Schraubenzieher
herabgedrückt wird. Am unteren Rand werden die
vorbereiteten Bohrungen für die Verbindungskabel
an den Stellen durchgestoßen, an denen die Kabel
angeschlossen werden. Siehe Abb. 2.
3.2. Wandbefestigung
Das Steuergerät wird außerhalb der Saunakabine an
einem trockenen Ort (Betriebstemperatur +0 °C).
Achtung! Das Steuergerät darf nicht in die Wand-
konstruktion versenkt werden. Siehe Abb. 2.
Am Boden der Steuereinheit benden sich Bohrun-
gen für drei Schrauben, mit denen die Steuereinheit
an der Wand festgeschraubt wird. Siehe Abb. 2.
Figure 2. Wall-mounting the control unit
Abbildung 2. Installation des Steuergeräts an der Wand
3,5 x 20 mm
3,5 x 20 mm
7 mm
1
32
3.3. Installing the Temperature Sensor
Note! The supply air vent of the sauna room must
not be located near the temperature sensor. The
air ow near an air vent cools down the sensor,
which gives inaccurate temperature readings to the
control unit. As a result, the heater might overheat.
The air vent’s minimum distance from the sensor
(gure 3):
• omnidirectional air vent: 1000 mm
• air vent directed away from the sensor: 500 mm
The sensor must be installed to the place defined
in these instructions. If the minimum distance is not
fulfilled, ventilation must be changed.
3.3. Montage des Temperaturfühlers
Achtung! Die Luftzufuhr der Sauna darf sich nicht
in der Nähe des Temperaturfühlers befinden. Der
Luftzug in der Nähe von Luftzufuhr kühlt den Fühler
ab, was zu ungenauen Temperaturmessungen am
Steuergerät führt. Dies kann zu einer Überhitzung
des Ofens führen. Mindestabstand des Fühlers zur
Luftzufuhr (Abb. 3):
• Mehrrichtungs-Luftzufuhr: 1000 mm
• Luftzufuhr weist vom Fühler weg: 500 mm
Der Fühler muss an der Stelle angebracht werden,
die in diesen Anweisungen angegeben wird. Wenn
der Mindestabstand nicht erfüllt ist, muss die
 Loading...