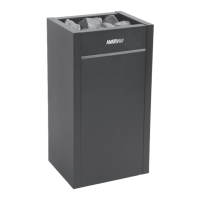
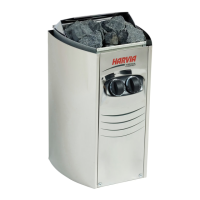
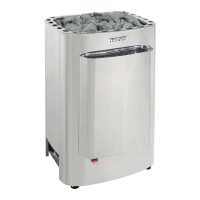
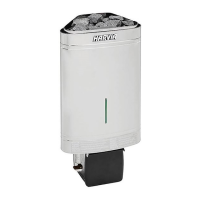
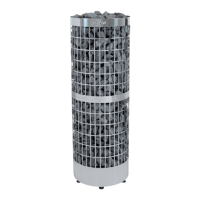
Harvia HL60E and HL110E Electric Sauna Heaters
This document provides comprehensive instructions for the installation, use, and maintenance of the Harvia HL60E and HL110E electric sauna heaters. These heaters are designed to provide a pleasant and relaxing sauna experience by heating the sauna room to the desired temperature.
Function Description
The Harvia HL60E and HL110E are electric sauna heaters that generate heat by warming sauna stones. Water can be thrown onto these hot stones to create steam, increasing the humidity in the sauna room. The heaters are controlled by a separate control unit (not included in the manual but mentioned as necessary for operation) which allows users to set the desired temperature and humidity levels.
Important Technical Specifications
The HL60E and HL110E models differ primarily in their power output and recommended sauna room volumes:
HL60E:
- Output: 6.0 kW
- Dimensions (Width/Depth/Height): 415/340/810 mm
- Stone Capacity: max. 50 kg
- Sauna Room Volume: min. 6 m³, max. 10 m³
- Height: 1900 mm
- Electrical Connections (200 VAC):
- 1-Phase (two circuits): 2x30 A fuses
- 3-Phase: 3x20 A fuses
- Heating Elements: Y10-0020 (2000W / 208V) x 3
HL110E:
- Output: 10.0 kW
- Dimensions (Width/Depth/Height): 415/410/810 mm
- Stone Capacity: max. 70 kg
- Sauna Room Volume: min. 9 m³, max. 18 m³
- Height: 1900 mm
- Electrical Connections (200 VAC):
- 1-Phase (two circuits): 2x40 A and 2x20 A fuses
- 3-Phase: 3x30 A fuses
- Heating Elements: Y10-0006 (3500W / 208V) x 3
General Specifications:
- Minimum Safety Distances: These are crucial for safe installation and vary depending on the heater model and the sauna room structure. Refer to Figure 4 in the manual for detailed minimum distances from walls and ceiling.
- Sauna Stones: The stones should be 10–15 cm in diameter. Only angular, split-face sauna stones made of olivine-dolerite and olivine are suitable. Porous ceramic stones or soft soapstones should not be used as they can damage the heating elements.
- Water Quality: The water used for throwing onto the stones should be clean and free of impurities. Hardness, iron, manganese, and chlorine content should be within specified limits (e.g., hardness < 12 mg/l, iron < 0.2 mg/l, manganese < 0.10 mg/l, chlorine < 100 mg/l). Seawater and arsenic/radon contaminated water are forbidden.
- Maximum Water Volume: The maximum volume of water to be thrown onto the stones at once is 0.2 litres. Excessive water can cause splashes and scalding.
Usage Features
Filling the Sauna Stones:
- Place the stones carefully into the heater, ensuring they are packed densely but allowing air to circulate. Do not drop stones into the heater or place them in a way that obstructs air circulation.
- Do not form a high pile of stones on top of the heater.
- Avoid placing any objects or devices inside the stone space or near the heater that could change the amount or direction of the air flowing through the heater.
Heating the Sauna:
- The heater is designed for heating a sauna room to bathing temperature. It is not to be used for any other purpose.
- The sauna stones normally reach bathing temperature at the same time as the sauna room. A suitable temperature for the sauna room is about 65–80 °C.
- The air in the sauna room becomes dry when warmed up. Throwing water onto the heated stones increases humidity, creating a more pleasant sauna experience.
Instructions for Bathing:
- Begin by washing yourself.
- Stay in the sauna for as long as you feel comfortable.
- Forget your troubles and relax. Do not disturb other sauna conventions or speak in a loud voice.
- Do not force other bathers from the sauna by throwing excessive amounts of water on the stones.
- Cool your skin down as necessary. If you are in good health, you can have a swim or a shower after bathing.
- Rest for a while and let your pulse go back to normal. Have a drink of fresh water or a soft drink to bring your fluid balance back to normal.
Warnings:
- Staying in the hot sauna for long periods of time makes the body temperature rise, which may be dangerous.
- Keep away from the heater when it is hot. The stones and outer surface of the heater may burn your skin.
- Keep children away from the heater.
- Do not let young, handicapped or ill people bathe in the sauna on their own.
- Consult your doctor about any health-related limitations to bathing.
- Consult your child welfare clinic about taking little babies to the sauna.
- Be extra careful when moving in the sauna, as the platform and floor may be slippery.
- Never go to a hot sauna if you have taken alcohol, strong medicines or narcotics.
- Never sleep in a hot sauna.
- See air and a humid climate may corrode the metal surfaces of the heater.
- Do not hang clothes to dry in the sauna, as this may cause a risk of fire. Excessive moisture content may also cause damage to the electrical equipment.
Maintenance Features
Troubleshooting:
- Heater does not heat:
- Check that the fuses to the heater are in good condition.
- Check that the connection cable is connected.
- Check that the control panel shows a higher figure than the temperature of the sauna.
- Check that the overheat protector has not gone off.
- Sauna room heats slowly, water thrown on stones cools down the stones quickly:
- Check that the fuses to the heater are in good condition.
- Check that all heating elements glow when the heater is on.
- Turn the temperature to a higher setting.
- Check that the heater output is sufficient (refer to 2.3).
- Check that the sauna room ventilation has been arranged correctly (refer to 2.2).
- Sauna room heats quickly, but the temperature of the stones remain insufficient:
- Check that the heater output is not too high (refer to 2.3).
- Check that the sauna room ventilation has been arranged correctly (refer to 2.2).
- Panel or other material near the heater blackens quickly:
- Check that the requirements for safety distances are fulfilled (refer to 3.1).
- Check that the heating elements can be seen behind the stones. If heating elements can be seen, rearrange the stones so that the heating elements are covered completely (refer to 1.1).
- Also see section 2.1.
- Heater emits smell:
- See section 1.2.
- The hot heater may emphasize odors mixed in the air that are not, however, caused by the sauna or the heater. Examples: paint, glue, oil, seasoning.
- Heater makes noise:
- Occasional bangs are most likely caused by stones cracking due to heat.
- The thermal expansion of heater parts can cause noises when the heater warms up.
Sauna Room Hygiene:
- Bathing towels should be used during bathing to prevent sweat from getting onto the benches.
- The benches, walls and floor of the sauna should be washed thoroughly at least every six months. Use a scrubbing brush and sauna detergent.
- Wipe dust and dirt from the heater with a damp cloth. Remove lime stains from the heater using a 10% citric acid solution and rinse.
Replacing Heating Elements:
- The manual provides detailed instructions and diagrams for replacing the heating elements (Figure 8). This is a maintenance task that may be required over the lifespan of the heater.
- Spare parts, including heating elements, are listed in section 4 of the manual. It is recommended to use only the manufacturer's spare parts.
Electrical Connections and Safety:
- All electrical connections must be made by a qualified electrician in accordance with current regulations.
- Before installing the heater, study the instructions for installation carefully.
- The heater is semi-stationarily connected to the junction box (Figure 7:3) on the sauna wall. The junction box must be splash-proof, and its maximum height from the floor must not exceed 500 mm.
- The connection cable must be of rubber cable type H07RN-F or its equivalent. PVC-insulated wire as the connecting cable of the heater is forbidden.
- Electrical insulation resistance: When performing the final inspection of the electrical installations, a "leakage" may be detected when measuring the heater's insulation resistance. This is due to moisture absorbed by the heating material during storage and transport. After operating the heater for a few times, the moisture will be removed from the heating elements. Do not connect the heater feed for the heater through the RCD (residual current device)!
This comprehensive guide ensures safe and efficient operation of the Harvia HL60E and HL110E electric sauna heaters, providing users with a reliable and enjoyable sauna experience.