XB-P / XB-A 9
PART
NAME
220
Arc Washer
(M6)
PART
DIAGRAM
NO. QT Y.
21
19
17
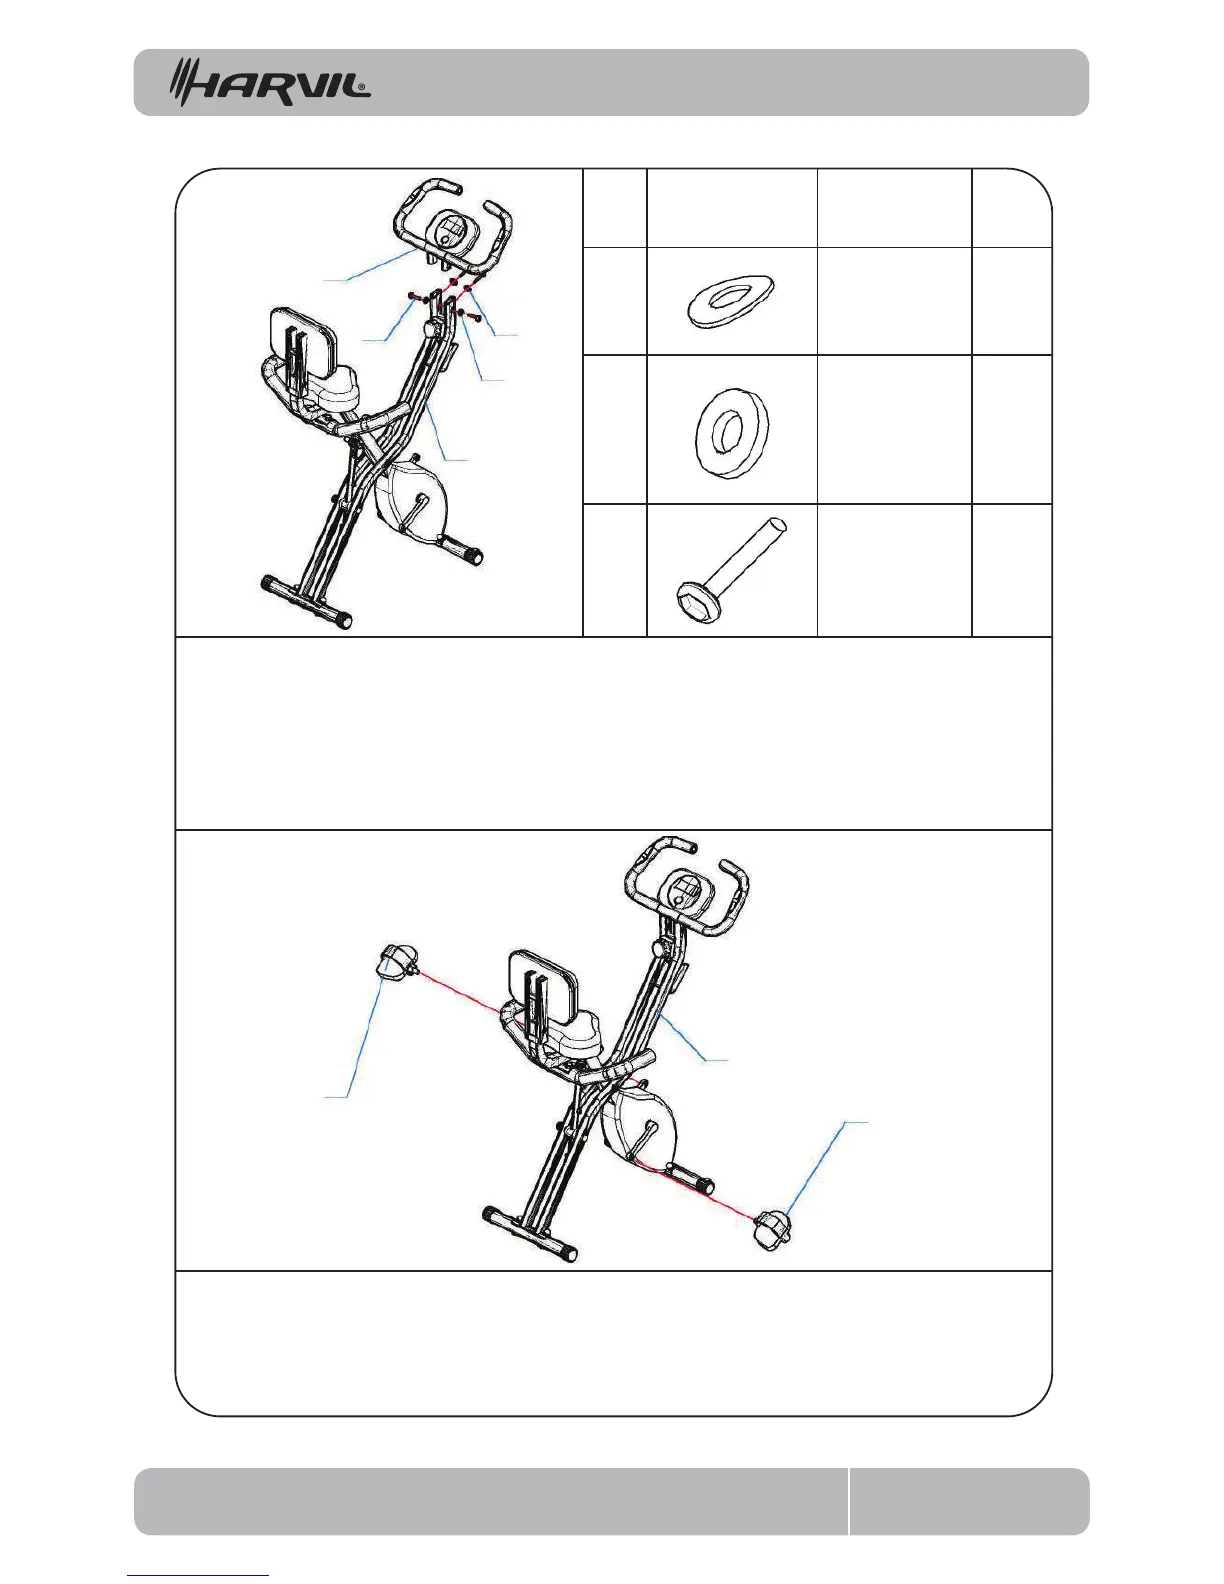
Put Arm rest of Main Frame (21) into Main Frame (17), align hole site beside and back, beside
hole, use M6*12 Semi-Round Head Screw (19), Ø 6.2 Flat Washer (18) to connect. Back side that
use M6*12 Semi-Round Head Screw (19), Ø 6.2 Arc Washer (20) to connect. And tighten all
Semi-Round Head Screw (19). Finally, connect wire between monitor & frame.
Step 7
Position the Pedal (12) and Crank of Main Frame (17) correctly, then tighten.
Note: Distinguish position of right and left. Same method to assemble Right Pedal (16).
Step 8
ASSEMBLY INSTRUCTIONS
218
Flat Washer
(M6)
419
Semi-Round
Head Screw
(M6 x 12)
17
12
16
20
18