5.
To
change
from
steam
to
dry
.
As
long
as
the steam
button
is
at the
UP
p
osition
the
iron
ca
n
be
u
sed
as
a
dry iron.
•It
is
normal
for
steam
to
be
emitted
for
a
while
just after changing
from
steam
to
dry
because
water
remains in the iron.
6.
To
add clean water.
Refill
cl
ean
wa
t
er
when the water level r
eac
h
es
the
"1
.
0"
li
ne
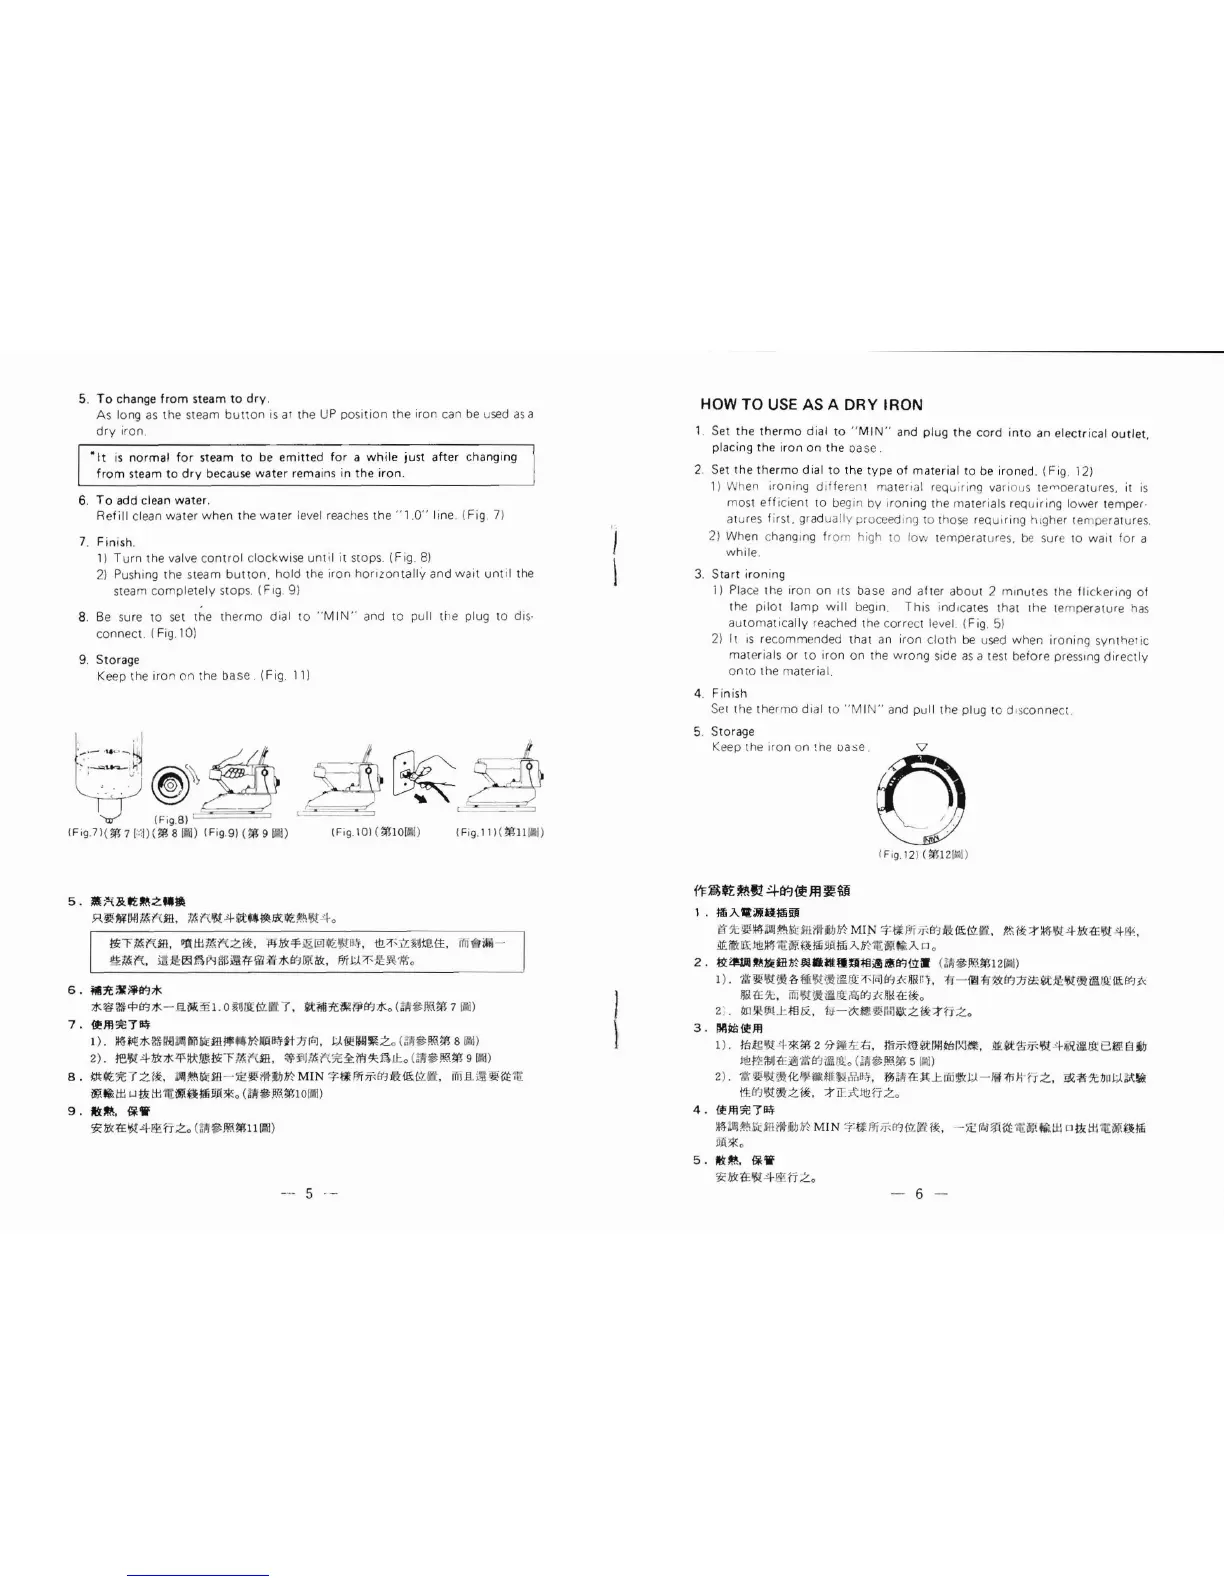
. (Fig . 71
7. Finish.
1) Turn the
va
l
ve
co
ntr
ol
cl
ockw
i
se
unt
il it stops. (F
ig
.
8)
21
Pu
shi
ng
the steam
butt
o
n.
ho ld the ir
on
horizo
nt
ally a
nd
wai
t
unt
il the
stea
m completely stops. ( F
tg
.
91
8.
Be
s
ur
e to
set
the th
er
mo dia l
to
"
MIN
" and
10
pu
ll the plug
10
di
s·
connect. (Fig. 1
0)
9. Storage
Keep the iron on the b
ase.
(Fig.
111
(Fig.\01
(
ln!OI
J!i) (Fig.
ll
l (
lnll
il!)
5.
•~&~~z••
~~M~m~m.
mn~4~-
~~~
~~4o
t{(T~
fl:m,
I>Jti±l
~'l'i.z1&
.
W~if
Jg
@JQZ:
~H;'f
,
tl!.'G
:lz:~
IJtl"
.
tE.
&m~
~
~~-~-a~Wfi*~~~
M~~
~--o
6.M:1f;tli*at!*
*~~<f>~]f(-
.13.~.3§
1.
o i;I
J/Jl't'li
7 .
~ij!j:1f~lf<~*o
(
;'iii~,OO.
;g
7
l:oi)
7 .
{f!ffl:i€1"~
1
).
l1Ut!*~llil
illl ll1l
/i:£m~"~lillillff£
t
/Jial
,
l:J(fi!IUJ~Z
o
C~~
~
.m
8 tl)
2).
felt[
4~*'1':tl\!.!!\t!iT
.i"\
m.
~iiJ.
fi:7
H:IWI<:a!.l:.o
(lil!
~~.m
9
!J\l)
s.
m~
,;:
-
rz~&
.
~li<'Ha
-
:iE~i'lti!J~
MrN
+
1'1
ffiii<B'-J®:i!it'li •
ffilll
.i;
~
~
~rr
iJl\~J:tj
1-lt,il±l
iJl\Qllfi~
.l
!3i:(o
(,
~~.1fff10
IIf
)
9.
At~
.
Q:'lf
'iO:~:tE~48H
rZ.o
(ll11~
JWJ!l
ll
~)
- 5
·-
'·
J
I
HOW TO
USE
AS A
DRY
IRON
1. Set the
thermo
dial
to
"
MIN
" and plug the cord
into
an electrical
outlet,
placing the iron on the oase .
2. Set the
thermo
dial to the type of material
to
be
ironed. (Fig. 121
11
Wh
en
ironing
dif
f
er
en
t
ma
te
rial req
uiri
ng
va
rious
tem
oera tures. it
is
most
efficien
t
10
be
gin
by
troning the materials requ
iring
l
ower
temper·
atur
es
first. gr
ad
ually proceed ing
to
those
req
ui
ring
ht
gher temperatures.
21
Wh
en
chang ing
fro
m high
10
low
t
emp
eratu
res.
be s
ur
to wait for a
wh
ile.
3.
S
tart
ironing
11
Pla
ce
the iron
on
tis
ba
se
and af ter about 2 m
tnu
tes the flickering ol
the
pilot
lamp
will
begtn. This ind1cates that the temperature
has
au
to
matically reached t
he
corr
ec
t leve l. (F
ig
.
51
21
It
tS
recommended that
an
iron
clo
th
be
used
when ironing
synthetic
mater
ia
ls or
to
iron on the w rong side as a t
est
before pre
ss
ing
direct
ly
onto the mater
ia
l.
4. Fin
ish
Se
t t
he
th
ermo d
ia
l to " M I
N"
an
d pu ll t
he
plug
10
d
ts
connect .
5. Storage
Keep the iron on
:he oase
1~~~~tt4rt-J<fm~~
1 .
Jli
A.
11UUI!illil.ll
( F
ig.12
) (lr{ll2)
1;<1)
8$\::~
Jm
l~
/i:££11i'fil!J~
MIN
+ltffi:if<B'1Al
!l&t'li!i't',
~1&?Jm~4~:tE'!S:t4f'l!.
;tilli:HX:!t!!lm
diJ
HJHi~JifiljA.m
1ltJi!
~J..
o o
2.
~il!llll~!td:H~W·MHID~~II!at!i;iiW
(f.II~
JI!:
iJ
(H2fl'<!
)
1
1.
n•w~
&
m•~~/Jl'~~
~~-~.
~ -
®
~•~:n••~•~~&!l&~~
Hfl
tl:$1::
,
il'il~~IXI.m'il'li
B'
~t<
n~:tE1~o
2/ .
tHl*!fllJ::.
;f!J
JX
,
l<f-<Xtf!'8!ro1
lltz1f;tf
"T
:Go
3.
llft~lflll
1) .
l'Stg
~4 *m
2
;?-
fiti:
:b,
fii;r<m~
I11!
~
1
XI~
•
.Mii!t
~iT<
R
4~
11iXm'Bm!EiiJJ
tt!!l'l!
~J
:tEj§n~IXI.Ill'o
Wi~
~
.m
s
fJll
)
2) .
···~
~
---~&~
.
m
,
:tEXJ::.~~~
-
M~W
ff~
··~h~~~
t'E
B';~ (fiz
i&.
? iEAtt!!ITZo
4.
{flft'li:"J~
lmill~
tOHrN'l!J~
MIN
+1iffiiJ<B'-
J{;'Lfa
i&
,
:iE~I~i:t,
.t;!
~W
(:
t
~I:H
~
tlllti
ll
H~o
5.
~~.
Q:tf
'iO:
~tER4
8H
rZo
- 6 -
 Loading...