6
12. Rear IR sensor
13. Battery holder
14. Battery holder catch
15. Upper strap lug
e Winder CW is supplied with an IR Remote control (3044113) and a
wrist strap (3044118).
Batteries 2
e winder uses six 1.5V pen cells of ‘AA’ (LR6) type. Under normal
conditions, alkaline batteries are recommended although lithium
or rechargeable batteries (preferably nickel-metal hydride for envi-
ronmental reasons) may also be used. Under very cold conditions,
however, lithium or rechargeable nickel-cadmium batteries are recom-
mended.
Move the battery holder catch clockwise and remove the battery holder.
Insert batteries ensuring they are aligned in the correct manner (see
moulded symbols for orientation). Replace battery holder and rmly
press it into place while moving the catch counter clockwise as far as it
will go until it clicks into position, locking the holder in place.
Under normal conditions new alkaline batteries should last for ap-
proximately 3,000 exposures.
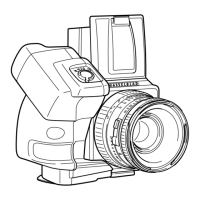
Attaching the winder 3, 4
Ensure the camera is fully wound. Remove the camera strap, winding
crank and lens (see camera instruction manual). To avoid accidental
damage, you may want to attach the front protective cover to the cam-
era body until you become used to attaching the winder. Ensure that
the red indexes on the winder coupling and bayonet mount will be in
alignment when mounted. If they are not, press the release button on
the winder once (in any mode except ‘L’). e coupling will then revolve
and stop automatically in the correctly aligned position.
Insert the strap lug on the camera body in the winder’s mounting plate
and move the winder into position so that the couplings on the camera
and winder match. When the winder drops into place tightly against
the camera body, rotate it clockwise a little until it snaps into position.
The winder immediately senses the status of the camera and reacts
accordingly. is can be faintly heard as a mechanical reaction if the
 Loading...
