7
camera is already wound. If the camera was unwound, however, it will
now be automatically wound (and an attached loaded lm magazine
will be advanced by one frame, see note below).
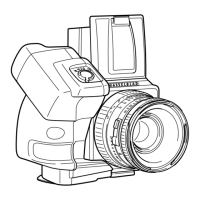
Removing the winder 5
Remove the lens. Firmly grip the winder and depress the winder catch
with the thumb. Rotate the winder counter clockwise, keeping the
catch depressed, and withdraw the unit from the camera body.
Operation modes 6
e mode selector has ve positions:
L = Lo c k / o f f
e winder remains in the locked mode to avoid unintentional expo-
sure when the camera is not being used or is being stored. Remove the
batteries if you do not intend to use the winder for several weeks.
S = Si n g L e e x p o S u r e
Aer depressing the release button, the shutter is released. e cam-
era is then automatically rewound aer relaxing the pressure on the
release button.
With exposures of 1/4 second and longer, retain the pressure on the re-
lease button until the complete exposure cycle is complete. See relevant
section in camera instruction manual for details.
c = co n t i n u o u S e x p o S u r e
After depressing the release button, the shutter is released and the
camera is automatically rewound. This operation repeats at the rate
of approximately 0.7 frames per second if the release button remains
depressed. e longest shutter speed possible in this mode is 1/8 sec.
M = Mu L t i p L e e x p o S u r e
After depressing the release button, the shutter is released but the
camera is not rewound; consequently the lm is not advanced in the
magazine. Aer inserting the magazine slide and removing the maga-
zine, switch to either the ‘C’ or ‘S’ mode. e camera will now rewind in
preparation for the new exposure. Reattach the magazine and remove
the slide. If only one more exposure is required, then the switch may