EasyManua.ls Logo

Hathaway MADISON User Manual

Hathaway MADISON
24 pages
To Next Page IconTo Next Page
Page #1 background imageLoading...
Page #1 background image
Please Do Not Hesitate to
Contact Our Consumer Hotline
at
800-759-0977
with Any Questions That May
Arise During Assembly or
Use of This Product!
MADISON 54-IN. 6 in 1
MULTI GAME TABLE
ASSEMBLY INSTRUCTIONS
NG5017
Ver. 0418
Question and Answer IconNeed help?

Do you have a question about the Hathaway MADISON and is the answer not in the manual?

Hathaway MADISON Specifications

General IconGeneral
BrandHathaway
ModelMADISON
CategoryVideo Gaming Accessories
LanguageEnglish

Summary

Madison 54-in Multi Game Table Assembly Instructions

Assembly Tips and Safety Precautions

Key Assembly Guidance

Read all instructions entirely before beginning assembly for best results.

Critical Safety Warnings

Details choking hazards and age suitability for children under 3 years.

Care and Usage Recommendations

Product is for indoor use only; avoid dragging the table when moving.

Complete Parts List

Hardware Pack Components

Initial Assembly Steps

Step 1: Frame Base Construction

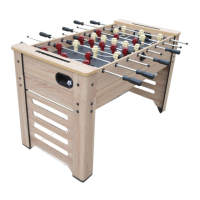
Connect side panels to the main frame using specified hardware.

Step 2: Playfield Attachment

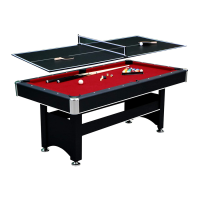
Place and secure the playfield onto the assembled frame.

Intermediate Assembly Steps

Step 3: Support Brace Installation

Attach support braces to the frame for structural integrity.

Step 4: Top Plate and End Panel Attachment

Secure top plates and end panels to the main structure.

Leg and Accessory Assembly

Step 5: Leg End Panel Mounting

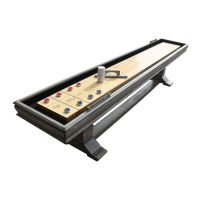
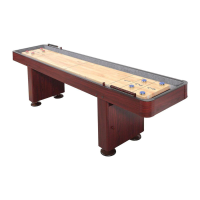
Attach leg end panels and end panels to the table legs.

Step 6: Levelers and Scorers Attachment

Install leg levelers and slide scorers onto the table legs.

Player Rods and Handles Assembly

Step 7: Player Rod Installation

Insert player rods with all necessary components into the frame.

Step 8: Handle and Ball Catcher Attachment

Attach rod handles and ball catchers to complete the player rod setup.

Base Structure and Side Panel Integration

Step 9: Leg Assembly

Connect the main support legs to the base frame.

Step 10: Attaching Side Panels to Base

Attach the side panels to the assembled leg structure.

Final Game Surface Setup

Step 11: Final Game Surface Assembly

Assemble the multi-game surfaces and place them on the table.

180-Day Limited Warranty Information

Related product manuals