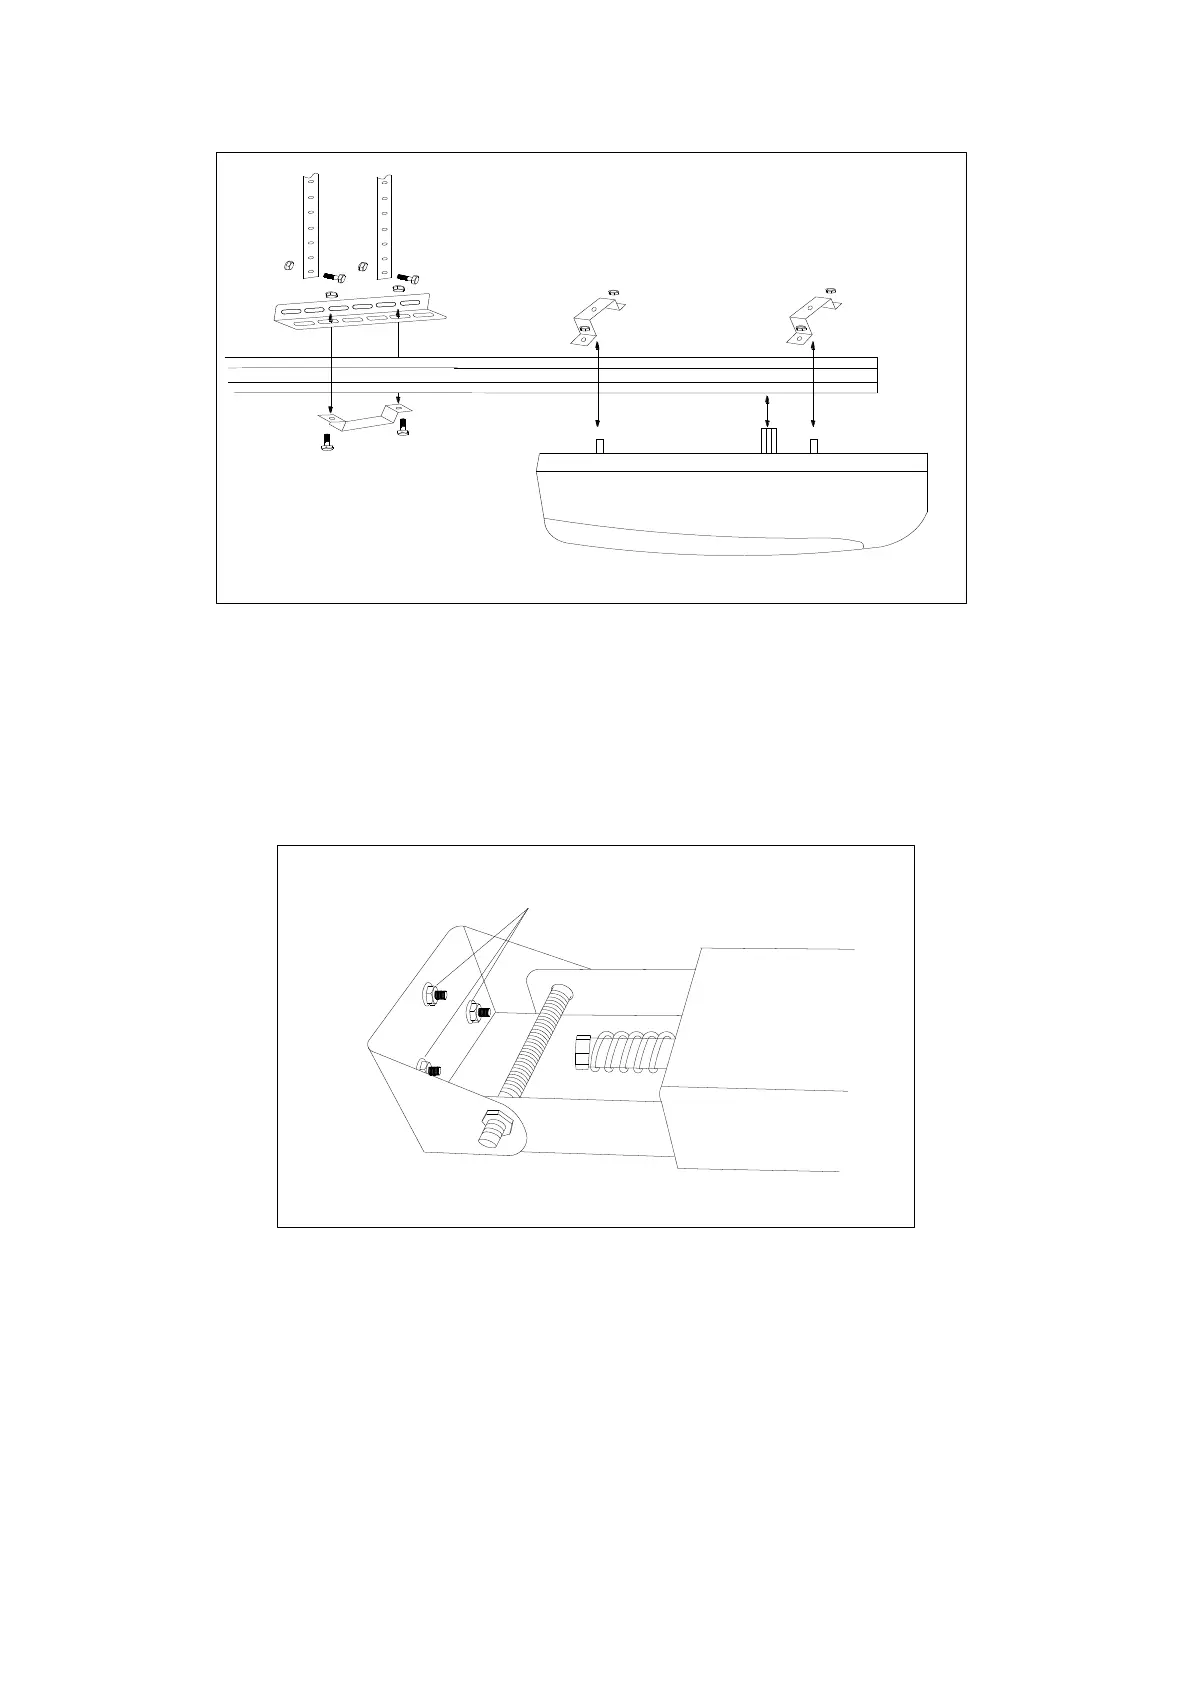
Fig.6
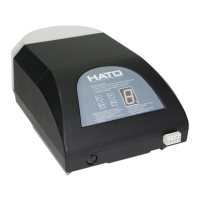
Step 4
Close the door.
Place the operator in the center of the floor. Lift the front end of the rail up to the header
bracket that has been mounted above the garage door, insert the bolt and secure it with
nut see Fig.7.
Fig.7
Step 5
Raise and support the powerhead with a ladder and line up the rail with the centerline
marked on the door. The rail must be level.
Fix the rail to ceiling with mounting brackets (not included in accessories) and angle iron
see Fig.6, make sure that the rail is level. If necessary, Check the door does not touch any
part of the rail by opening or closing it manually.