3 Undo and remove the nut and washer
securing the swivel hub balljoint to the lower
suspension arm. Release the taper of the
balljoint shank using a universal balljoint
separator, or the alternative method
described in Section 3 paragraph 5.
4 Move the lower suspension arm
downwards to disengage the balljoint shank.
5 Undo and remove the nut and bolt securing
the tie-bar to the suspension arm and then
move the tie-bar sideways out of the way.
6 Undo and remove the nut and washer from
the rear of the pivot bolt securing the lower
suspension arm to the subframe (see
illustration).
7 Lever the pivot bolt forward and off the
subframe, then lift out the lower suspension arm.
8 Lift the rubber bushes off the suspension
arm and inspect them carefully for swelling,
cracks or deterioration of the rubber. Also
inspect the pivot bolt for wear or damage.
Renew any worn components.
Refitting
9 Refitting is the reverse sequence to
removal, bearing in mind the following points:
a) Ensure that the flat of the pivot bolt head
locates under the tab on the subframe.
b) Tighten all nuts and bolts to the specified
torque.
c) Do not fully tighten the pivot bolt retaining
nut until the car has been lowered to the
ground.
Suspension and steering 10•7
10
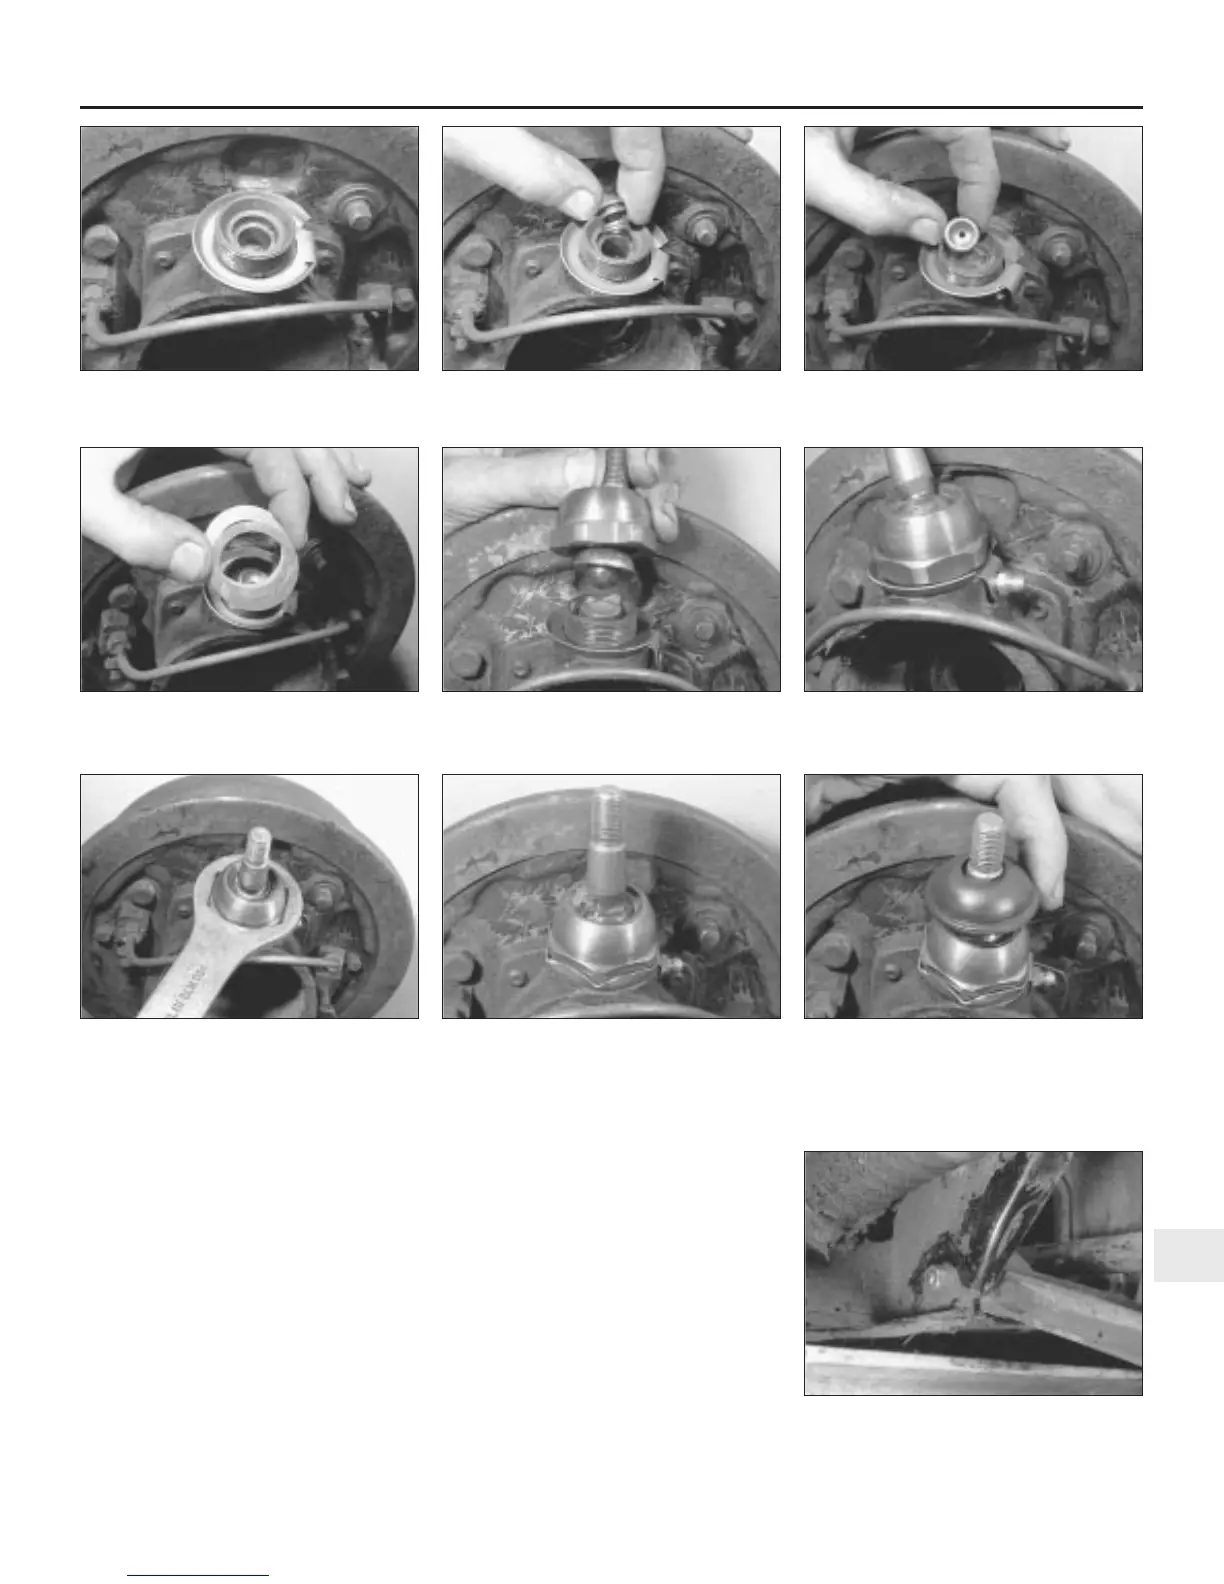
5.11a Fit the lockwasher . . . 5.11b . . . spring . . . 5.11c . . . ball-pin seat . . .
5.12c . . . and fully tighten the nut 5.12d Bend up the lockwasher . . . 5.13 . . . and fit the dust cover
6.6 Lower suspension arm inner mounting
5.11d . . . and shims 5.12a Refit the ball-pin and nut . . . 5.12b . . . screw in the grease nipple . . .
 Loading...