6 Refitting is the reverse sequence to
removal. With the mounting attached to the
body, it is important to measure the gap
between the rear of the mounting and the
subframe, and then to select an appropriate
number of shims of the same thickness for
fitting in the gap. The shims are slotted and
square in shape, and are 1.32 mm thick. They
are located over the mounting bolt shanks.
Rear mounting
7 Chock the rear wheels then jack up the
front of the car and support it on axle stands
(see “Jacking and vehicle support”).
8 Support the subframe with a jack on the
side to be released.
9 Undo and remove the two nuts and bolts
securing the subframe to the mounting.
10 Lift up the carpets inside the car and have
an assistant hold the two bolts securing the
mounting to the body. Undo and remove the
nuts from below and lift off the mounting.
11 Refitting is the reverse sequence to
removal.
13 Front subframe - removal and
refitting
4
The front subframe, complete with
engine/transmission and all suspension
components still in position, can be removed
from the car using the procedure described in
Chapter 2B. With the engine/transmission
lifted off, the suspension components can
then be withdrawn by referring to the relevant
Sections of this Chapter.
14 Rear hub bearings - renewal
3
1 Chock the front wheels then jack up the rear
of the car and support it on axle stands (see
“Jacking and vehicle support”). Remove the
rear roadwheel, then release the handbrake.
2 Slacken off the brake adjuster, unscrew the
two brake drum retaining screws and lift off
the drum. If it is tight, tap it gently using a soft-
faced mallet.
3 By judicious tapping and levering, extract
the hub cap and withdraw the retaining split
pin from the hub securing nut (see
illustration).
4 Using a large socket, undo and remove the
hub securing nut and thrustwasher. Note that
the left-hand hub nut has a left-hand thread
and the right-hand hub nut has a right-hand
thread.
5 Withdraw the hub from the stub axle using
a hub puller. Alternatively, lever it off using
two stout screwdrivers or flat bars.
6 With the hub assembly removed from the
car, prise out the rear oil seal, then tap out the
two bearing inner races using a brass drift.
Take care not to lose the balls which will be
released as the inner races are removed. On
certain models, taper roller bearings are fitted
and the inner races are simply lifted out.
10•10 Suspension and steering
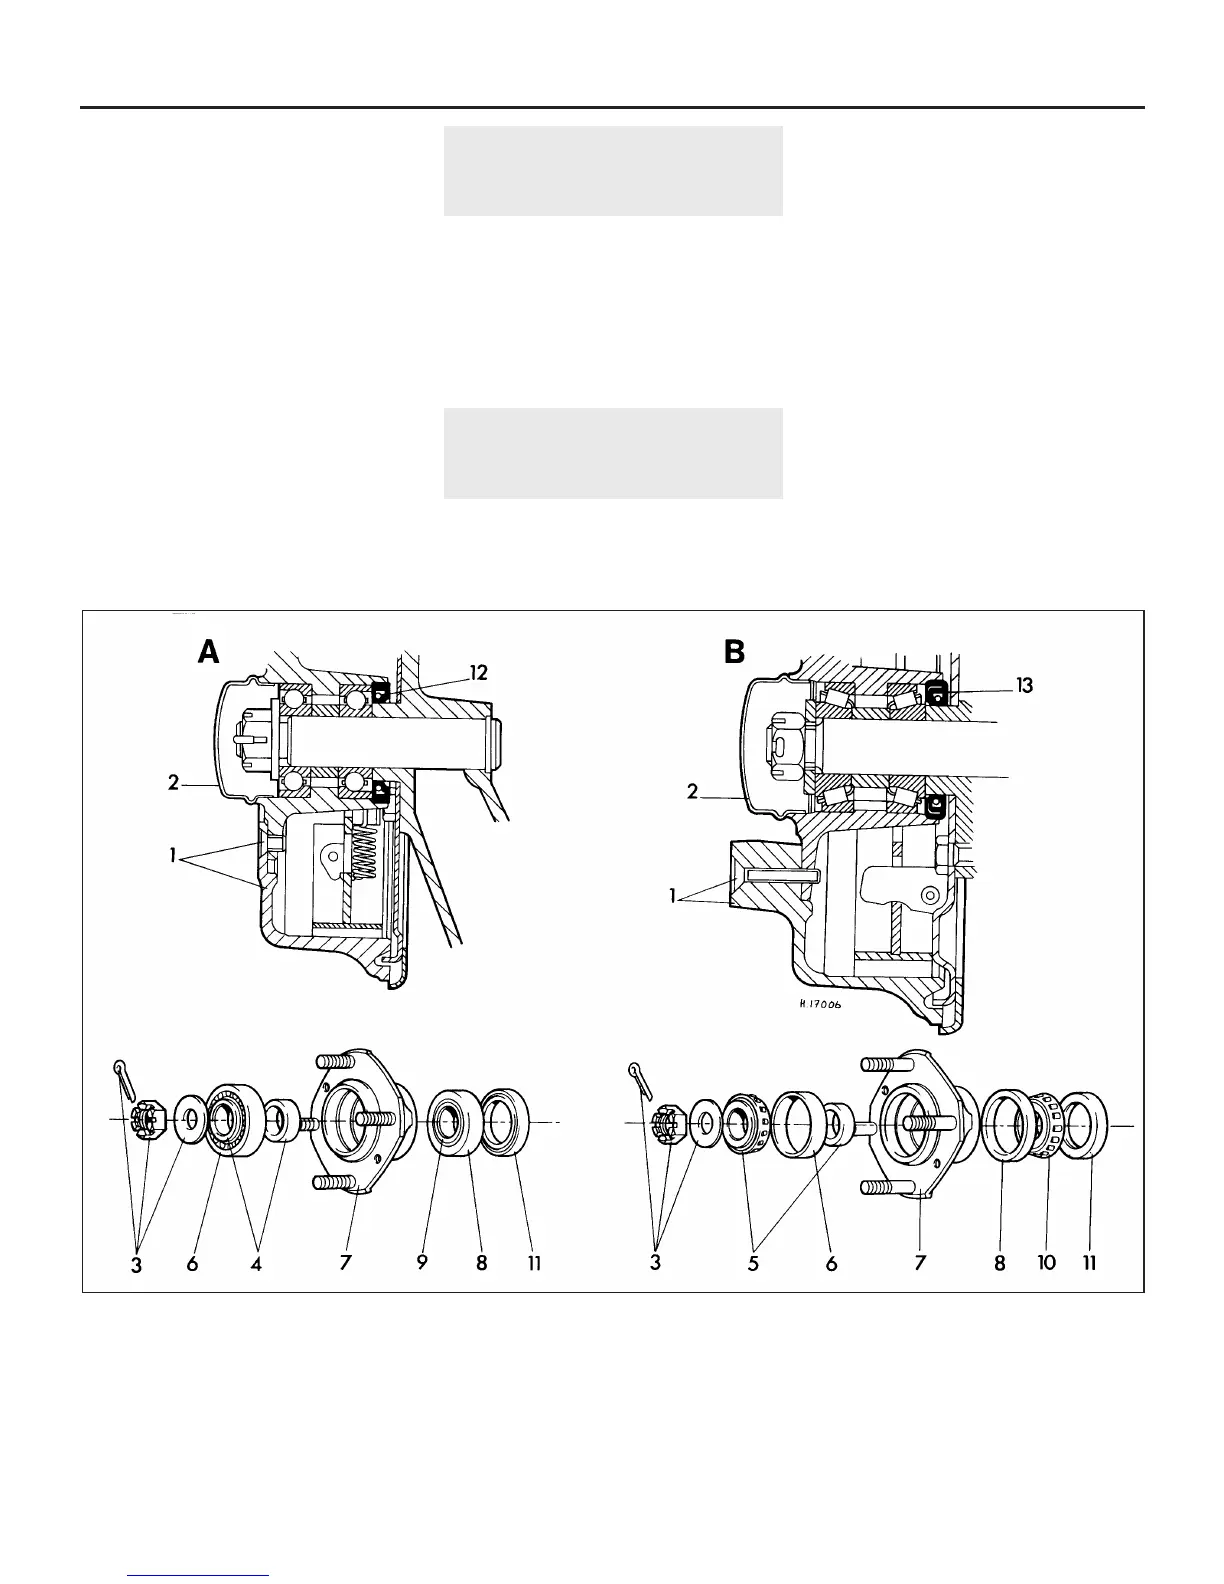
14.3 Exploded view of the rear hub components
A Ball bearing type B Taper roller bearing type
1 Brake drum and retaining screw
2 Hub cap
3 Hub retaining nut assembly
4 Outer ball bearing inner race and spacer
5 Outer taper roller bearing inner race and
spacer
6 Outer bearing outer race
7 Rear hub
8 Inner bearing outer race
9 Inner ball bearing inner race
10 Inner taper roller bearing inner race
11 Oil seal
12 Oil seal installed with lips facing inwards
13 Oil seal installed with lips facing outwards
 Loading...