driveshaft and attempting to rotate the wheel.
Repeat this check by holding the inner joint and
attempting to rotate the driveshaft. Any
appreciable movement indicates wear in the
joints, wear in the driveshaft splines, or a loose
driveshaft retaining nut.
16 Steering and suspension
lubrication
1
1 Unlike most modern cars, there are a number
of steering and suspension joints on the Mini
which require regular attention. Provision for
lubrication of these joints is by means of a
grease nipple, to which a grease gun can be
engaged. The grease nipples are located in the
following areas (see illustrations):
a) Steering swivel hub; two nipples, one
upper and one lower on each side.
b) Upper suspension arm inner pivot; one
nipple on each arm.
c) Rear radius arm pivot; one nipple on each
pivot. Remove the rubber blanking plug to
expose the nipple on early models.
2 When lubricating the front grease nipples it
is preferable to raise the front of the car and
support it on axle stands (see “Jacking and
vehicle support”) so that the load is taken off
the suspension. This will allow the grease to
penetrate into the joints more effectively. The
rear radius arm pivots can be lubricated with
the car on its roadwheels if wished.
3 With the car raised and suitably supported,
wipe clean the area all round the grease
nipple and the nipple itself. Engage the head
of a grease gun, filled with the specified
grease, squarely onto the nipple, keeping it
pushed fully home. Operate the gun until
grease can be seen to appear from under the
dust cover over the joint or from around the
side of the pivot bushes.
4 When lubricating the rear radius arm pivots, a
generous amount of grease will be needed each
side, quite a bit more than was required for the
front suspension joints. It probably won’t be
possible to tell when sufficient has been
applied, unless you look underneath at the inner
attachment on the subframe, it may be possible
to see it appear around the inner pivot; add a bit
more if in doubt .This is a vitally important area
on the Mini and it must be well lubricated.
5 Although not actually part of the steering
and suspension, the handbrake cable guides
and the moving sectors on the rear subframe
should be lubricated at this time to ensure
smooth operation. There are no grease
nipples, so the grease should be applied with
a wooden spatula or similar tool to lubricate
these areas thoroughly.
17 Rear brake wear check
1
The procedure for checking the rear brake
components is the same as described in
Section 14 for models with drum brakes.
18 Underbonnet check for fluid
leaks and hose condition
1
General
1 High temperatures in the engine
compartment can cause the deterioration of
the rubber and plastic hoses used for engine,
accessory and emission systems operation.
Periodic inspection should be made for
cracks, loose clamps, material hardening and
leaks.
2 Carefully check the large top and bottom
radiator hoses, along with the other smaller-
diameter cooling system hoses and metal
pipes; do not forget the heater hoses/pipes
which run from the engine to the bulkhead.
Inspect each hose along its entire length,
replacing any that are cracked, swollen or
shows signs of deterioration. Cracks may
become more apparent if the hose is
squeezed (see Haynes Hint).
3 Make sure that all hose connections are
tight. If the spring clamps that are used to
secure some of the hoses appear to be
slackening, they should be renewed to
prevent the possibility of leaks.
4 Some other hoses are secured to their
fittings with screw type clips. Where screw
type clips are used, check to be sure they
haven’t slackened, allowing the hose to leak.
If clamps or screw type clips aren’t used,
make sure the hose has not expanded and/or
hardened where it slips over the fitting,
allowing it to leak.
5 Check all fluid reservoirs, filler caps, drain
plugs and fittings etc, looking for any signs of
leakage of oil, transmission and/or brake
hydraulic fluid or coolant. If the vehicle is
regularly parked in the same place, close
inspection of the ground underneath it will
soon show any leaks. As soon as a leak is
detected, its source must be traced and
rectified. Where oil has been leaking for some
time, it is usually necessary to use a steam
cleaner, pressure washer or similar, to clean
away the accumulated dirt, so that the exact
source of the leak can be identified.
Vacuum hoses
6 It’s quite common for vacuum hoses,
especially those in the emissions system, to
be numbered or colour-coded, or to be
identified by coloured stripes moulded into
them. Various systems require hoses with
different wall thicknesses, collapse resistance
and temperature resistance. When renewing
hoses, be sure the new ones are made of the
same material.
7 Often the only effective way to check a
hose is to remove it completely from the
vehicle. If more than one hose is removed, be
sure to label the hoses and fittings to ensure
correct installation.
8 When checking vacuum hoses, be sure to
include any plastic T-fittings in the check.
Every 6000 miles or 6 months 1•15
1
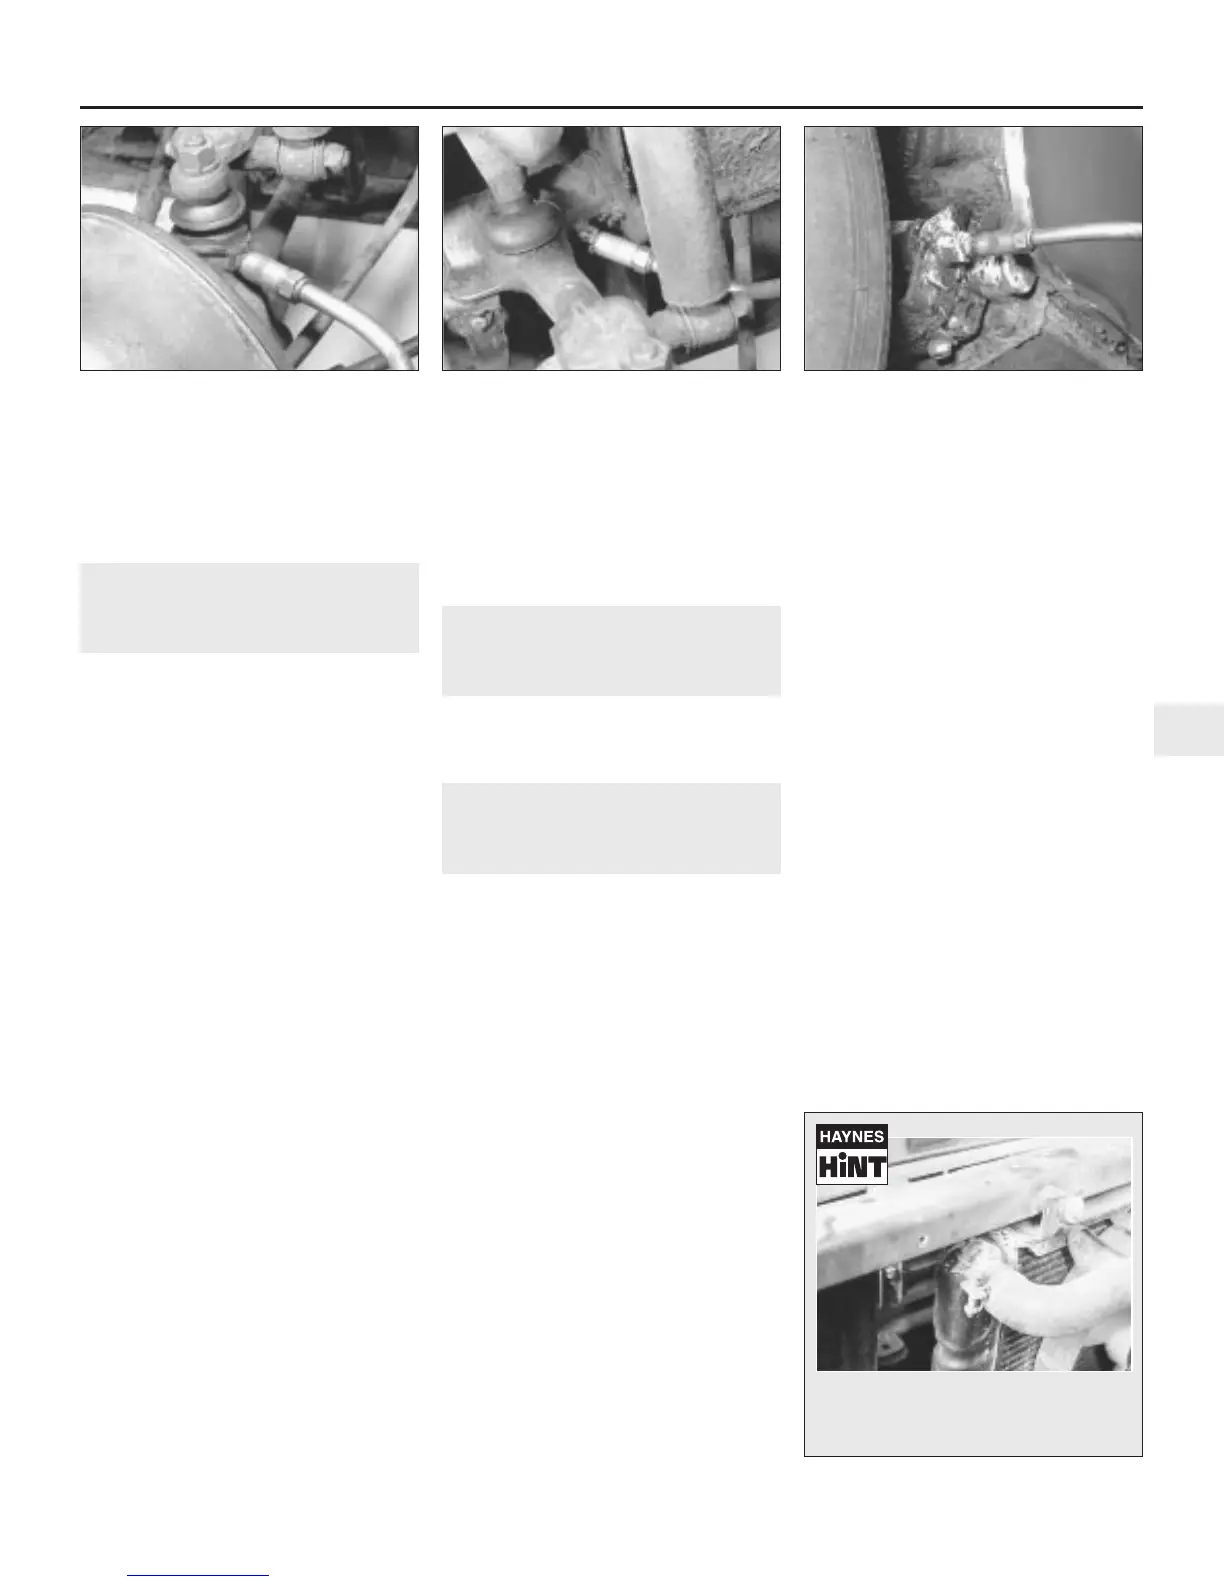
16.1a Lubricating the swivel hub upper
grease nipple . . .
16.1b . . . the upper suspension arm inner
pivot grease nipple . . .
16.1c . . . and the rear radius arm pivot
grease nipple
A leak in the cooling system will usually
show up as white or rust coloured
deposits on the area adjoining the leak
 Loading...