3 Carefully ease off the interior lock control
surround (see illustration).
4 On later models undo and remove the
retaining screws and lift away the storage bin.
5 If the top edge of the trim panel
incorporates a trim capping, undo the two
screws, then carefully ease the capping away
from the door using a wide-bladed
screwdriver or flat strip of metal. This will
release the three retaining studs behind the
capping, allowing the capping to be lifted
away. If any of the studs break during
removal, extract the broken stud and glue a
new one in its place.
6 Using a wide-bladed screwdriver or flat
strip of metal inserted between the trim panel
and the door, carefully detach the trim panel
clips from the door panel (see illustration).
7 When all the clips are released, the panel
can be withdrawn.
8 If it is wished to gain access to the internal
door components, carefully peel off the
waterproof covering.
Refitting
9 Refitting is the reverse sequence to
removal, but ensure that the waterproof
covering is in position before refitting the
panel. If the panel incorporates a trim
capping, refit by placing the capping in
position and pushing the studs fully home.
Secure with the three retaining screws.
7 Doors - removal and refitting
2
All models except Van
and Pick-up
Removal
1 Refer to Chapter 3 and remove the fresh air
vent assembly (if fitted) adjacent to the door
pillar.
2 Gently ease the door sealing rubber from
the door pillar around the area where it retains
the facia inner trim.
3 Undo and remove the retaining screws (if
fitted), and then carefully fold back the facia
inner trim to give access to the door check
strap aperture.
4 Extract the split pin and clevis pin from the
door check strap.
5 Support the weight of the door on blocks,
or engage the help of an assistant. Undo and
remove the four nuts and two washer plates,
accessible from inside the front wheel arch.
6 Carefully lift the door assembly, complete
with hinges, off the body, noting the position
of any alignment shims that may be fitted to
the hinges.
Refitting
7 Refitting the door is the reverse sequence
to removal.
Van and Pick-up models
Removal
8 Upon inspection it will be seen that each
door is held in place by two hinges and a
check strap.
9 To remove a door, first unscrew and
remove the two set screws and washers that
secure the door check strap coupling bracket
which is located on the inside of the door
pillars. To gain access it will be necessary to
ease back the side trim first.
10 Open the door carefully and pull out the
interior lining of the door.
11 Undo and remove the cross-head screw
and nut from the door side of each of the two
hinges.
12 The door can now be lifted away from the
body, leaving the hinges still attached to the
body.
Refitting
13 Refitting the door is the reverse sequence
to removal.
8 Door hinge - removal and
refitting
2
All models except Van
and Pick-up
Removal
1 Remove the door as described in Section 7.
2 The hinges can now be removed from the
door by simply undoing the retaining screws
and lifting off.
Refitting
3 Refitting is the reverse sequence to
removal.
Van and Pick-up models
Removal
4 Refer to Section 7 and remove the door.
5 Two nuts/bolts hold each hinge to the inside
of the front wing. The heads of the nuts/bolts
are very difficult to get at because they are
surrounded at the top and bottom by the sides
of the support brackets. This is particularly
applicable to the top hinge, inside bolt.
6 Using a socket and universal coupling,
undo and remove the nuts and bolts and lift
away the hinge.
7 If the head on one of the bolts has become
so burred that the spanner will no longer fit
and provide a positive grip, very carefully
examine a new hinge and decide on the exact
position of the old bolt by comparison.
8 The old bolt can then be carefully drilled out
from the outside of the hinge.
Refitting
9 Refitting the door hinge is the reverse
sequence to removal.
9 Front door glass - removal
and refitting
3
All models except Van
and Pick-up
Removal
1 Refer to Section 6, and remove the door
interior trim panel.
2 Carefully ease off the waist rail finisher
strips from the top of the door edge, taking
care not to damage them as they are lifted
away from the clips.
3 Wind the window approximately half-way
down so that the two arms of the regulator
mechanism are as near vertical as they can
be. With a piece of wood, wedge the window
glass at the sill in this position.
4 Remove the regulator mechanism securing
screws (see illustration).
5 Pull the regulator away from the door panel
enough to move it forwards so that the rear
arm comes out of the window channel. Then
move the mechanism back to release the arm
from the front channel and lift it away.
6 Support the glass with one hand, remove
the wedge and tilt the forward edge down into
the door so that the top rear corner of the
glass comes inside the top of the window
frame. The glass can then be lifted out.
Refitting
7 Refitting is the reverse sequence to
removal, bearing in mind the following points:
a) Make sure that the window is located
snugly in the frame glazing channels
before wedging it in the half-way position.
Bodywork and fittings 11•5
11
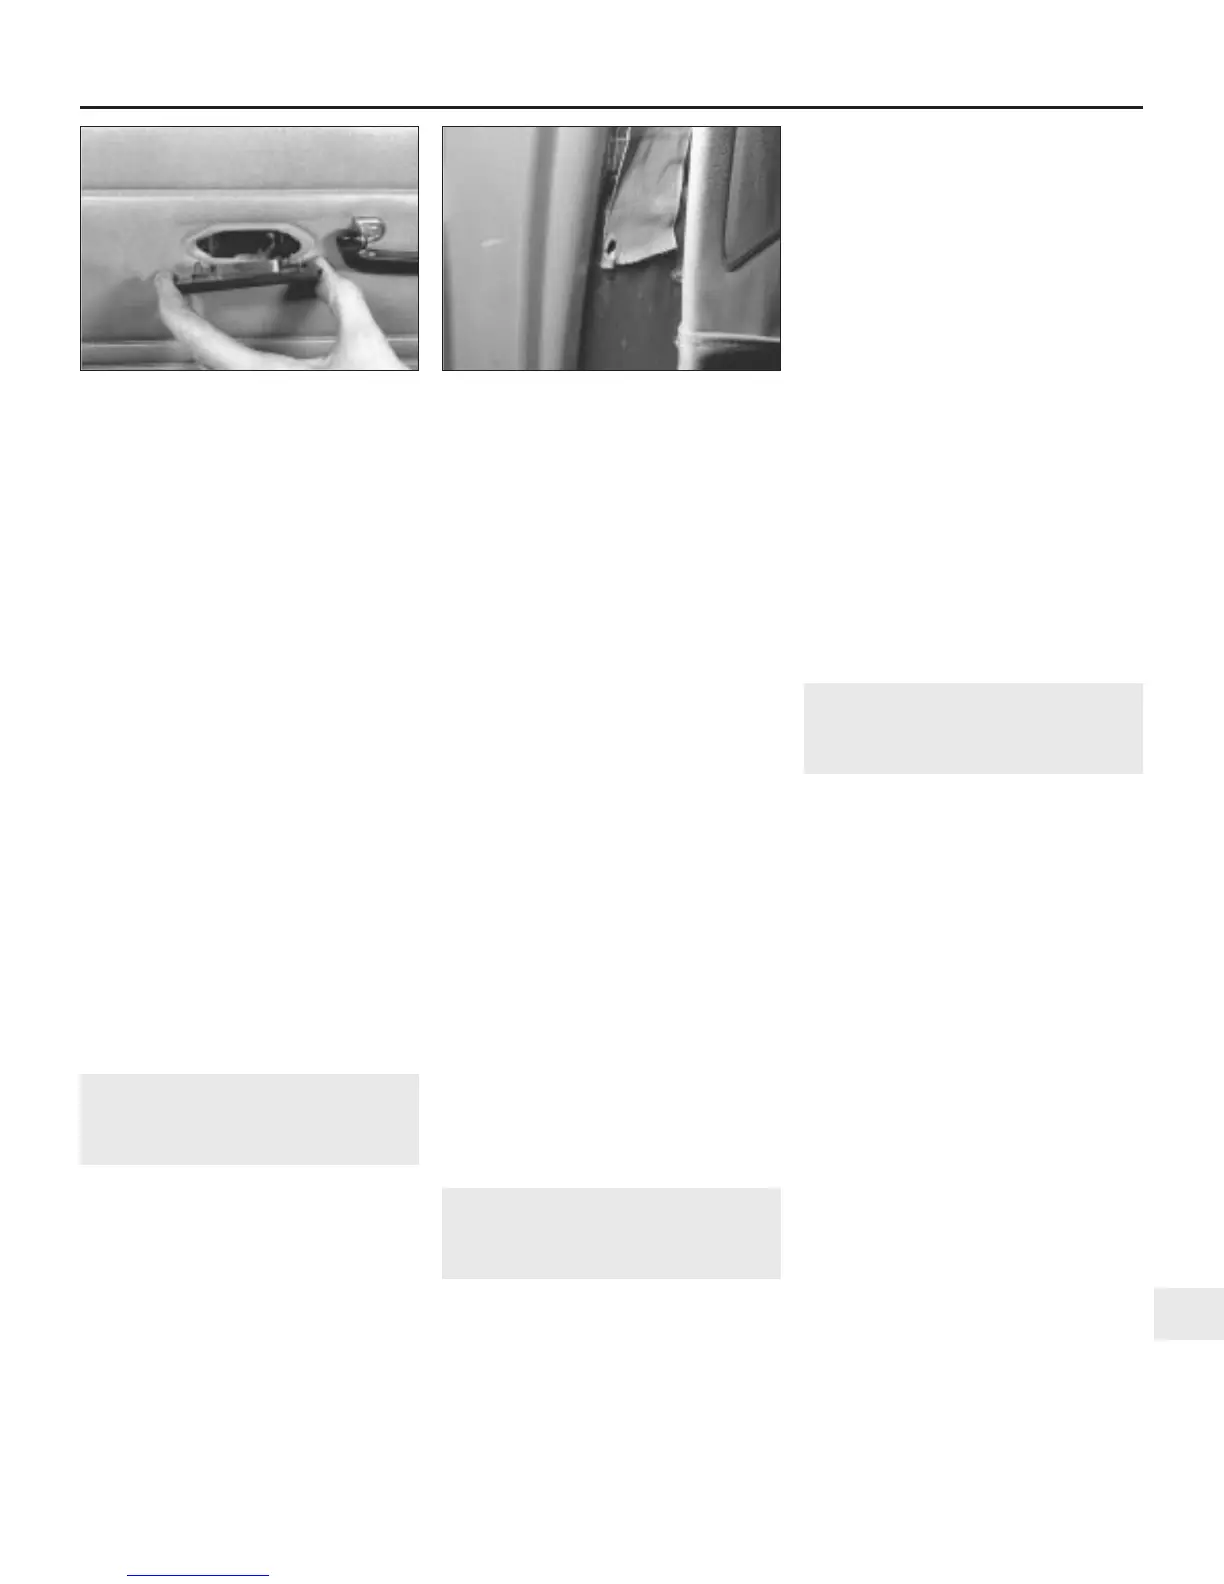
6.3 Ease off the interior lock control
surround . . .
6.6 . . . then detach the panel clips and
withdraw the trim panel
 Loading...