b) Check that the waist rail finisher clips are
evenly spaced before fitting the finishers
back on. With the inner finisher, butt the
forward end against the glazing channel
rubber seal before fitting the rest.
c) Before securing the regulator mechanism
to the door panel, apply a suitable sealer
to the edge of the plate. This
compensates for any irregularities in the
panel which could cause rattles. Ensure
that the lip on the front edge of the plate
is engaged inside the panel.
Van and Pick-up models
Removal
8 Undo and remove the retaining screw, boss
and washer securing the catches to the glass.
Lift off the catches and sealing rubbers.
9 Slide the front glass rearwards and then
undo and remove the screw securing the
lower channel to the door. If the screw is very
tight or badly corroded, apply liberal amounts
of penetrating oil to the screw and allow it to
soak in. Give the screw a sharp tap with a
hammer and drift to break the corrosion. It
should now be possible to unscrew it.
10 Move both glasses forward and repeat the
above procedure, if necessary, on the other
lower channel retaining screw.
11 Ease the glasses, lower channel, and
glass catch strip towards the centre of the car
at the bottom, then lift the assembly off the
door. The two sliding glasses can then be
removed from the lower channel.
Refitting
12 Refitting is the reverse sequence to
removal.
10 Front door lock assembly -
removal and refitting
1
All models except Van
and Pick-up
Removal
1 Refer to Section 6 and remove the door
interior trim panel.
2 Undo and remove the screws securing the
door inner remote control handle to the door
panel (see illustration).
3 Undo and remove the screws securing the
interior lock control to the door panel (see
illustration).
4 Undo and remove the screws securing the
door lock to the side of the door (see
illustration).
5 Slide the door lock out of its location in the
door and carefully release the two small
circlips securing the remote control handle
and interior lock operating rods to the door
lock assembly.
6 Lift away the door lock, then withdraw the
remote control and interior lock control from
the door panel.
11•6 Bodywork and fittings
10.2 Remove the door inner remote
control handle retaining screws . . .
10.3 . . . the interior lock control retaining
screws . . .
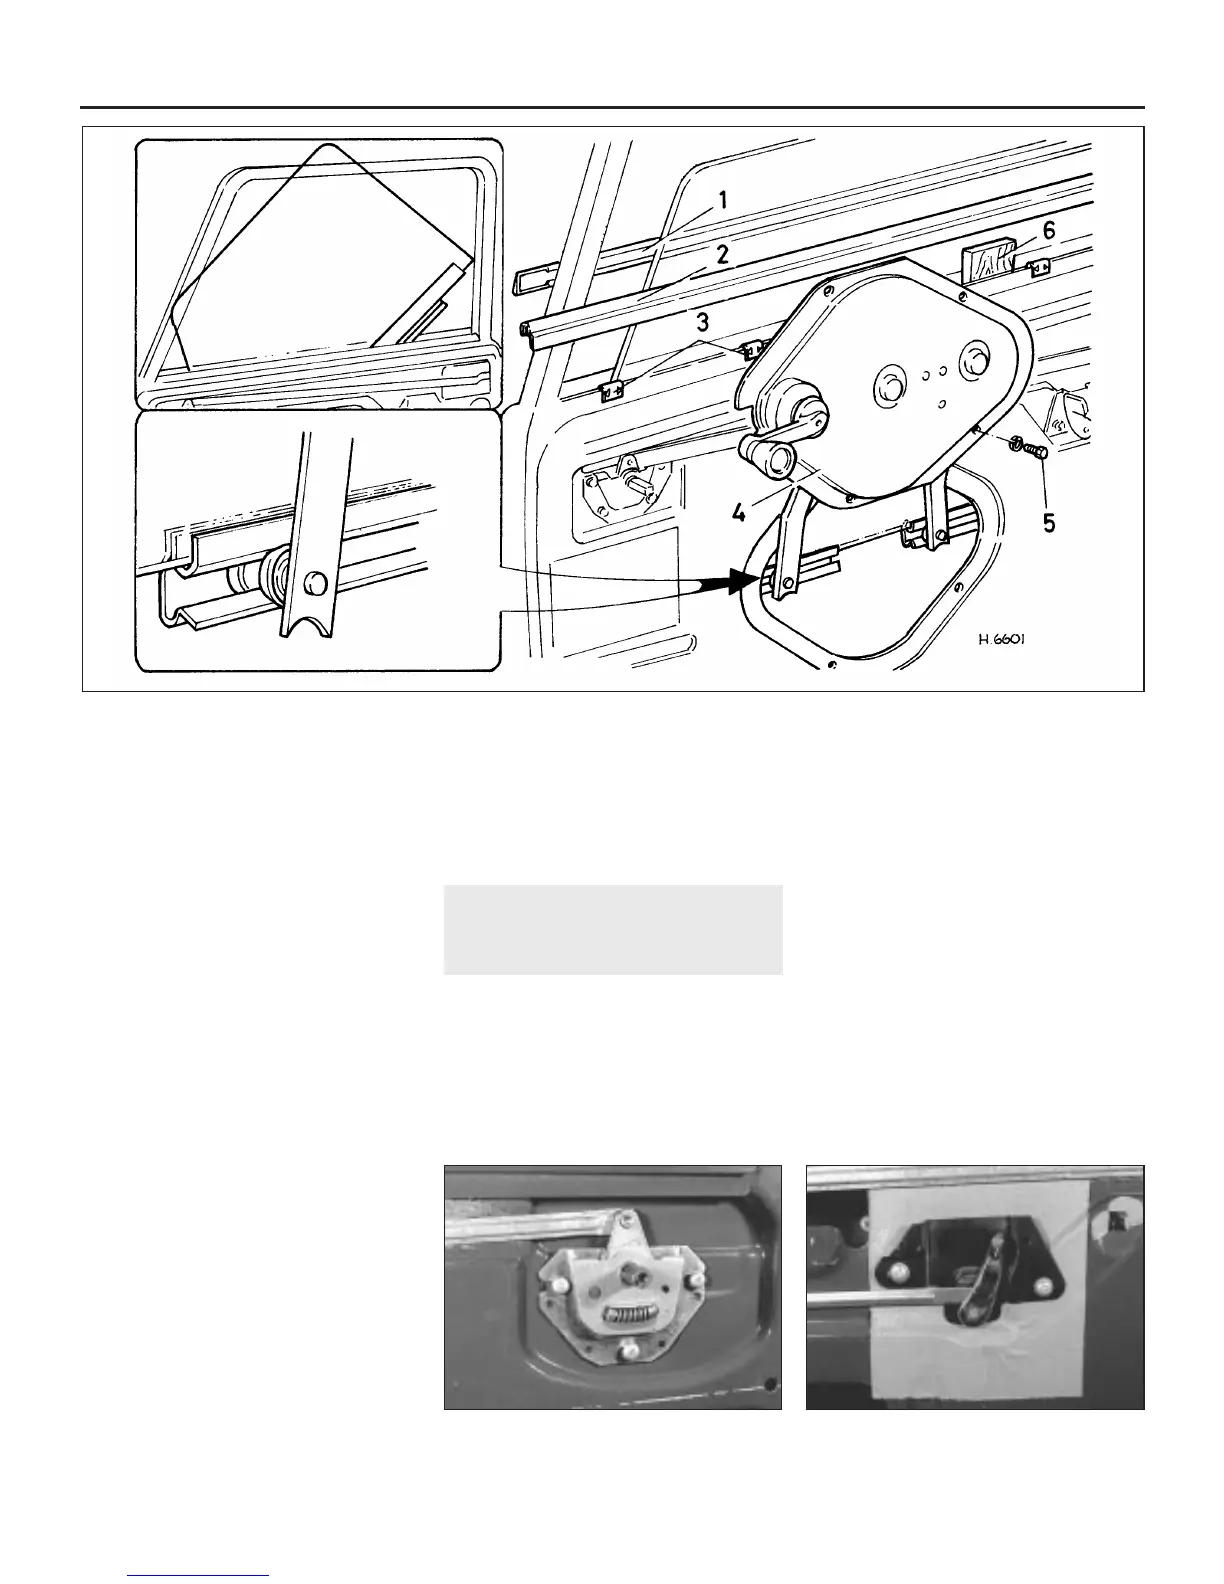
9.4 Removal of front door glass
Inset shows regulator arm and position of door glass ready for removal
1 Waist rail finisher (outer)
2 Waist rail finisher (inner)
3 Securing clips for finishers
4 Window regulator
5 Regulator securing screws
6 Wedge (to hold glass)
 Loading...