This can be checked by removing No 1 spark
plug and feeling the pressure being developed
in the cylinder as the piston rises, or by
removing the rocker cover and noting when the
valves of No 4 cylinder are rocking, ie the inlet
valve just opening and the exhaust valve just
closing. On manual transmission models, the
engine can be turned over quite easily by
engaging top gear and moving the car
forwards. This should only be done on level
ground; and make sure that the car cannot run
away! An alternative method, and the method
that should be used on automatic transmission
models, is to press the fan belt midway
between the water pump pulley and dynamo or
alternator pulley and then turn the fan blades.
Fine positioning of the torque converter can be
done by inserting a screwdriver through the
access hole and turning the ring gear.
6 Continue turning the engine, in the correct
direction of rotation, until No 1 piston is at
TDC on the compression stroke. Verify this by
checking that the timing marks are aligned.
The timing marks on the flywheel (or torque
converter), and the pointer on the housing,
can be viewed through the inspection
aperture using a small mirror. The 1/4 mark on
the flywheel or torque converter indicates
TDC and should be aligned with the pointer in
the housing. On later models with a timing
scale on the timing cover, the notch in the
crankshaft pulley should be aligned with the 0
pointer on the timing cover scale.
7 The distributor rotor arm should now be
pointing towards the No 1 spark plug HT lead
segment in the distributor cap indicating that
the crankshaft is correctly positioned with
number 1 cylinder at TDC on its compression
stroke. Temporarily place the cap in position
to verify this if necessary. If the rotor arm is
pointing at the No 4 HT lead segment in the
cap, rotate the crankshaft one full turn (360º)
until the TDC timing marks are realigned and
the rotor arm is pointing at the No 1 segment.
4 Valve clearances -
adjustment
2
1 The valve adjustments should be made with
the engine cold. The importance of correct
rocker arm/valve stem clearances cannot be
overstressed as they vitally affect the
performance of the engine. If the clearances
are set too wide, the efficiency of the engine is
reduced as the valves open later and close
earlier than was intended. If, on the other
hand the clearances are set too close there is
danger that the stems will expand upon
heating and not allow the valves to close
properly, which will cause burning of the valve
head and seat, and possible warping.
2 To gain access to the rocker arms, remove
the ignition shield (where fitted) from the front
of the engine then undo the two rocker cover
retaining bolts. Lift out the bolts along with the
ignition shield brackets and lift the rocker
cover and gasket away. Collect the rocker
cover retaining bolt dished washers from the
top of the two rubber seals.
3 It is important that the clearance is set when
the tappet of the valve being adjusted is on the
heel of the cam, (ie opposite the peak). Turn
the engine until valve No 8 (nearest the
flywheel end of the engine) is fully open. With
the engine in this position, valve No 1 will be
fully closed and ready to be checked. On
manual transmission models, the engine can
be turned over quite easily by engaging top
gear and moving the car forwards. This should
only be done on level ground; and make sure
that the car cannot run away! An alternative
method, and the method that should be used
on automatic transmission models, is to press
the fan belt midway between the water pump
pulley and dynamo or alternator pulley and
then turn the fan blades.
4 A feeler blade of the correct thickness
should now be inserted between the valve
stem and rocker arm. When the clearance is
correct the feeler blade should be a smooth
stiff sliding fit between the valve stem and
rocker arm. The correct valve clearances are
given in the Specifications at the start of this
Chapter.
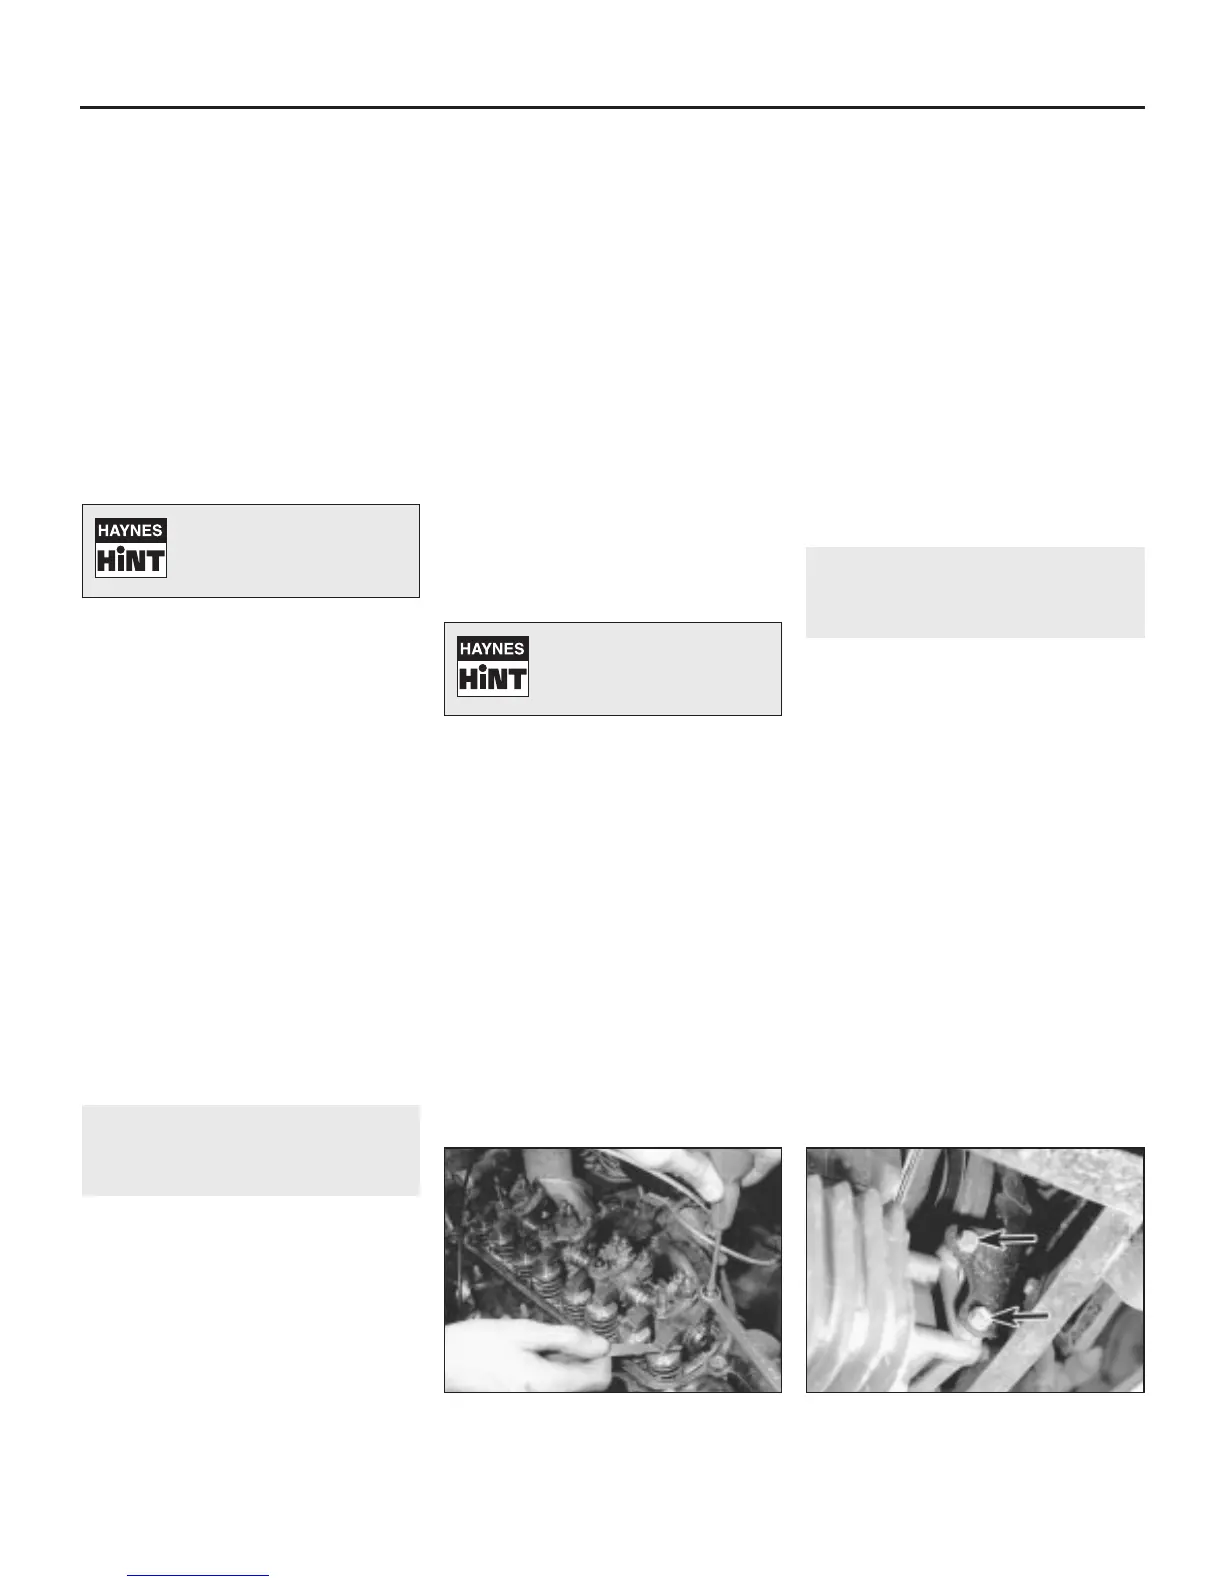
5 If the feeler blade is a tight or loose fit then
the clearance must be adjusted. To do this,
loosen the locknut of the adjustment stud and
screw the adjuster stud in or out until the
feeler blade can be felt to drag slightly when
drawn from the gap (see illustration).
6 Hold the adjuster firmly in this position and
tighten the locknut. Recheck the gap on
completion to ensure that it has not altered
when locking the nut and stud.
7 Check each valve clearance in turn in the
following sequence (which also avoids turning
the crankshaft more than necessary). The
valves are numbered from the timing chain
end of the engine.
Valve fully open Check and adjust
Valve No 8 Valve No 1
Valve No 6 Valve No 3
Valve No 4 Valve No 5
Valve No 7 Valve No 2
Valve No 1 Valve No 8
Valve No 3 Valve No 6
Valve No 5 Valve No 4
Valve No 2 Valve No 7
8 When all the valves have been checked and
adjusted, refit the rocker cover using a new
gasket and secure with the retaining bolts.
Where applicable, remember to fit the ignition
shield brackets with the retaining bolts. Avoid
over-tightening the rocker cover bolts.
9 Refit the spark plugs, HT leads and ignition
shield.
5 Timing chain, tensioner and
sprockets - removal,
inspection and refitting
3
Removal
1 Disconnect the battery negative lead.
2 Refer to Chapter 1 and remove the fan belt.
3 Refer to Chapter 3 and remove the radiator.
4 Undo the bolts securing the fan to the water
pump spindle, and remove the fan.
5 On later models, it may be necessary to
remove the lower radiator mounting bracket
to gain the necessary clearance to allow
removal of the crankshaft pulley. To do this,
undo the two nuts and bolts, accessed from
underneath the wheel arch, securing the left-
hand engine mounting to the subframe.
Position a jack with interposed block of wood
beneath the engine/transmission and carefully
lift the jack until the engine/transmission is
raised slightly. Undo the nuts and through-
bolts securing the mounting bracket to the
transmission, and remove the bracket
assembly from the vehicle (see illustration).
6 Bend back the locking tab of the crankshaft
pulley locking washer under the crankshaft
pulley retaining bolt, prising it back with a cold
2A•4 Engine in-car repair procedures
5.5 Left-hand mounting bracket
attachment bolts (arrowed) on later
manual transmission models
4.5 Adjusting the valve clearances
Turning the engine will be
easier if the spark plugs are
removed first - see Chapter 1.
Turning the engine will be
easier if the spark plugs are
removed first - see Chapter 1.
 Loading...