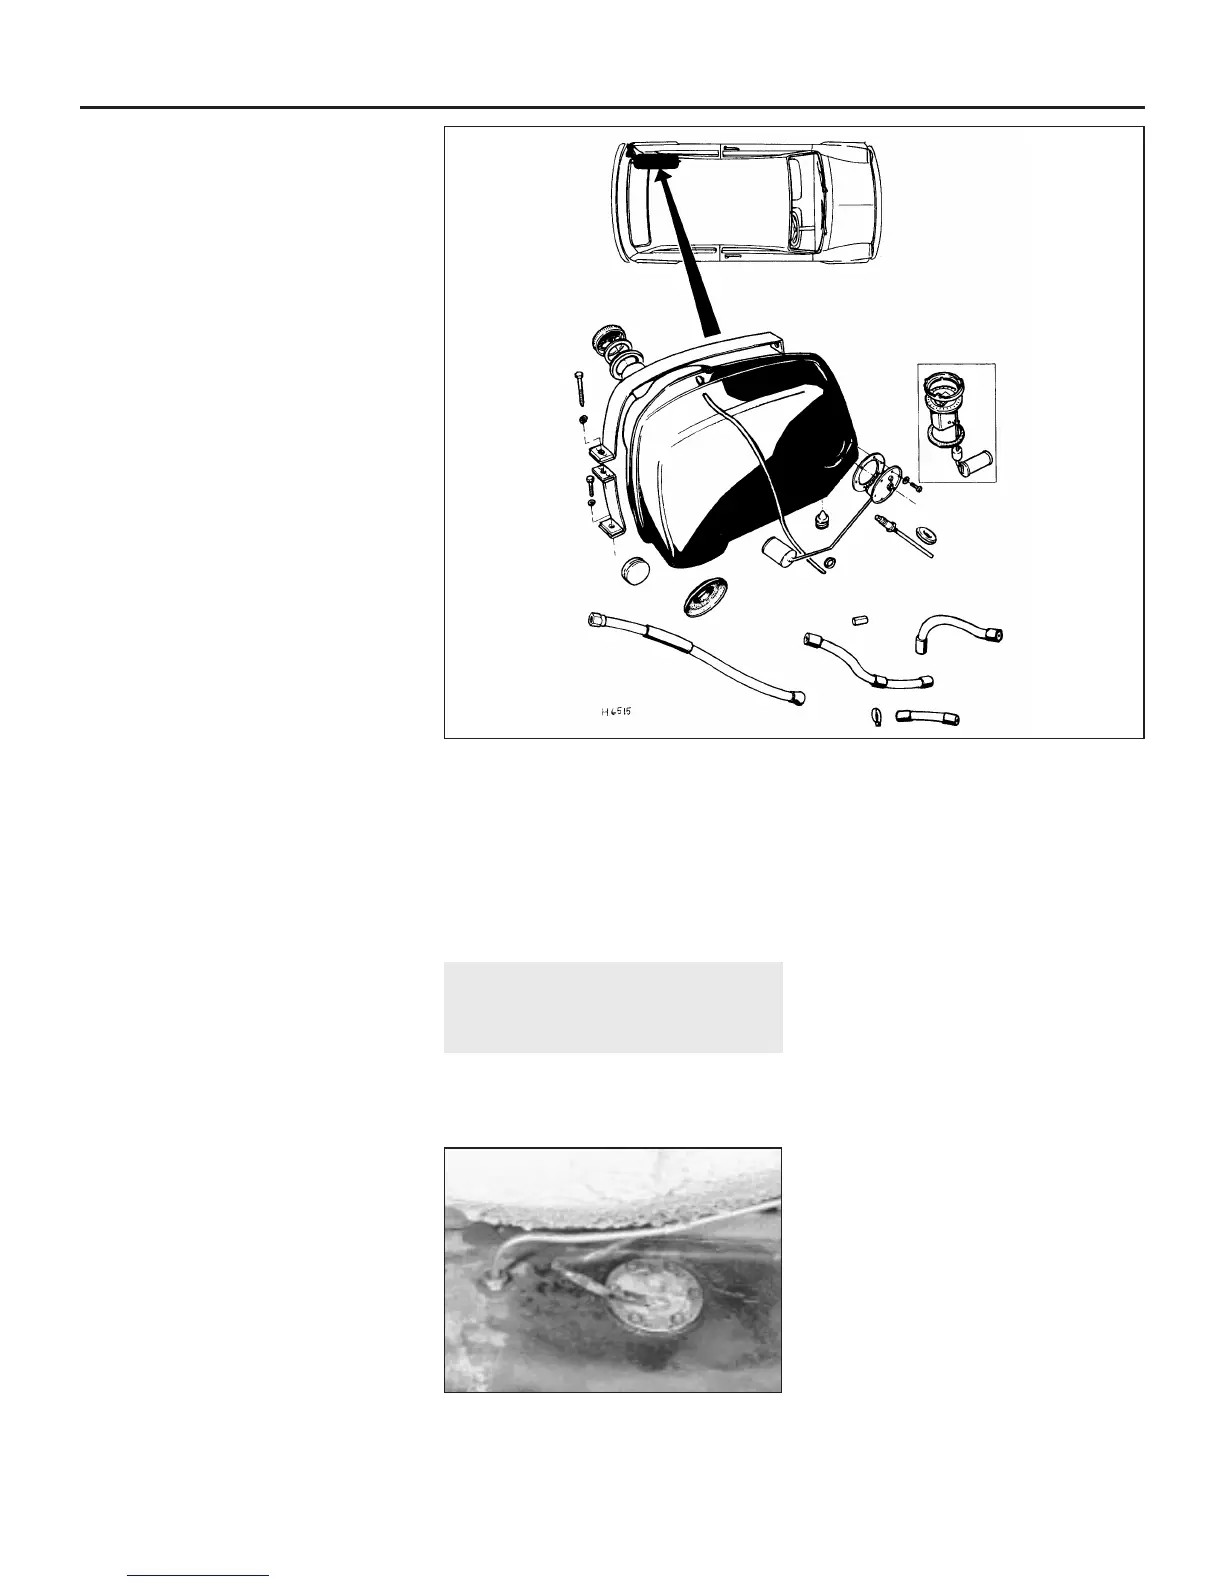
15 Disconnect the fuel outlet pipe and the
fuel gauge wires from their connections on the
sender unit on the side of the tank (see
illustration).
16 Undo and remove the six screws which
hold the tank in place and remove the tank. It is
helpful if a jack is positioned under the tank as
the retaining screws are removed so that the
tank does not drop out under its own weight. It
may also be found easier to lower the tank
slightly on the jack before disconnecting the
sender unit leads, as with the tank half
removed they are more accessible.
17 Refer to the information contained in
paragraph 10.
Refitting
18 Refitting the tank is the reverse sequence
to removal bearing in mind the following points:
a) Make sure that the nylon spacers located
at each retaining screw hole are in
position before refitting the tank.
b) Ensure that the drain plug and washer are
in place and securely tightened.
c) Ensure that the rubber ferrule beneath the
filler cap makes an effective seal with the
body.
Cooper S twin fuel tanks
Removal
19 Disconnect the battery negative lead.
20 Working in the rear luggage compartment
remove the trimmed floor panel.
21 Lift out the spare wheel.
22 Remove the fuel filler caps.
23 Unscrew the left-hand fuel tank drain plug
three turns and allow fuel to drain from both
tanks into a suitable container. Do this in a
well ventilated area, not in a garage or over an
inspection pit. When drained, resecure the
drain plug.
Left-hand tank
24 Disconnect the electrical connectors from
the fuel gauge sender unit.
25 Remove the tank strap securing bolt.
26 Detach the flexible pipe and the vent pipe
from the fuel tank.
27 Carefully ease the fuel tank towards the
centre of the luggage compartment and lift
away.
28 Refer to the information contained in
paragraph 10.
Right-hand tank
29 Completely remove the battery, referring
to Chapter 5A if necessary.
30 Remove the tank strap securing bolt.
31 Detach the flexible hose from the left-
hand tank.
32 Move the tank slightly from its mountings,
taking extreme care not to damage the
flexible fuel pipes.
33 The fuel tank will still contain a small
amount of petrol which should be drained into
a small container when the flexible fuel pipe is
disconnected.
34 Disconnect the flexible fuel pipe.
35 Finally detach the vent pipe from the tank
and lift the tank from the car.
36 Refer to the information contained in
paragraph 10.
Refitting
37 Refitting either fuel tank is the reverse
sequence to removal. Make sure that the seal
around the drain plug housing is water-tight.
10 Unleaded petrol - general
information and usage
Note: The information given in this Chapter is
correct at the time of writing. If updated
information is thought to be required, check
with a Rover dealer. If travelling abroad,
consult one of the motoring organisations (or a
similar authority) for advice on the fuel
available.
1 The fuel recommended by Rover is given in
the Specifications Section of this Chapter.
2 Models built up to October 1988 (as
delivered from the factory) cannot use
unleaded petrol; the valve seats fitted as
standard will suffer serious premature wear
without the protection of the petrol’s lead
content. Only four-star leaded petrol should
be used, irrespective of the engine’s
compression ratio. Exceptions to this are
those engines which have been modified as
described in paragraph 5 below.
3 From October 1988 onwards (ie during the
1989 model year), improved components
were gradually introduced at the factory to
enable engines to run on 95 RON unleaded
petrol; these vehicles can be identified by the
green “95 RON unleaded petrol” label
attached to the bonnet lock platform. These
vehicles can use either unleaded or leaded
petrol, without modification or risk of damage.
4 If you have a 1989 model and suspect that
the label has become detached, check first
with a Rover dealer whether the vehicle can or
cannot use unleaded petrol; the VIN (Vehicle
Identification Number) will be required for
positive identification. Note, however, that as
a general rule, 998 cc engines which can use
unleaded petrol have the engine serial number
prefix “99HE”.
4A•8 Fuel system - carburettor engines
9.5 Fuel tank and fittings – Saloon models
9.15 Fuel tank outlet pipe and fuel gauge
sender unit (Estate, Van and
Pick-up models)
 Loading...