Printed in UK
All Rights Reserved
©2020 - Hayter Limited
Spellbrook, Bishop’s Stortford,
Herts, CM23 4BU
17
After Operation
Charging the Battery Pack
Important: Remove the battery from the machine
before charging. Non-rechargeable batteries are
not to be recharged.
Charge the battery pack only in temperatures
that are within the appropriate range; refer to
Appropriate Temperature Ranges.
Note: At any time, press the battery-charge-
indicator button on the battery pack to display the
current charge (LED indicators).
Indicator light Indicates
Off No battery pack inserted
Green blinking Battery pack is charging
Green Battery pack is charged
Red Battery pack and/or battery charger is over
or under the appropriate temperature range
Red blinking Battery pack charging fault*
*Refer to Troubleshooting for more information.
1 3
2
4
5
6
7
8
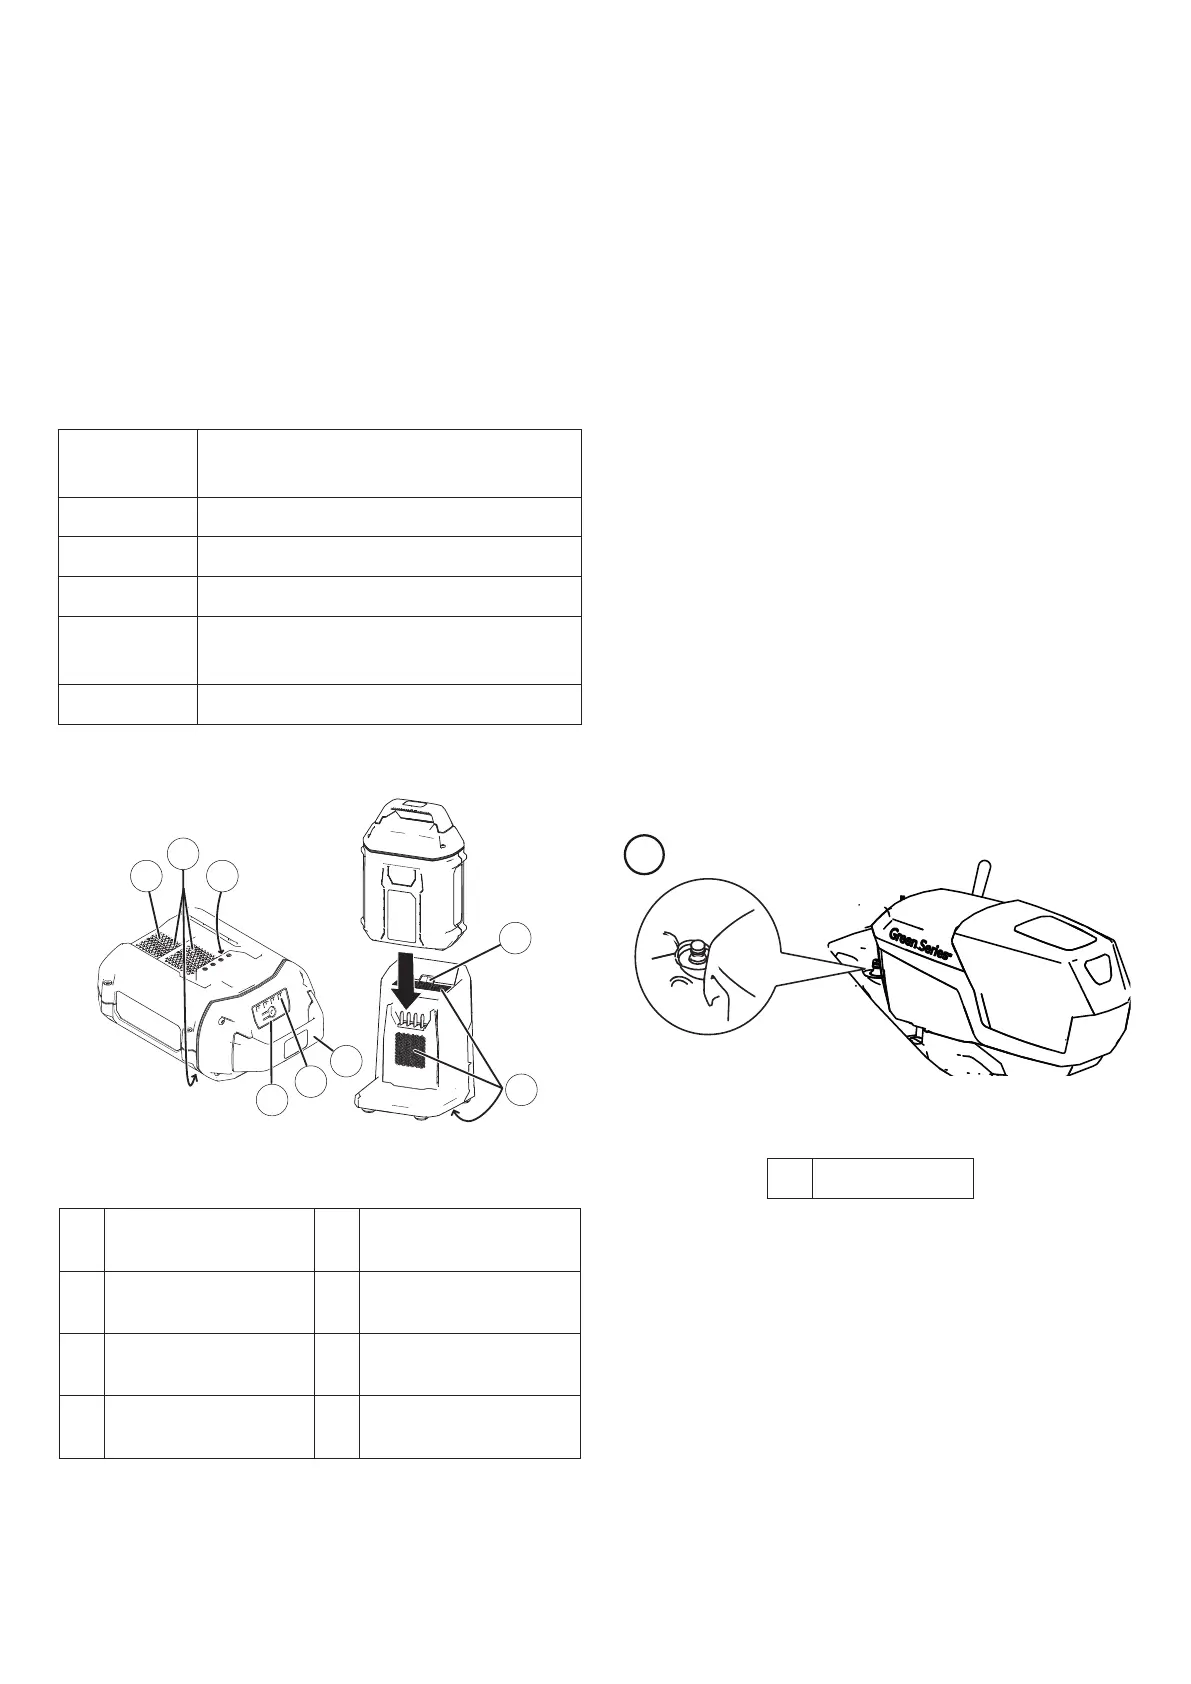
Figure 20
1. Battery pack cavity 5. LED indicators (current
charge)
2. Battery pack venting
areas
6. Handle
3. Battery pack terminals 7. Charger LED indicator
light
4. Battery-charge-
indicator button
8. Charger venting areas
1. Make sure that the vents on the battery are clear
of any dust and debris.
2. Line up the cavity in the battery pack with the
tongue on the charger. Figure 20
3. Slide the battery pack into the charger until it is
fully seated. Figure 20
4. Slide the battery backward out of the charger.
5. Refer to the following table to interpret the LED
indicator light on the battery charger.
Cleaning under the Machine
Service Interval: After each use or daily.
For best results, clean the machine soon after you
have completed mowing, using the easy-wash port.
1. Move the machine onto a flat paved surface.
2. Shut off the motor and wait for all moving parts
to stop before leaving the operating position.
3. Lower the machine to its lowest cutting-height
setting. Refer to Adjusting the Cutting Height.
4. Wash out the area under the rear deflector
where the clippings go from the underside of the
machine to the grass bag.
1
Figure 21
1. Easy-wash port
5. Attach a garden hose that is connected to a water
supply to the easy-wash port (1). Figure 21.
6. Turn the water on.
7. Start the motor and run it until the clippings no
longer come out from under the machine.
8. Shut off the motor.
9. Shut off the water and disconnect the hose from
the machine.