Do you have a question about the Hayward 2 wheel and is the answer not in the manual?
Patented turbines maximize water flow power, allowing movement at low suction and pressure.
Programmed steering system causes left wheel to periodically reverse for turning and direction changes.
Treads offer better climbing and obstacle maneuverability with tread wear markers for replacement.
Allows cleaner to turn freely without hose interference, preventing hose coiling.
Cleaner climbs walls with sufficient floor-to-wall radius and adjustable skirts for optimal suction.
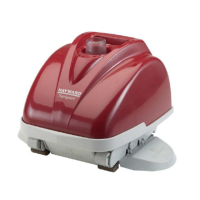
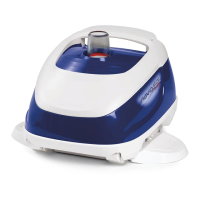
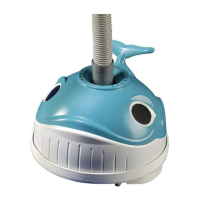
Illustrated list of components for the 2-wheel suction-side pool cleaner.
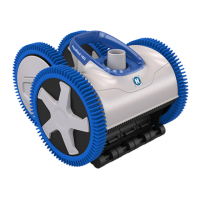
Illustrated list of components for the 4-wheel suction-side pool cleaner.
Manual debris removal, filter/basket cleaning, chemical balance check, and return fitting adjustment.
Instructions and diagrams for connecting the cleaner hoses, including length adjustments.
Diagrams illustrating how to attach the cleaner to the connected hoses and suction line.
Methods to submerge the cleaner and purge air from the hose and cleaner.
Instructions for connecting to skimmers or threaded suction ports using adapters.
How to measure and adjust the cleaner's wheel revolutions per minute (RPM) for optimal operation.
Regulates suction by bypassing water to control RPM; adjust top or bottom screw.
Adjust the flow from the suction line or skimmer line to obtain the proper flow.
Instructions on proper placement of turbine vanes/blades for correct operation.
Instructions for tire removal, replacement, and identifying wear marks.
Step-by-step guide for removing and replacing the cleaner's wheels or bearings.
Instructions for removing and replacing the cleaner's skirts and inlet sizes.
Diagnosing and resolving problems like slow movement, no rotation, or not moving straight.
Addressing issues like not cleaning the entire pool, climbing walls too much, or not climbing walls.
Resolving issues with hoses not coming out, popping out, or wobbly wheels.
Troubleshooting turbine vanes, cleaner falling on its side, or taking too long to recover.
| Brand | Hayward |
|---|---|
| Model | 2 wheel |
| Category | Swimming Pool Vacuum |
| Language | English |