iren
INSTALLATION & MOUNTING
Before installation, examine the siren and controller for transit damage. Do not use damaged or broken parts.
SIREN CONTROLLER
Determine the best mounting position for the controller in the vehicle. Mount the cradle on any suitable fl at
surface via either of the 2 methods detailed below. If the vehicle is fi tted with air-bags, ensure that the chosen
mounting position will not effect their deployment.
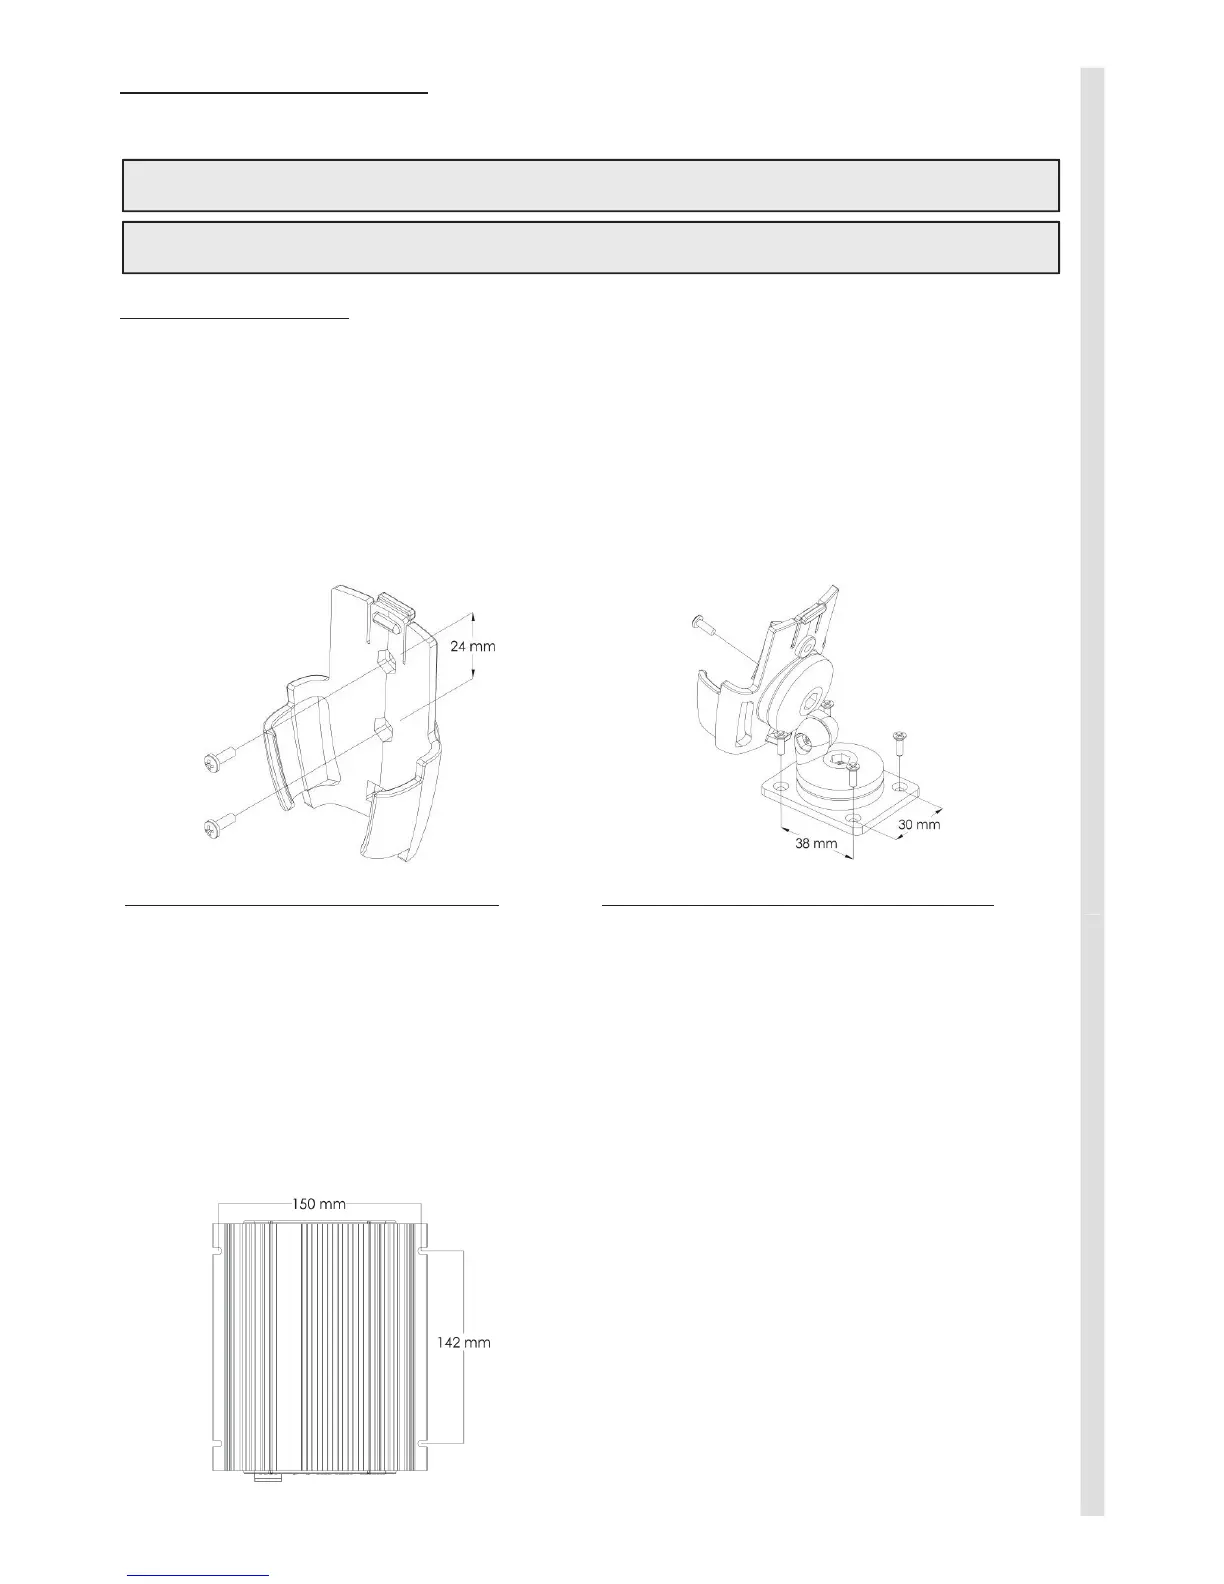
Option 1: Cradle Mount
The control head cradle can be screwed directly onto
the dash using 2 x
suitable screws to mount the cradle
and control head vertically.
Option 2: Swivel Mount
Alternatively the cradle can be attached to the swivel
to mount to any suitable surface in the vehicle. The
cradle can be angled to suit the user. Screws are
supplied with swivel mount.
Important! This unit is a safety device and it must be connected to its own separate, fused power source to
assure its continued operation should any other electrical accessory fail.
Caution: When drilling into any vehicle surface, make sure the area is free from any electrical wires, fuel lines,
vehicle upholstery, etc. that could be damaged.
MOUNTING THE SIREN AMPLIFIER
Before any installation work is carried out, plan where
the various components will be mounted and what
route the wiring will take. The CS200 series siren
is not waterproof, so it must be mounted within the
vehicle cabin. The siren can be mounted by screwing
it into any fl at surface using the 4 x
supplied screws,
preferably with the connector pointing down so water
can not run down the cables into the siren.
Suggested mounting locations include the boot, under
passenger seat or passenger foot well area.
MOUNTING THE SIREN SPEAKER(S)
The CS200 series siren requires one or two 11 ohm
100 watt siren speaker(s). Speakers are weatherproof
and may be mounted on a bull bar or under the
bonnet. Roof mounting is not recommended due to
occupational health and safety regulations regarding
excessive cabin noise levels.
Install the siren speaker in the desired location, drilling
any extra holes in the mounting bracket if necessary.
Due to the varying types of mounting methods
that may be encountered, and to keep waste to a
minimum, mounting hardware is not supplied. Ensure
that the speaker is securely fi xed into position. Ensure
the position is such that water can not accumulate
inside the speaker fl are and that the drain hole in the
speaker driver is at the bottom.
For most effi cient operation, ensure that the position
of the speaker fl are is such that the sound path to the
open air is as unobstructed as possible.
Connect the speaker(s) to the speaker wires using
6.3mm (0.25”) female spade semi-insulated terminals
 Loading...