(G)
Operation Continued)-((Model#HDX123)
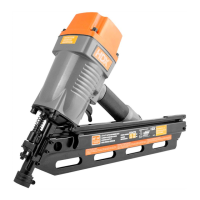
Clearing jams
3
Occasionally, afastenermaybecomejammedinthefiring
mechanismofthetool,makingthetoolinoperable.To
removeajammedfastener,followthestepsbelow:
Disconnectthetoolfromthe airsource.
Removefastenersfromthetool.Failuretodosowill
causethefastenerstoejectfromthefrontofthetool.
Completelyremovethesmallnosescrewsandthe
topnoseplatetorevealthejammedfastener.
Usingcautionnottobendordamagethedriverblade,
usepliersorascrewdriverifrequiredtoclearthe
jammedfastener.
Putthenoseplatebackonthenose ,fasteningit
withthescrews .
Reconnectthetooltotheairsource.
Reloadthetoolwithfasteners.
(D)
(E)
(E)(F)
(D)
Nose (F)
Nose plate (E)
Nose screw (D)
WARNING: Makesurethereisnofastenerin
magazinebeforeclearingajam.
WARNING:Disconnectthetoolfromtheairsource
wheneverclearingajam.Afterdisconnectingthe
toolfromtheaircompressor thereshouldstillbe
enoughairpressuretofirethetool.Aftertheair
hoseisdisconnected,alwaysfirethetoolintoscrap
woodrepeatedlytomakesureallofthe
compressedairisexpended.
Setting the air pressure
4
Theamountofairpressurerequireddependsonthe
sizeofthefastenersandtheworkpiecematerial.
Begintestingthedepthofdrivebydrivingatestnail
intothesametypeofworkpiecematerialusedforthe
actualjob.Driveatestfastenerwiththeairpressure
setat90-95 psi.Raiseorlowertheairpressuretofind
thelowestsettingthatwillperformthejobwith
consistentresults.Itmaybepossibletoachievethe
desireddepthwithairpressureadjustmentsalone.
Firing the tool(Single mode)
5
Disconnectthetoolfromtheairsource.
Rotatethesafetyswitch(G)fromcentersafetyposition
totheleftorrightsideoftrigger.
Connectthetooltotheairsource.
Gripthetoolfirmlytomaintaincontrol.Positionthe
noseofthetoolontotheworksurface.
Squeezethetriggertodriveafastener.
Turnthesafetyswitch(G)backtocentersafety position
whennotusingthetool.
Rotate to left
side or right side
WARNING: Duringnormaluse,thetoolwillrecoil
immediatelyafterdrivingafastener.Thisisanormal
functionofthetool.Donotattempttopreventthe
recoilbyholdingthetoolagainstthework.
Restrictiontotherecoilcanresultinasecond
fastenerbeingdrivenfromthetool.Gripthehandle
firmlyandletthetooldothework.Failuretoheed
thiswarningcanresultinseriouspersonalinjury.
12
13
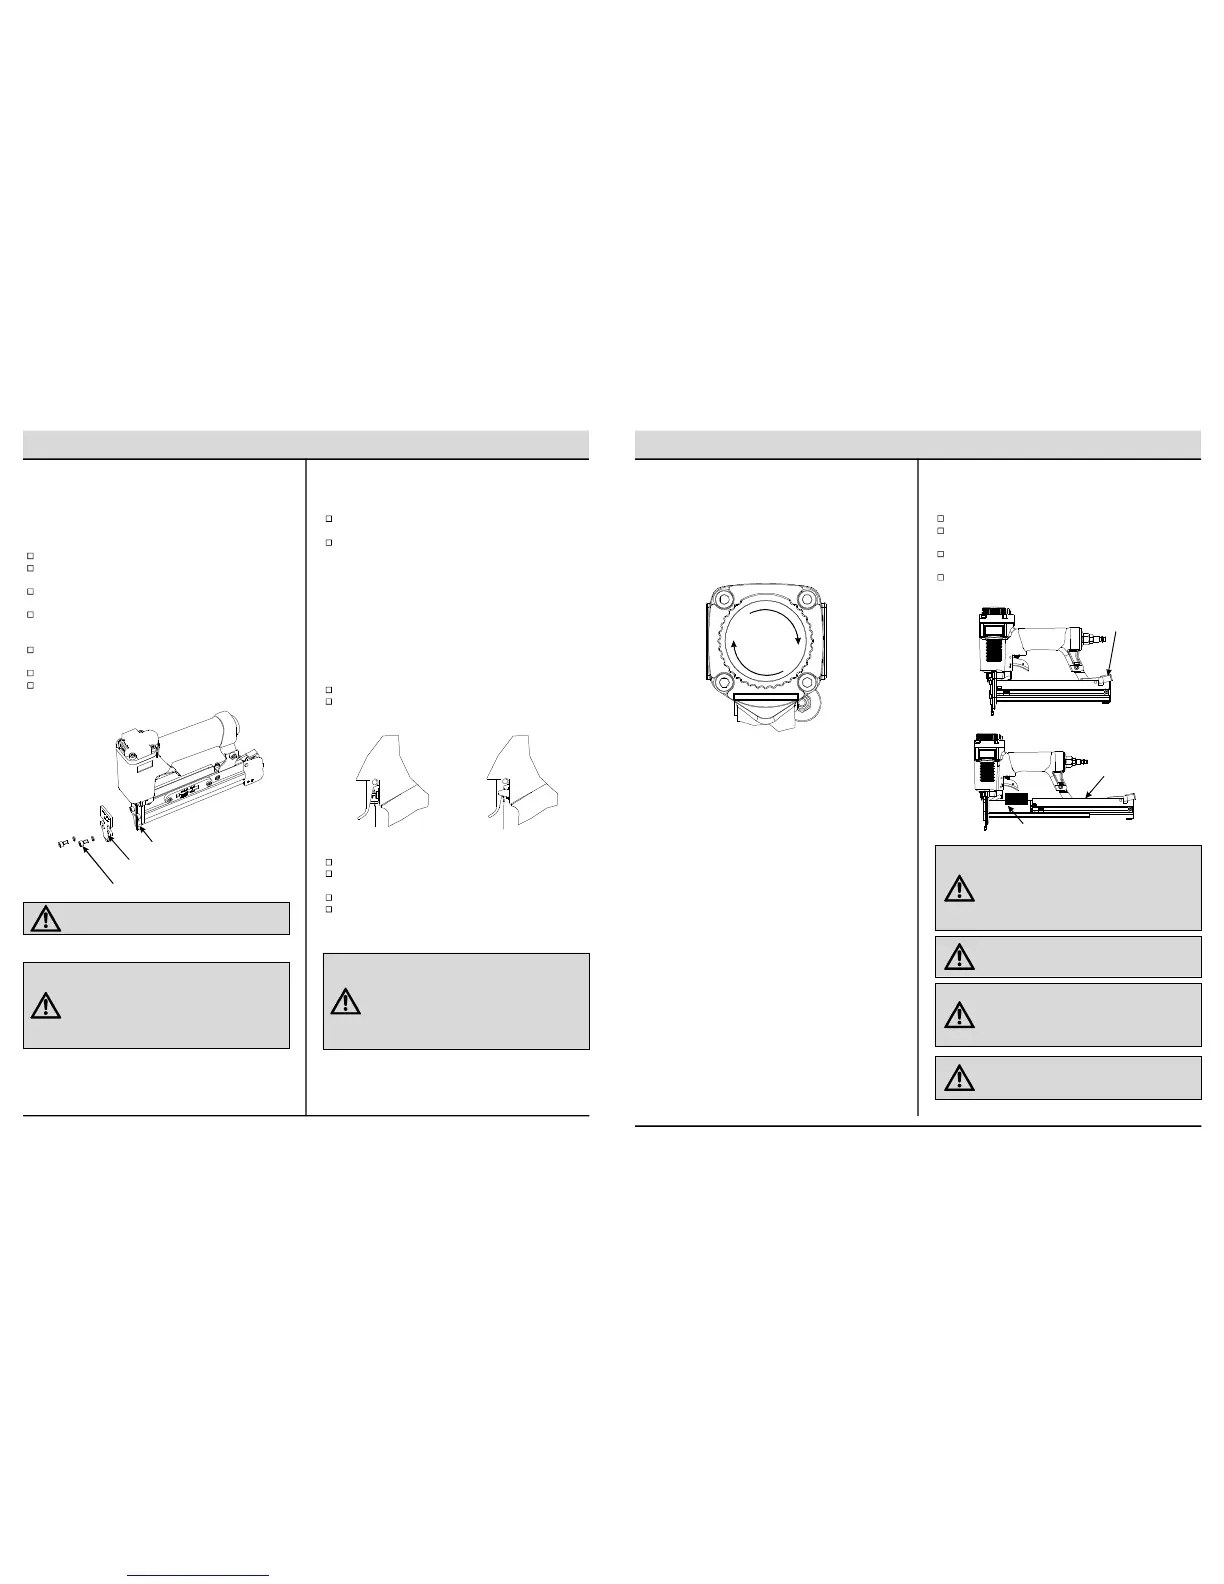
Adjusting the exhaust
1
Theadjustableexhaustonthecapofthetoolallows
userstodirecttheexhaustaccordingtooperator
preference.Toadjustthedirection,turntheexhaustcap
inthedesireddirection.
Loading Fasteners
2
Connectthetooltotheairsource.
Pushdownonthelatchbutton (A).Pullbackonthe
magazinecover (B).
Loadaclipoffastenerswiththecrownsstraddlingthe
magazinerail (C).
Pushthemagazinecover (B)forwarduntillatchbutton
popsup.
Latchbutton(A)
Magazine
Cover(B)
WARNING: Thetoolmayfirewhenitis first
connectedtotheairsource.Alwaysconnectthe
tooltotheairsourcebeforeloadingfastenersto
preventinjuryfromunintendedcycling.Alwaysmake
surethetool’smagazineisemptyatthebeginning
ofeachworksession,beforeconnectingtoanair
source.
WARNING:Keepthetoolpointedawayfromyourself
andotherswhenloadingfasteners.Failuretodoso
couldresultinpossibleseriouspersonalinjury.
WARNING:Useonlyfastenersrecommendedfor use
withthistool.Fasteners not identified for use with this
tool by the tool manufacturer are able to result in a risk
of injury to persons or tool damage when used in this
tool.
WARNING: Neverloadfastenerswiththeworkpiece
contactortriggeractivated.Doingsocouldresultin
possibleseriouspersonalinjury.
MagazineRail(C)
OperationContinued)-((Model#HDXST9032)
HOMEDEPOT.COM
Please contact 1-800-514-6729 for further assistance.