Do you have a question about the Heartland VALUE Series and is the answer not in the manual?
Provides phone number for assembly and general inquiries.
Details for help requests, FAQs, and live chat.
Information on becoming a backyard installer with earning potential.
Steps to review your product for a chance to win a $500 Visa gift card.
Key steps and considerations before starting shed assembly.
Contact information for assistance with product issues.
List of tools needed for assembly and optional items.
Explanation of symbols used throughout the manual for guidance.
Guidance on orienting lumber and trim for optimal visual results.
Information about foundation and floor materials not included in the kit.
Details on materials needed for an optional reinforced floor frame.
List of materials needed to finish the shed, including siding and roofing.
List of optional materials for customization and finishing touches.
Details on required floor panels and associated fasteners for floor construction.
Explanation of double-letter part identification and stamping locations.
Table for converting nominal board sizes to actual dimensions.
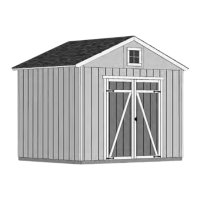
Categorized list of parts required for the 12'x12' gable shed assembly.
List of all panel and door components required for the shed structure.
List of all roof panel parts needed for the shed roof assembly.
List of parts for constructing loft and shelf systems within the shed.
Illustration and identification of nail boxes included in the kit.
Illustration and identification of fastener and hardware bags.
List and illustration of miscellaneous hardware items not shown to scale.
List of parts required for the 12'x4' gable extender kit.
List of parts required for the 12'x8' gable extender kit.
Material requirements for concrete foundations based on shed dimensions.
Important guidelines for installing on concrete, including materials and clearance.
Detailed instructions for the preferred 4x4 treated runners leveling method.
Overview of leveling options and required materials for floor support.
Procedure for ensuring the floor frame is square using diagonal measurements.
Steps for attaching the frame to the 4x4 runners for stability.
Guidance on placing floor panels and ensuring the frame remains level.
Tips for using the floor as a work surface and organizing the build process.
Index directing to specific wall assembly pages based on shed dimensions.
List of required parts and detailed instructions for assembling the door header.
Instructions and tips for correctly installing wall panels, ensuring squareness.
Details on maintaining measurements for panel squareness and correct orientation.
List of required parts and initial steps for assembling Gable Wall 01.
Detailed instructions for assembling Gable Wall 01 with door, including part placement.
Steps for installing the left-side panels of Gable Wall 01.
Steps for installing the right-side panels of Gable Wall 01.
Final steps for completing the Gable Wall 01 assembly.
List of required parts and initial steps for assembling Gable Wall 02.
Detailed instructions for assembling Gable Wall 02, including part placement and fastening.
Steps for installing the 48"x84" panels onto Gable Wall 02.
Final steps to finish the assembly of Gable Wall 02.
List of required parts and initial steps for assembling Eave Wall 03.
Detailed instructions for assembling Eave Wall 03, including part placement and fastening.
Steps for installing 48"x84" panels onto Eave Wall 03.
Final steps to finish the assembly of Eave Wall 03 and build the second wall.
List of required parts and initial steps for assembling Eave Wall 04.
Detailed instructions for assembling Eave Wall 04, including part placement and fastening.
Steps for installing 48"x84" panels onto Eave Wall 04.
Final steps to finish the assembly of Eave Wall 04 and build the second wall.
List of required parts and initial steps for assembling Eave Wall 05.
Detailed instructions for assembling Eave Wall 05, including part placement and fastening.
Steps for installing 48"x84" panels onto Eave Wall 05.
Final steps to finish the assembly of Eave Wall 05 and build the second wall.
List of required parts and initial steps for assembling Eave Wall 06.
Detailed instructions for assembling Eave Wall 06, including part placement and fastening.
Steps for installing 48"x84" panels onto Eave Wall 06.
Final steps to finish the assembly of Eave Wall 06 and build the second wall.
Instructions for centering and initially securing the 12' Gable Wall 02.
Steps for securing the lower edge of the gable wall to the floor frame.
Steps for placing and initially securing the first 12' eave wall.
Instructions for nailing panel edges to the floor and studs of the 12' eave wall.
Final step for securing the top plate of the first 12' eave wall.
Steps for placing and initially securing the second 12' eave wall.
Instructions for securing the second eave wall to the gable wall structure.
Steps for nailing panel edges to the floor, studs, and securing the top plate.
Steps for placing and initially securing the 12' gable wall with door.
Instructions for securing wall panels to the floor frame and wall studs.
Steps for securing top plates and finishing wall installation.
Steps for orienting and securing wall doublers to the top of wall frames.
Instructions for securing the bottom of wall doublers with screws.
Steps for centering and temporarily bracing the 12' gable wall 02.
Instructions for securing the lower edge of Gable Wall 02 to the floor frame.
Steps for centering and bracing the first 16' eave wall.
Instructions for attaching the eave wall to the floor, studs, and top plate.
Steps for centering and bracing the second 16' eave wall.
Instructions for securing the second eave wall to the gable structure.
Steps for nailing panel edges to the floor frame.
Instructions for attaching the 20' wall panel to the 12' wall studs.
Final step for securing the gable wall top plate.
Steps for placing and initially securing the 12' gable wall with door.
Instructions for securing wall panels to the floor frame and wall studs.
Steps for securing top plates and finishing wall installation.
Steps for orienting and securing wall doublers to the top of wall frames.
Instructions for securing the bottom of wall doublers with screws.
Steps for centering and temporarily bracing the 12' gable wall 02.
Instructions for securing the lower edge of Gable Wall 02 to the floor frame.
Steps for centering and bracing the first 20' eave wall.
Instructions for attaching the eave wall to the floor, studs, and top plate.
Steps for centering and bracing the second 20' eave wall.
Instructions for securing the second eave wall to the gable structure.
Steps for nailing panel edges to the floor frame.
Instructions for attaching the 20' wall panel to the 12' wall studs.
Final step for securing the gable wall top plate.
Steps for placing and initially securing the 12' gable wall with door.
Instructions for securing wall panels to the floor frame and wall studs.
Steps for securing top plates and finishing wall installation.
Steps for orienting and securing wall doublers to the top of wall frames.
Instructions for securing the bottom of wall doublers with screws.
Steps for centering and temporarily bracing the 12' gable wall 02.
Instructions for securing the lower edge of Gable Wall 02 to the floor frame.
Steps for centering and bracing the first 24' eave wall.
Instructions for attaching the eave wall to the floor, studs, and top plate.
Steps for centering and bracing the second 24' eave wall.
Instructions for securing the second eave wall to the gable structure.
Steps for nailing panel edges to the floor frame.
Instructions for attaching the 24' wall panel to the 12' wall studs.
Final step for securing the gable wall top plate.
Steps for assembling rafter halves using gussets and nails.
Instructions for completing the rafter assemblies, including second gusset placement.
Instructions for aligning and securing rafters on 12'x12' and 12'x16' sheds.
Important notes on maintaining correct measurements between rafters for stability.
Instructions for aligning and securing rafters on 12'x20' and 12'x24' sheds.
Important notes on maintaining correct measurements between rafters for stability.
Steps for positioning and attaching the middle, left, and right gable panels.
Instructions for finalizing the gable unit assembly and building the second unit.
Steps for measuring, placing, and initially securing the gable unit.
Instructions for fastening gable panels to rafters and wall doublers.
Steps for securing the gable unit from the inside and installing the opposite side.
Instructions for placing and securing the first 48"x96" roof panel.
Steps for placing and securing the second roof panel, including alignment.
Steps for installing 23-7/8"x48" and 48"x48" roof panels.
Instructions for maintaining spacing and securing roof panels along rafters.
Steps for installing 36-1/2"x96" and 36-1/2"x47-7/8" roof panels.
Instructions for securing all roof panels with nails spaced appropriately.
Instructions for placing and securing the first 48"x96" roof panel.
Steps for placing and securing the second roof panel, including alignment.
Steps for installing 47-7/8"x48" and 48"x48" roof panels.
Instructions for maintaining spacing and securing roof panels along rafters.
Steps for installing 36-1/2"x96" and 36-1/2"x47-7/8" roof panels.
Instructions for securing all roof panels with nails spaced appropriately.
Instructions for placing and securing the first 48"x96" roof panel.
Steps for placing and securing the second roof panel, including alignment.
Steps for installing 48"x96" and 47-7/8"x48" roof panels.
Instructions for maintaining spacing and securing roof panels along rafters.
Steps for installing 36-1/2"x96" and 36-1/2"x47-7/8" roof panels.
Instructions for securing all roof panels with nails spaced appropriately.
Steps for installing gable trim flush to the roof panel and peak.
Instructions for installing trim on the opposite gable and finishing.
Steps for placing and securing VX eave trim along the roof panel edge.
Instructions for installing WTC eave trim, with notes on potential trimming.
Steps for placing and securing WTC eave trim along roof and gable edges.
Instructions for installing VX and VF eave trim pieces.
Steps for placing and securing WTC eave trim along roof and gable edges.
Instructions for installing VX eave trim pieces.
Steps for placing and securing WTC eave trim along roof and gable edges.
Instructions for installing VX and VF eave trim pieces.
Steps for installing gable end corner trim flush to panels.
Instructions for installing eave side corner trim flush to soffit and seams.
Instructions for installing collar ties to rafters using nails.
Diagrams showing collar tie placement for different shed dimensions.
Steps for orienting and assembling loft joists using nails.
Instructions for drilling holes in loft joists for support.
Steps for installing loft joist components NK and PT to the top plate.
Instructions for clamping, drilling, and securing loft joists to wall studs.
Instructions for installing loft panels over joists and securing with nails.
Instructions for assembling shelf supports, including quantity and orientation.
Steps for installing shelf supports onto wall studs at specified heights.
Instructions for securing shelf panels to supports and seams with nails.
Steps for installing facia trim (WJ, KP) to the bottom of shelf panels.
Instructions for placing doors on a flat surface with correct offset and identifying hinge colors.
Steps for attaching temporary supports (OO, GAA) to doors during preparation.
Steps for installing OO supports under panels and securing them to the floor frame.
Instructions for centering doors and screwing hinge boards into wall supports.
Steps for vertically centering and securing the OO stiffener on the left door.
Steps for vertically centering and securing the OO stiffener on the right door.
Steps for installing door trim pieces, including leveling AH.
Instructions for centering ZJ trim and installing the metal threshold.
Steps for installing decorative hinges on the doors using screws.
Steps for installing OO bolts into the door frame and pre-drilling.
Steps for installing OO bolts into the floor and pre-drilling.
Steps for marking, drilling, and installing the door handle and securing it.
Steps for installing hooks in the wall and locating eye position by swinging the door.
Steps for centering the window in the gable and securing with screws.
Instructions for installing window trim and securing with nails, avoiding window frame.
Steps for locating, marking, cutting, and caulking vent openings.
Instructions for securing the vents using screws.
Recommendations for using paint and caulk on the shed structure.
Instructions for correctly installing roof felt on the shed roof.
Steps for installing drip edge along the roof edges for water management.
Introduction to 3-Tab shingles and critical safety warnings for installation.
Detailed steps for installing the first starter row of shingles, including overhang and alignment.
Steps for installing the first and second rows of shingles, ensuring proper alignment and staggering.
Instructions for continuing the shingle installation process by staggering rows.
Instructions for shingling to the peak, managing overlap, and cutting shingles.
Steps for shingling the opposite side, trimming ends, and cutting shingles.
Instructions for cutting shingles into three pieces and scoring for angled cuts.
Steps for installing the first and second rows of ridge cap shingles.
Instructions for installing ridge cap to the back of the roof and ensuring proper alignment.
Steps for cutting and installing the final ridge cap pieces for completion.
Details on what is covered by the warranty and the conditions for validity.
Information on maintaining the unit for warranty and how to file a claim.
| Capacity | Varies by model (e.g., 42 cu ft, 70 cu ft) |
|---|---|
| Assembly | Assembly Required |
| Lockable | Yes |
| Dimensions | Varies by model |
| Color Options | gray |