Wall Sleeve Brands:
#6 Whirlpool 17 Deep
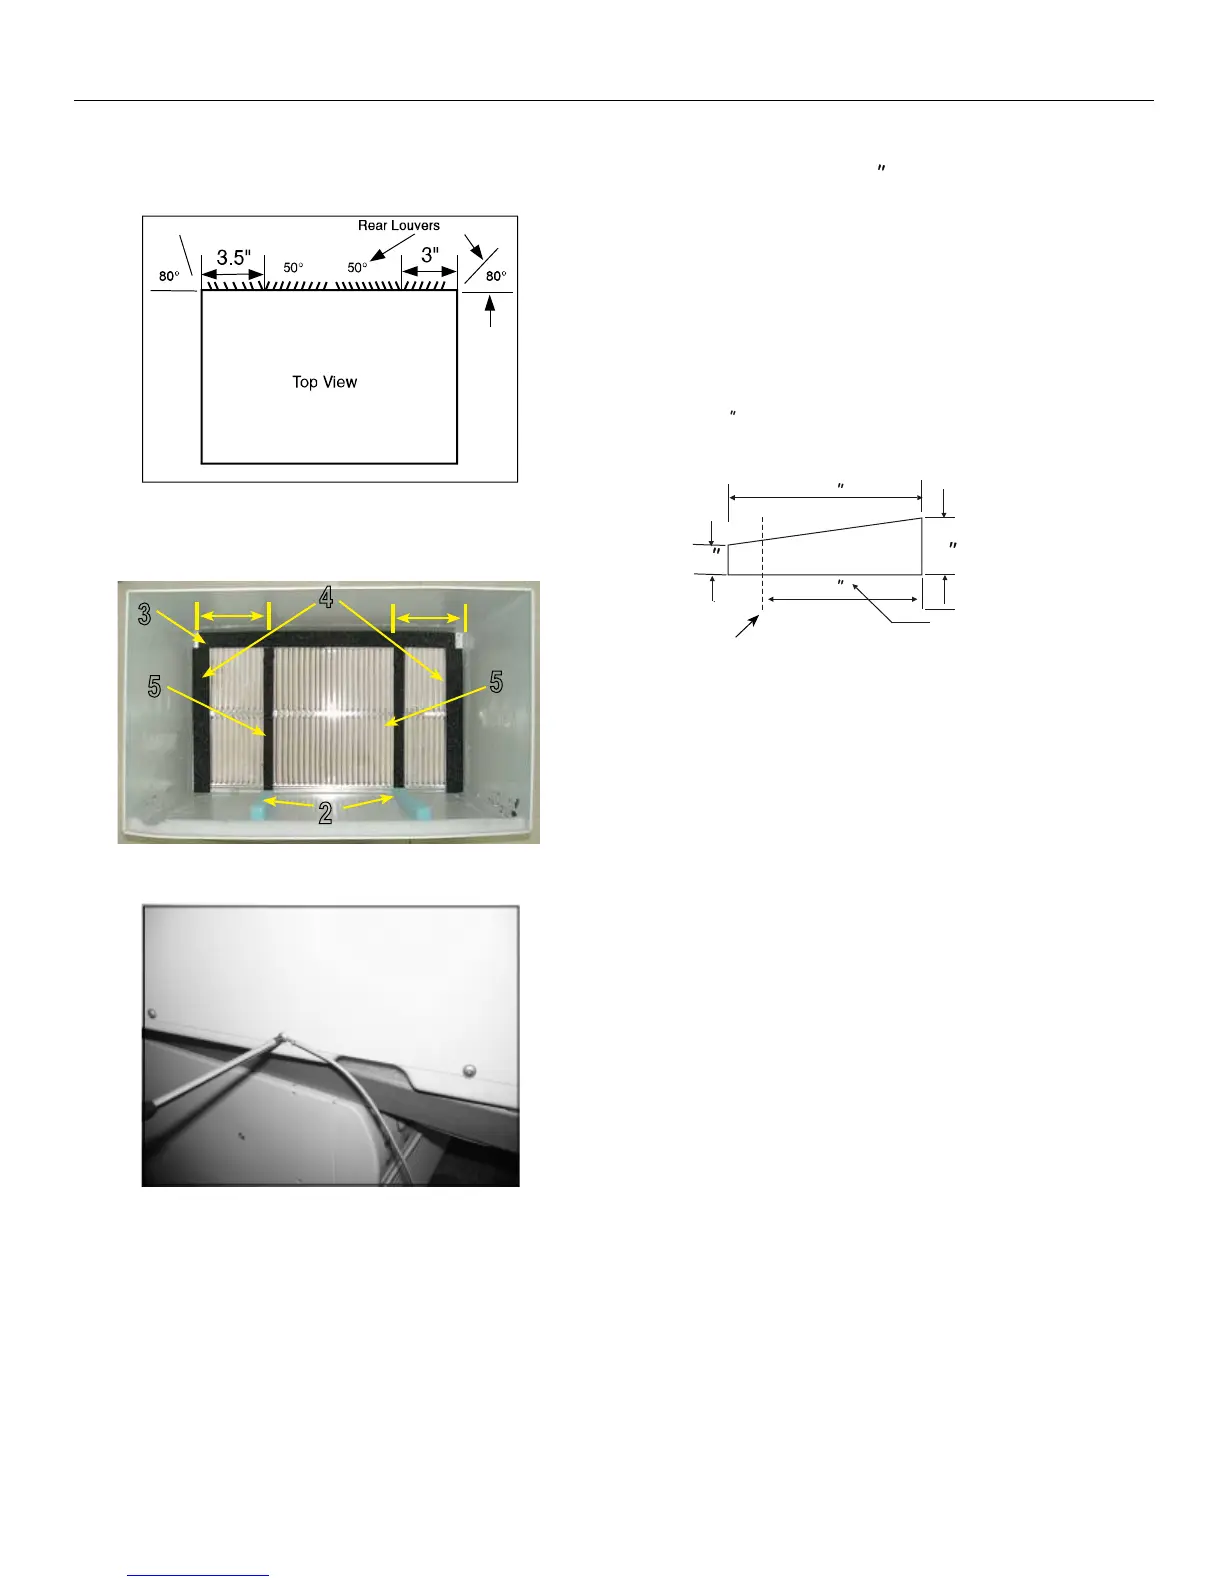
1. Remove existing rear grille as shown on Page
11 of this manual and replace with provided
louvered rear panel. Install as shown here.
NOTE: You may need to drill holes in flange of
existing sleeve to match new rear grille.
1
8
/
2. Cut (2) 17 Tapered Spacer Blocks as shown
below into two pieces.
3. Install to the floor of the sleeve as shown.
This helps induce a rearward slop on the
unit.
4. Attach (1)1 x3/8 x25 long seal in the center
at the top of the sleeve. Remove the backing
paper and press into position.
5. Attach (2) 1 x3/8 x14 seals to the left and
right sides of the sleeve.
6. Cut (2) 1 x3/8 x25 long seal to 14 long
and attach it to the vertical sections of the rear
grille as shown.
7. Center unit and gently slide unit into sleeve.
8. Before sliding all-the-way back, remove 2nd
screw from front on left side of unit.
9. Remove the plastic washer from the screw.
10. Screw and attach the other end of the ground
wire to the unit as shown in picture. Make sure
that the toothed washer is against the cabinet.
11.Slide the unit completely to the rear to ensure
a good seal, making sure the ground wire does
not become tangled.
12.Seal & Frame the unit as described on the last
page of these instructions.
13. If you have difficulty with mounting the grill to
the sleeve, follow the instructions for direct
mounting on Page 21.
3
/
4
17
Tapered Spacer Block
1
Protection Paper
Backing
Cut Here
13
5
4
Owner’s Manual Room Air Conditioner with R-410A Heat Controller, Inc.
17
3
4
5
2
5
3.5”
3”
1. Remove existing rear grille and replace with
provided louvered rear panel. Install as shown here.
NOTE: You may need to drill holes in ange of
existing sleeve to match new rear grille. (see pg. 11)
page 22.
Attach (1) 1” x 3/8” x 25” long seal at the top of the
sleeve. Remove the backing paper and press into
position.
Attach the (2) 1” x 3/8” x 14” long seals to the left and
right sides of the sleeve.
Cut (2) 1” x 3/8” x 14” to 25” long seals, and attach
them to the vertical sections of the rear grille as shown.
4.
5.
6.
7.
8.
9.
10.
11.
12.
3.
Cut Here