Owner’s Manual Room Air Conditioner with R-410A Heat Controller, Inc.
21
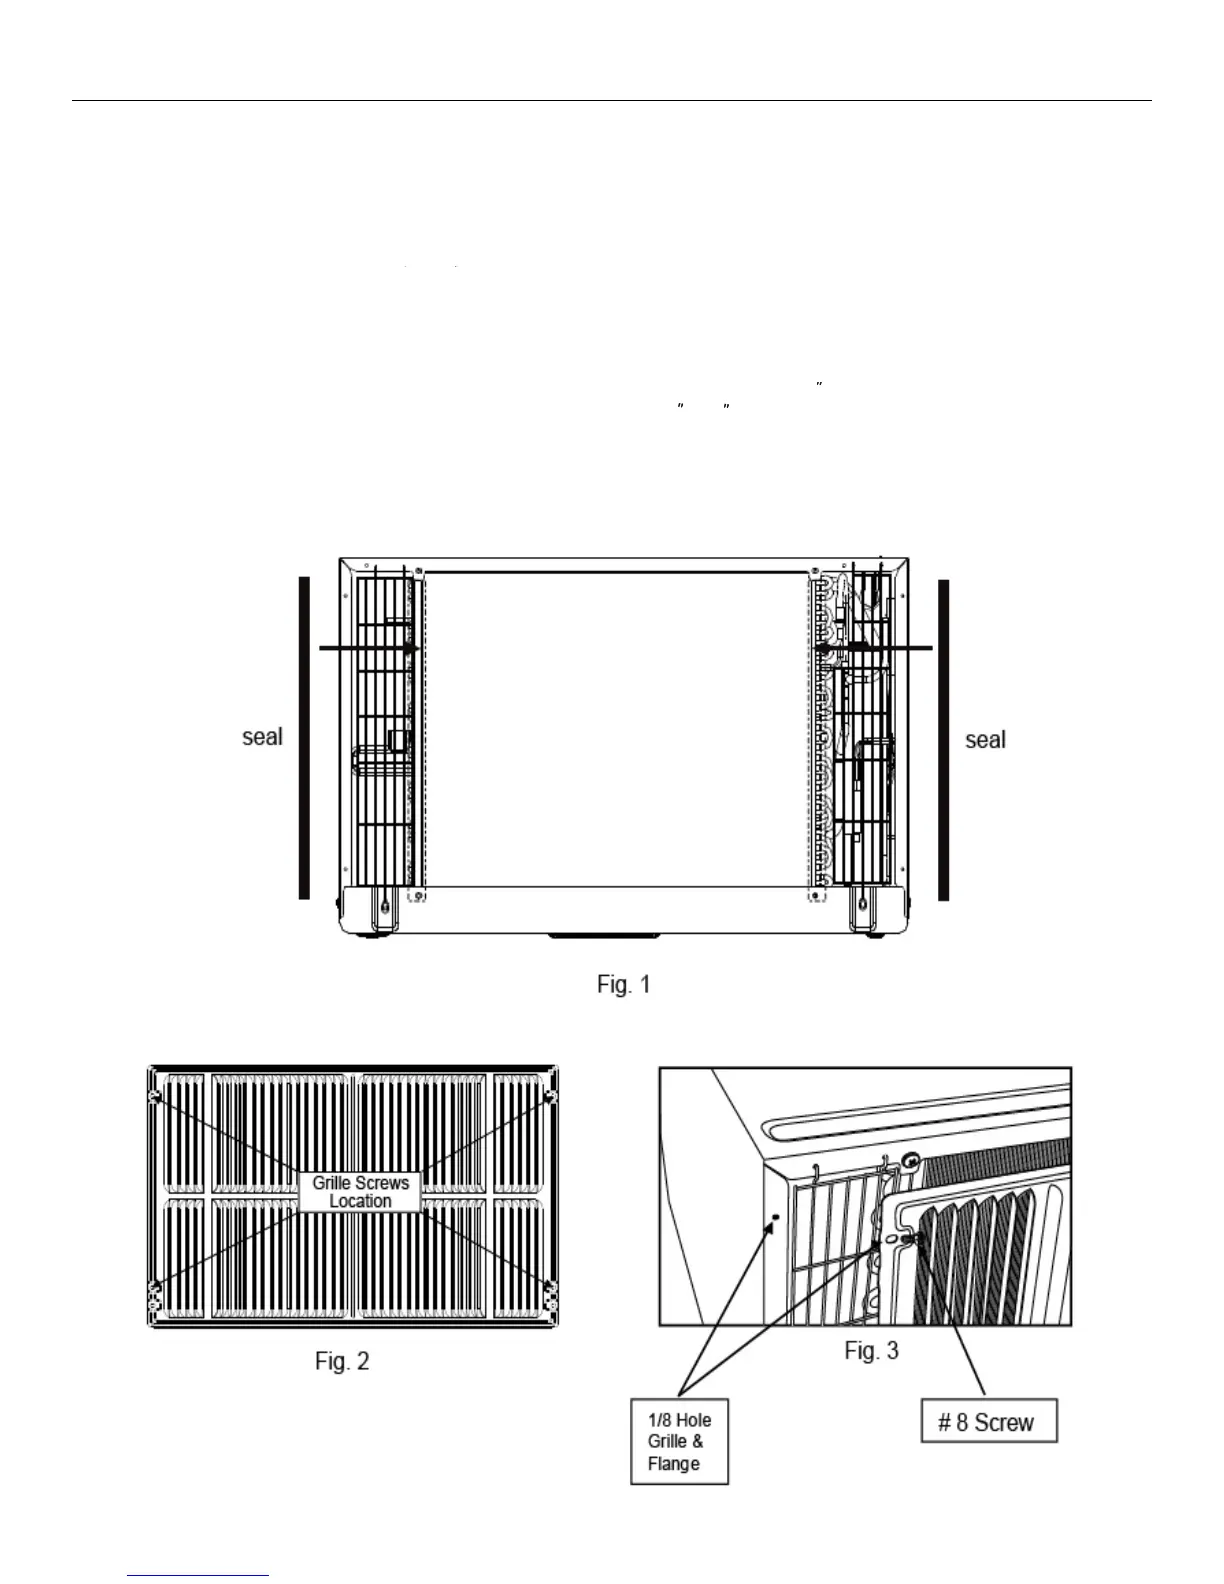
Direct Unit Mounting:
The previous directions are the preferable way to mount the new rear grill. The units performance is
slightly better and the possibility of draughts is reduced. As a last resort, direct mounting of the grille
to the unit can be considered.
Note: The grille must be installed prior to inserting the unit into the sleeve.
1. Attach the 2 seal pieces (1 X3/8 X14 ) as shown in Fig. 1.
2.Position the grille over the rear of the unit making sure that:
a. The double set of screw holes are at the bottom.
b. The fins of the grill are pointed away from the unit.
3. Align the top of the grille with the top of the unit. The overhang on each side is equal.
4. If the unit has not been pre-drilled (some models), carefully drill 4-1/8 holes through the
grille and into the side flange of the unit approximately 1 to 2 from the top and bottom as
in Fig. 2, 3 .
(Be careful not to drill into the copper heat exchanger coils.)
5. Install 4 - #8 self tapping screws to affix the grille to the unit.
6. Insert the unit into the sleeve.
1
/
2
5. Install (4) #8 self tapping screws to afx the grille to the unit.
The previous directions are the preferable way to mount the new rear grill. The unit’s performance is
slightly better and the possibility of drafts are reduced. As a last resort, direct mounting of the grille to the
unit can be considered.
1. Attach the (2) seal pieces (1” x 3/8” x 14”) as shown in Fig. 1.
a. The double set of screw holes are at the bottom.
b. The ns of the grill are pointed away from the unit.
3. Alight the top of the grille with the top of the unit. Ensure that the overhang on each side is equal.