-
n"s"16
,,@
e
Y
3-LUG
TERMINAL STRIP
_LINE
CORDz
STRAIN RELIEF
CORD
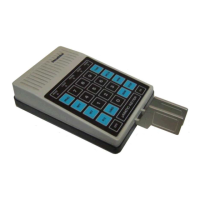
PICTORIAL
IO
REAR PANEL ASSEMBLY,
WIRING,
AND
INSTALLATION
Refer to Pictorial
10
for the
following
steps.
(
)
Install
a
line
cord
retainer at
each
corner
of
therearpanelasshown.
Usetwo#6 x
t/4"
sheet
metal
screws for each
retainer.
(
)
Mount
a
3-1ug
terminal
strip
on
the
rear
panel.
Use
a
6-32
x
1/4"
phillips
head
screw,
two #6 lockwashers,
and a
6-32
nut.
Place
a lockwasher
on
each side of
the terminal
strip mounting foot
as
shown
in Detail
10A.
NOTE:
A
3-wire flat line
cord
is
supplied
with
this kit. Some
localities, especially
outside
the
United States,
require the use
of
a
round line
cord.
If a
round
line cord is required,
you
can
purchase
one
from a
local
dealer. Thefollowing
steps will apply to either t5pe.
(
)
Separate the three
leads of
the
linecordfor
about 1". Twist the finewirestrandsof each
lead and
apply
a
thin
film of
solder
to
hold
the
strands together.
:
(
)
Pass
the
endof
thelinecordthroughthe hole
in
the
rear
panel.
(
)
Connect the
green
(ground)
lead
to lug 2
of
the terminal
strip
(S-1).
(
)
Connect
one
of
the
other
line cord leads
to
lug
1
(NS)
andthe
remainingleadto
lug 3
(NS)
of
the terminal
strip.
(
)
Install the
line
cord
strain relief as shown
in
Detail
108.
The
strain relief
shownisfor
the
flat
line cord supplied
with the kit.
If
a round line
cord
is used, the
other
strain
relief must
be used in this same
manner.
(
)
Wrap
the
line
cord
around the
four line
cord retainers.
$,,,^,,",*
-@o-r.
r'
CJ>uo
,-o.*,nor"r*
#,,..ftfr
rK5
(-j)oo.ocr*osH.*
,
.:.,...,.]f-.t,, ..
-'1
.,,
,:.,,.r,
'J..ir'.1,,1r.I
i
..,
l.
'i'
ii'...:':,
:i:ii'i'
j
i,;,,,rr,.,,.,,,,']
't,::,,,:,,,,...,1:::::.....
..';:l'
t
'1..irl.
il
6-32\t.'4"
dtr
PHTLLTPS
scREw
REAR PANEL
l\
r,iri.iji'
Detqil
10A Detqil
l0B