WARNING: Please unplug the fan before installing to the wall and the grid, and please
install the fan impeller and grid completely (detail as graph) before using.
1. Attach the stand pipe to the fan base with the attached screws.
2. Pull out the extension pipe to required height and fasten the pipe locking nut
tightly.
3. Mount the fan head assembly to the fan-stand assembly and fasten the thumb
screw.
4. Remove the blade locking nut and the rear guard locking nut from the motor
shaft, attach the rear guard to the head by tightening the locking nut firmly.
5. Attach the fan blade to motor shaft and tighten the blade locking nut firmly.
6. Mount the front guard to rear guard with plastic hoop and tighten the screw on
the firmly.
Note
Please screw the plastic nut out of the machine head thread counterclockwise.
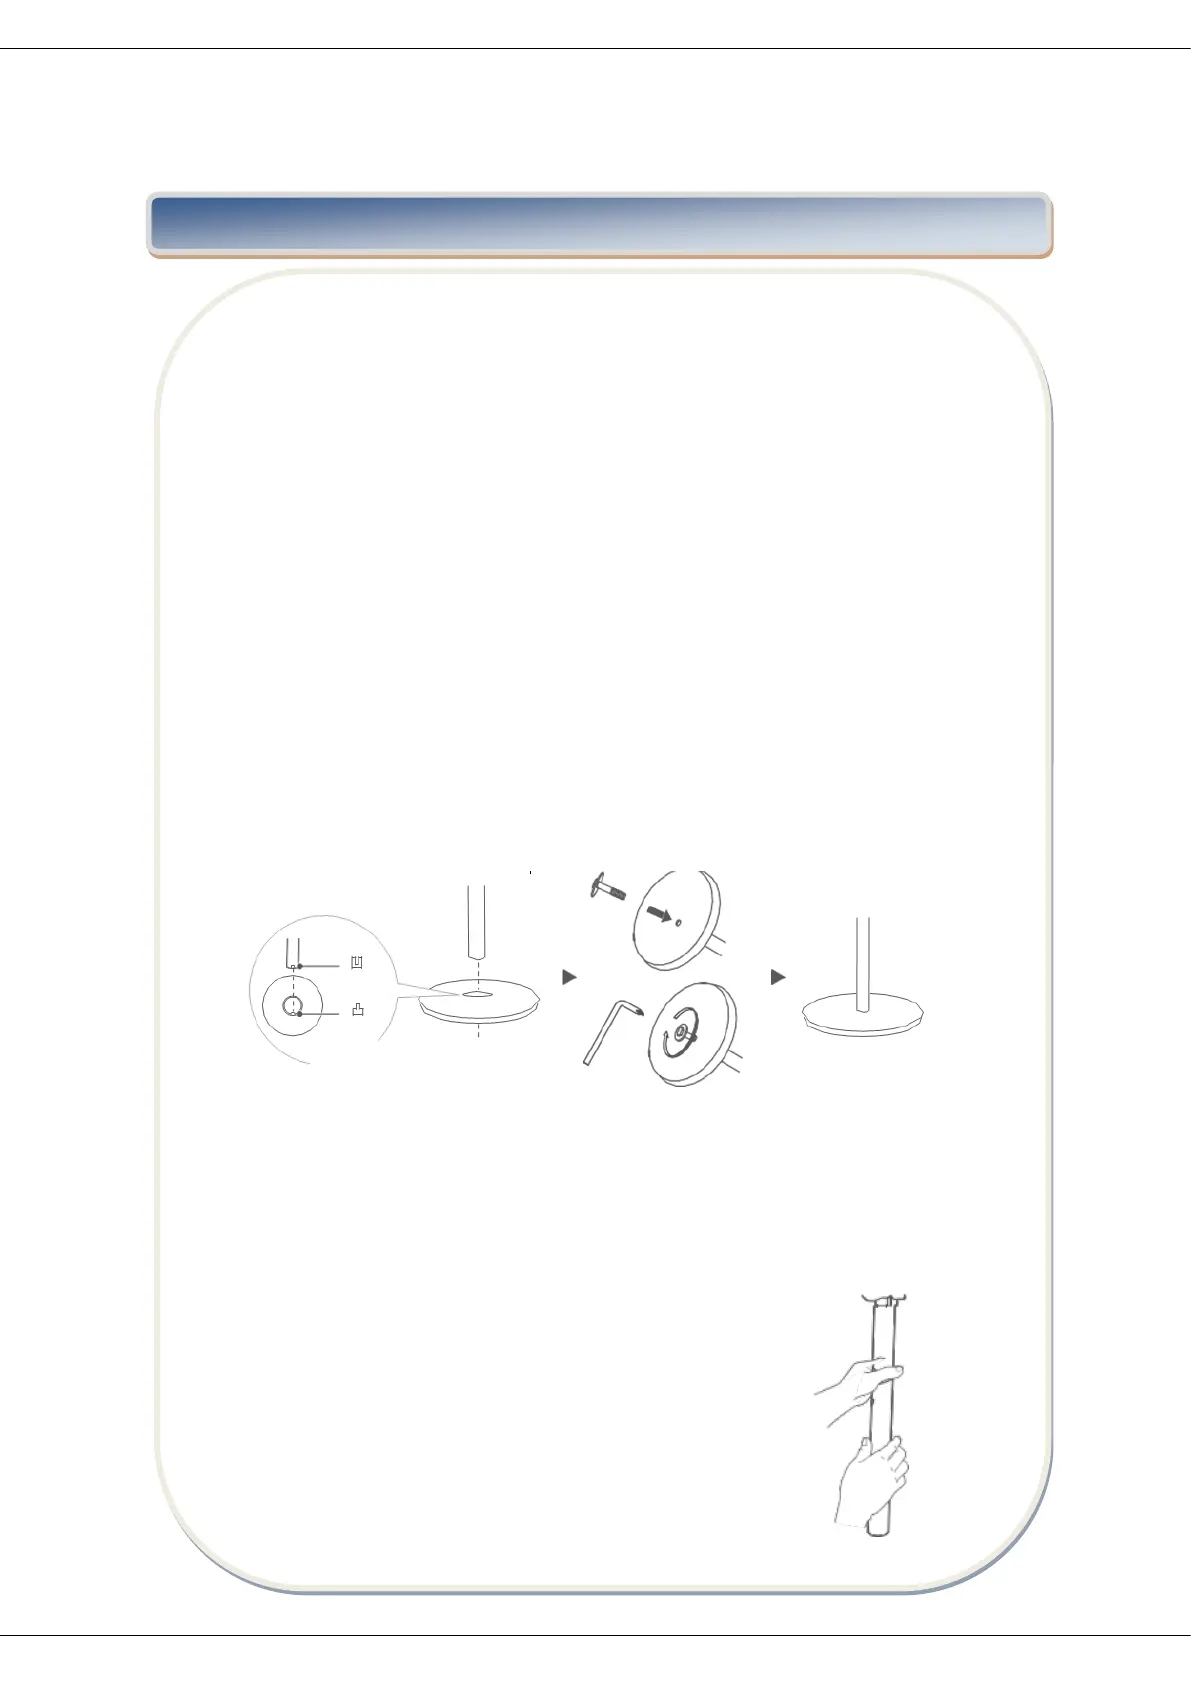
1. CHASSIS INSTALLATION
Align the lower pole assembly with the chassis, clamp them stably and then fix them
with bolts and pads
2. INSTALLATION OF MACHINE BODY AND LOWER POLE ASSEMBLY
Firstly align the machine body with the hole position of the lower pole assembly, then
rotate it clockwise and finally fix it.