IN
STALLATION:
CAUTION: Before installing the fan, make sure you have turned OFF the electricity supply.
1. Secure the hanging bracket to the ceiling joist or suitable structure that is capable of carrying a
load of at least 45Kg, with the two long fixing screws provided. Ensure that at least 30mm of
the screw is threaded into the support.
NB: The fixing screws included are designed for use when ceiling fan is secured onto timber joists.
For all other surfaces, additional and suitable fixing screws for that surface will need to be
purchased.
2. Make sure that the position of installation will not allow the blades to come into contact with
any object. The fan must be mounted so that the tips of the blades are at least
2.1 metres
above the floor.
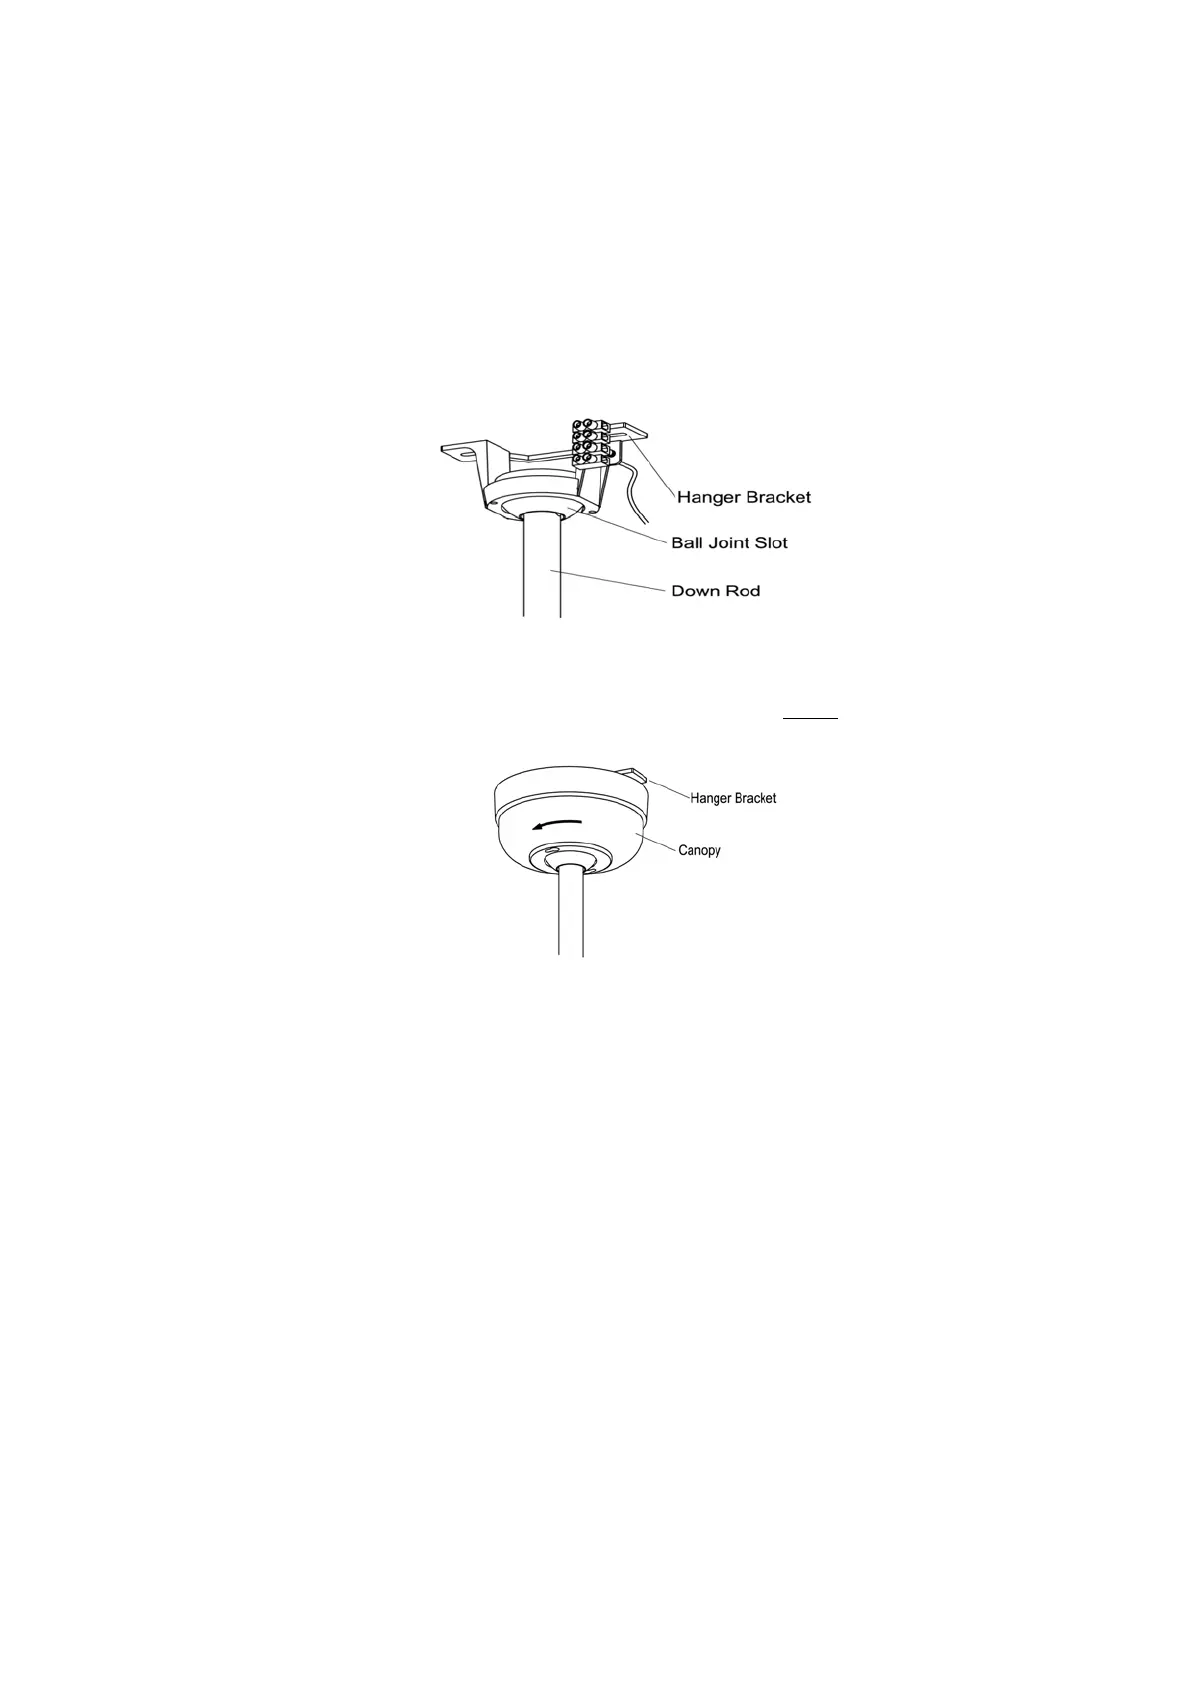
3. Carefully lift the fan, and place the down rod ball assembly into the mounting plate ensuring
that the ball correctly locks into place.
4. Refer to the following section detailing “Electrical Connection” for details on how to wire this
product correctly.
5. After the fan has been wired to the power supply, carefully position all excess cable inside the
boundaries of the hanging bracket.
6. Carefully s
lide the canopy up to cover the hanging bracket and ball joint, taking care not to
damage wires. Once in position, secure the canopy with the screws provided.