1-360008/G
2
packaging.
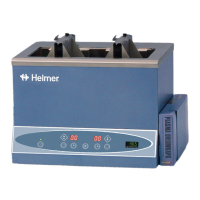
2) Remove the metal protective cover over the drain port, located on the lower portion of the left rear
side panel of the unit, by loosening the two screws located on the back of the unit. These screws
do not need to be removed, just loosened. Discard the protective cover, as it is used for shipping
purposes only, and retighten the screws.
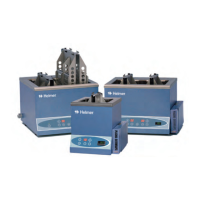
3) Select a location for the unit keeping the following points in mind:
a. There must be a grounded outlet with adequate power provisions to meet the electrical
requirements as listed on the specification label on the back of the unit.
b. It is helpful to place the unit near a sink or drain to make draining and filling of the chamber
bath easier. It is preferable to locate a laboratory sink on the drain valve side of the unit - if
not, contact Helmer for a drain tube "U-Fitting Assembly" that will allow for easier
draining to the right side of the unit.
c. Keep the unit away from direct sunlight or high temperature areas.
d. There should be at least 8 inches (20cm) of clearance above the unit for the Basket Assembly
lift-out system to operate.
4) Make sure that the chamber is clean of any packaging debris and fill the chamber bath with
distilled or deionized water until the water reaches the desired "Fill Line." There are two "Fill
Lines" stamped in the center of the chamber back wall. The following describes what the two Fill
Lines represent:
____ ____ ____ - Maximum water level for thawing random bags.
____ ____ ____ - Maximum water level for thawing apheresis bags
Caution:
For safety purposes it is recommended to turn the main power switch to
OFF when the chamber bath is emptied of water. The power switch may be
left ON while the chamber bath is dry. However, the bottom of the chamber
will become hot and the controller temperature will initially exceed the set
temperature and trigger the high alarm system - after a period of time it will
decline back down to the set temperature and stabilize.
5) Insert the Helmer Digital Thermometer, if ordered, or a calibrated glass, digital, or small dial
thermometer into the Thermometer Holder brackets located at the back right corner of the chamber.
6) If a Chamber Cover has been ordered with the unit, the knob on the top of the cover will need to be
unscrewed and turned around so that the knob is on the exterior of the cover. The knob is installed
upside down for protection during shipping.
7) Plug the power cord into a properly selected-grounded outlet.
 Loading...