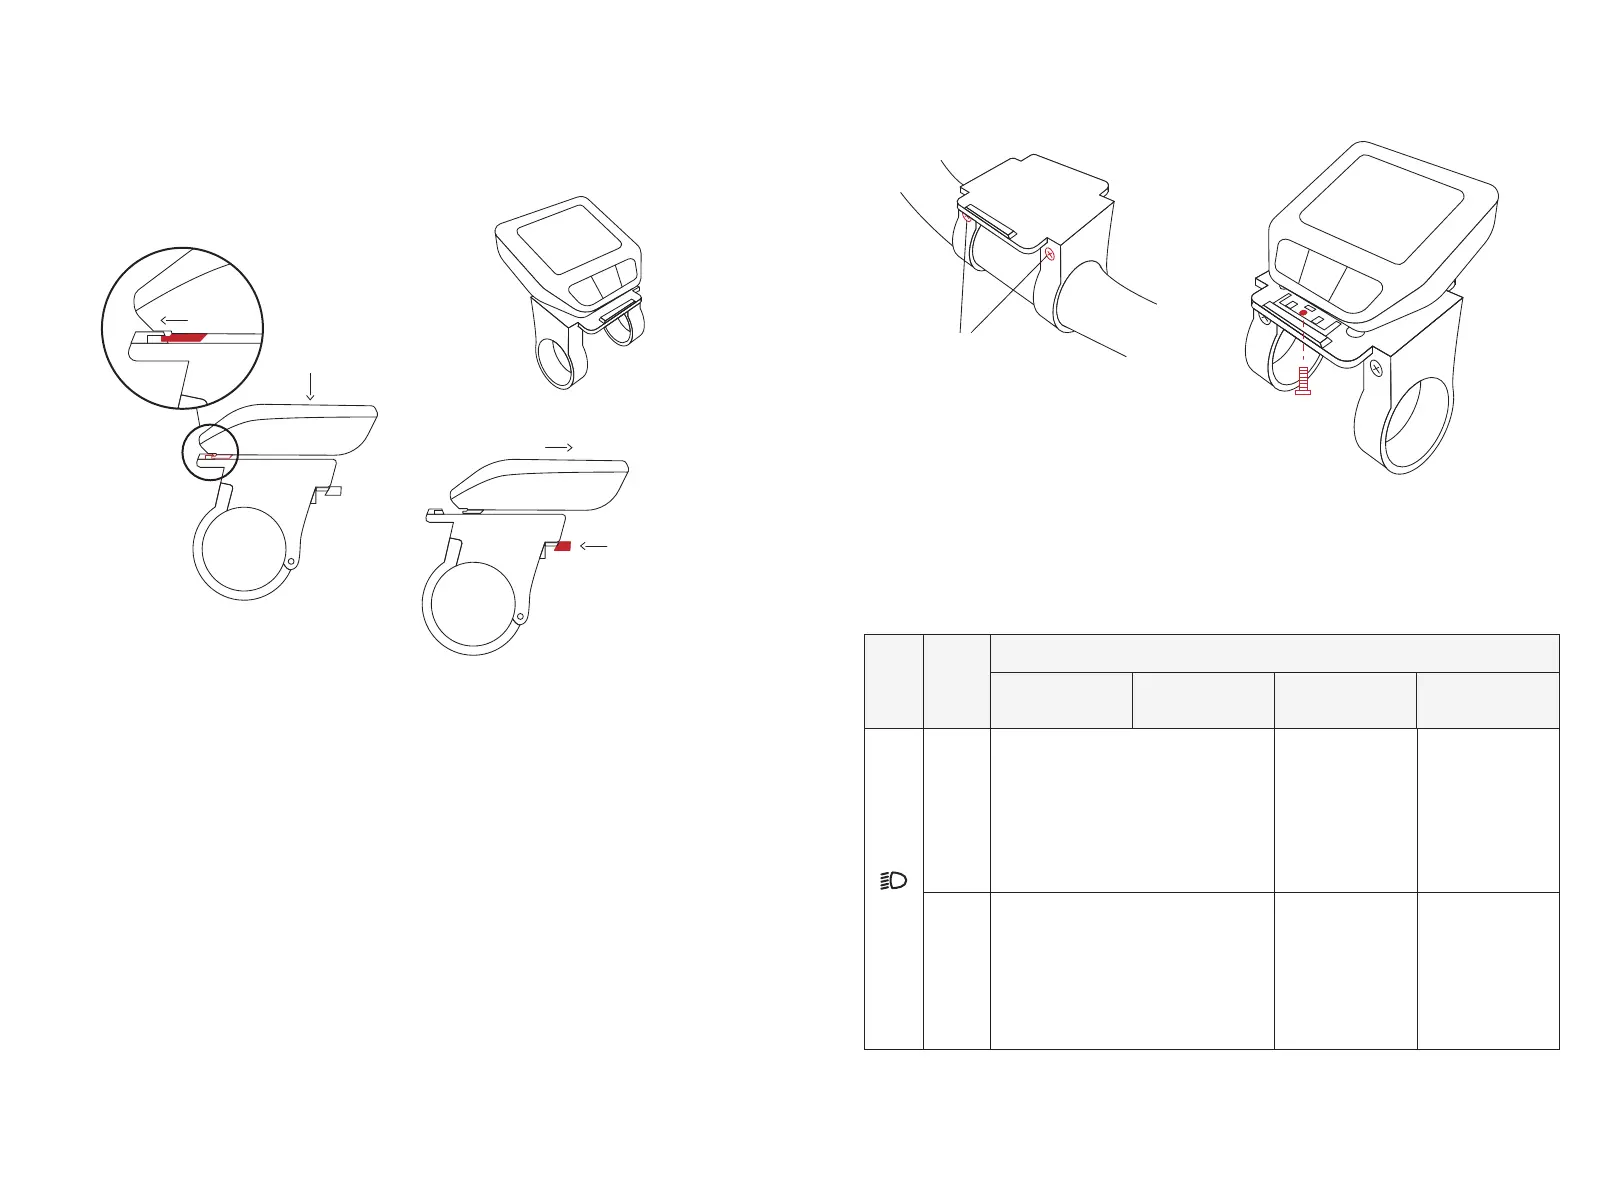
Assembly Operation
05 06
5. Operation
① insert
② press after
insert the display
① press here
② remove
Install
Uninstall
Fasten the display if you don't want to carry the display with you.
Remove the display holder using Allen key #3. Press the display to your display
holder. Turn back the display holder, take an M3 screw from the toolbox, and
fasten it using Allen key #3. Then install the display holder and the display back
to your handlebar.
① unscrew these two
screws and remove
the holder from the
bike
③ fix the screw and
install the holder back
to the bike
② install the display to
the holder before fix
the screw
4.2. Fasten your display
5.1 Buttons
M3 screw
Display Status
Off-bike & not
charging
switch lights
(automatic/manual)
(on *Level 1 page)
page up on
(on *Level 2 page)
Turn on the flashlight (on *Level 1 page)
turn the page up (on *Level 2 page)
Long
press
Turn on the flashlight (on *Level 1 page)
turn the page up (on *Level 2 page)
Short
press
switches the lights
(on/off) (on *Level 1
page)
turn the page up on
(on *Level 2 page)
switch lights
(automatic/manual)
(on *Level 1 page)
switches the lights
(on/off) (on *Level 1
page)
Off-bike & charging
On-bike & not
charging
On-bike & charging
Button Operation



 To Next Page