This document describes the NDAP-01 Air Purifier, a device designed to improve indoor air quality.
Function Description
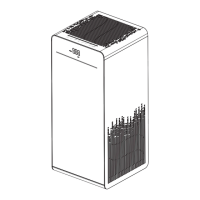
The NDAP-01 Air Purifier is equipped with a multi-stage filtration system and intelligent sensors to monitor and purify the air. Its primary function is to remove various pollutants from the air, including PM2.5 particles. The device features a digital display that shows real-time PM2.5 data, and an air quality indicator that changes color (blue for good, green for normal, red for poor) based on the detected air quality. It includes an auto mode that adjusts fan speed based on air quality, a sleep mode for quiet operation, and a timer function for scheduled shutdown. A negative ion function is also available to release negative ions into the air, contributing to fresher air. The device also incorporates a key lock function to prevent accidental changes to settings.
Important Technical Specifications
While specific numerical technical specifications like power consumption or CADR (Clean Air Delivery Rate) are not provided in the manual, the following can be inferred:
- Filter Life: The filter life is defined as 2160 hours of operation. After this period, a filter replacement indicator will flash, signaling the need for a new filter.
- PM2.5 Measurement: The device displays PM2.5 data in ug/m³.
- Sensor: It includes a built-in dust sensor to detect air quality.
- Operating Environment: Intended for household use under normal operating conditions. Not suitable for wet surroundings or areas with high ambient temperatures like bathrooms or kitchens.
- Safety: Not a substitute for proper ventilation, vacuum cleaning, or extractor hoods. Does not remove carbon monoxide (CO) or radon (Rn) and cannot be used as a safety device for combustion processes or hazardous chemicals.
- Radio Waves: Should be kept at least 2 meters away from sources of radio waves to prevent interference.
Usage Features
The NDAP-01 Air Purifier offers several user-friendly features:
- Control Panel: A touch panel with clearly labeled buttons for ON/OFF, Auto Mode, Fan Speed, Sleep Mode, Timer (1h, 2h, 4h), Anion, Key Lock, and Filter Replacement Indicator.
- Auto Mode: Automatically adjusts fan speed based on the air quality detected by the dust sensor, optimizing purification efficiency.
- Fan Speed Adjustment: Allows manual selection of low, medium, or high fan speeds.
- Sleep Mode: Reduces fan speed and noise for quiet operation, with specific indicators dimming or turning off.
- Timer Function: Enables users to set the appliance to turn off after 1, 2, or 4 hours.
- Anion Mode: Activates the negative ion function to release negative ions for fresher air.
- Key Lock: Locks the control panel to prevent unintended operations. Activated by pressing and holding the lock button for 3 seconds.
- Filter Replacement Reminder: An indicator light flashes when the filter life (2160 hours) is reached, prompting the user to replace the filter. The filter life can be reset by pressing and holding the reset button for 3 seconds after replacement.
- Initial Setup: Requires users to remove the packaging from the filters before first use and correctly place them back into the appliance.
Maintenance Features
Regular maintenance is crucial for the optimal performance and longevity of the air purifier:
- Cleaning the Purifier Body: The inside and outside of the purifier body should be regularly wiped with a soft, dry cloth to prevent dust accumulation. The air inlet and outlet should also be cleaned with a soft, dry cloth.
- Cleaning the Air Quality Sensor: The air quality sensor should be cleaned every 2 months, or more frequently in dusty environments. This involves using a soft brush to clean the air inlet and outlet of the sensor, removing its protective cover, rinsing the filter cotton under pure water, drying it, and then reassembling.
- Filter Replacement:
- The appliance indicates when the filter needs replacement (after 2160 hours of use) by flashing the filter replacement indicator.
- Before replacing, the appliance must be turned off and unplugged.
- The back cover is removed by pressing down on the signs at both sides and lifting the hooks.
- The old filter is pulled out, and all packaging material is removed from the new filter.
- The new filter is loaded, ensuring the label is facing up.
- The back cover is reattached by inserting the bottom hooks first and then pushing it against the body.
- After replacement, the power plug is reinserted, and the filter reset button is pressed for 3 seconds to reset the filter life indicator.
- It is crucial to remove the plastic packaging from each new filter before installation.