Non Contact Infrared Body
Thermometer
Instructions for use
10
General Setup and Use
Start measuring
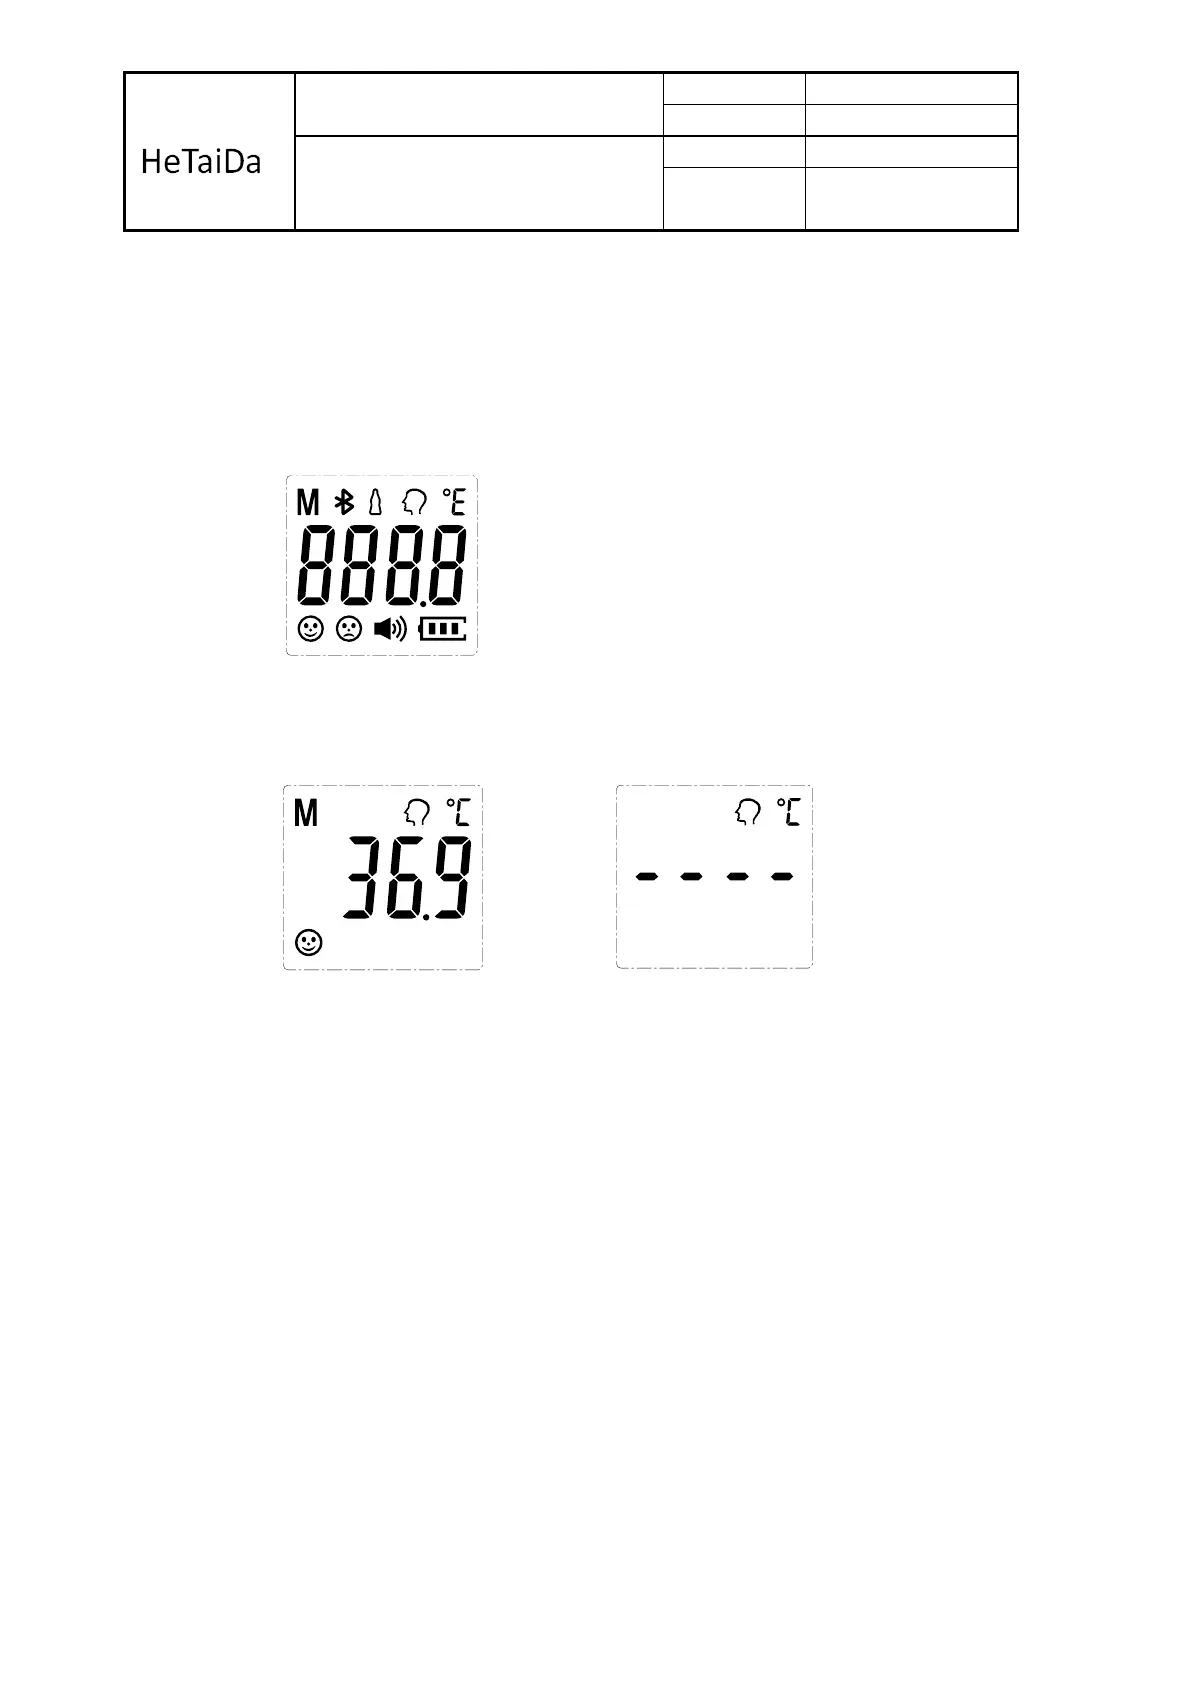
1. Turn on the thermometer by pressing the On / Scan button. The thermometer
will perform self-test with all segments displayed (Figure 4) for 1 second.
2. And then show last measurement value (Figure 5), and back to ready display
for measurement displayed ‘- - - -‘. (Figure 6)
3. Forehead mode: Align staff forehead to keep the distance, and then press the
On/Scan button, the position lamp indicates measurement site with light spot
on the forehead, and start the measurement, read the data.
4. Forehead scan method: position the probe flush (flat) on the center of the
forehead, midway between the eyebrow and the hairline. Press and hold the
On/Scan button. Lightly slide the thermometer across the fore-head keeping
the sensor flat and in contact with the skin until you reach the hairline, release
the On/Scan button and remove the thermometer from the head, then the
temperature will display on the screen. The whole process takes 3~10 seconds.
Note: 1) After full display over, you will hear a rattle or "bibi" four times, which means that
the measurements have been completed, while the target value of the measured
temperature is displayed on the LCD, while backlit display according to the
appropriate setting among the three colors green, yellow, orange one of. And the
Green means ready for next measurement. When 37.5°C ~ 38.5°C, it's yellow,
means slight fever warning. Please pay attention to body temperature. When the
Figure 4- All segments displayed
Figure 5 – Last memory display
Figure 6 – Ready display for measurement
 Loading...