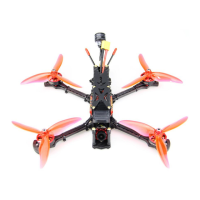
The HGLRC Sector 5 V2 FPV Racing Drone is a high-performance quadcopter designed for FPV racing and freestyle flying. This manual provides comprehensive instructions for setup, configuration, and troubleshooting, ensuring users can maximize their drone's potential.
Function Description:
The HGLRC Sector 5 V2 is a ready-to-fly (RTF) FPV racing drone, meaning it comes pre-assembled and largely configured, requiring minimal setup before its first flight. Its primary function is to provide an agile and powerful platform for competitive FPV racing and dynamic freestyle maneuvers. The drone integrates a flight controller, electronic speed controllers (ESCs), motors, a video transmitter (VTX), and a camera into a robust frame kit. Users can customize flight modes, OSD (On-Screen Display) settings, LED configurations, and motor protocols to suit their flying style and preferences. The drone supports various receiver types, allowing compatibility with a wide range of radio transmitters. Its advanced flight controller and powerful propulsion system enable precise control and high-speed performance.
Important Technical Specifications:
- Model: FPV Racing Drone
- Frame Kit: Sector 5 V2 Frame Kit
- Flight Controller: Forward F722 Flight Controller
- Serial Ports (UARTs):
- UART1: Receiver
- UART3: VTX image transmission
- UART4: GPS
- UART6: ESC telemetry
- ESC: Forward 60A 4in1 ESC
- Recommended Protocol: DSHOT1200
- Motor Poles: 14
- Motor Idle Throttle Value: 5.5%
- VTX: Forward MT VTX 800MW
- Power Output: 800mW (adjustable: 0/25/100/200/400/800mW)
- Frequency: 5.8GHz
- Smart Audio: Supported for remote configuration via OSD
- Camera: Caddx Ratel Camera
- Motor: Forward 2306 Motor
- 4S Configuration: KV2450
- 6S Configuration: KV1600
- Supported Receivers: SBUS, PPM, DSMX (e.g., Frsky XM+, FlySky FSA8S V2, Frsky R9MM & R9Mini, TBS Crossfire Nano RX)
- Input Voltage: 3-6S Lipo
- Weight: 372.3g
- PID and Gyroscope Refresh Rate: Up to 8K/8K
Usage Features:
- Flight Controller Driver Installation: The manual guides users through installing the necessary drivers for the Forward F722 Flight Controller. This involves connecting the drone via USB while holding the BOOT button, allowing the system to automatically install drivers. If automatic installation fails, users are directed to download and run the ImpulseRC_Driver_Fixer tool. The process concludes with opening Betaflight Configurator in DFU mode, ideally using the latest Betaflight version.
- Firmware Flashing: Instructions are provided for flashing the flight controller with the appropriate firmware (HGLRCF722). Users select the firmware version, load it online, and then flash it to the board. A "Programming: SUCCESSFUL" message confirms completion.
- Accelerometer Calibration: To ensure stable flight, the accelerometer must be calibrated. This involves placing the drone horizontally and clicking "Reset Z axis" and then "Calibrate Accelerometer" in Betaflight's Setup tab.
- Serial Port Configuration (UARTs): The manual details the specific functions assigned to each UART, such as receiver input (UART1), VTX image transmission (UART3), GPS (UART4), and ESC telemetry (UART6). Users must enable the correct serial port for their chosen receiver type (e.g., Serial Rx for SBUS/DSMX on UART1) and for ESC telemetry (ESC AUTO on UART6).
- Aircraft Model Selection: Users select "Quad X" as the aircraft model in the Mixer tab of Betaflight.
- Motor Protocol Selection: The recommended ESC/Motor protocol is DSHOT1200, which is chosen in the ESC/Motor Features section. Users are also instructed to enable ESC telemetry by connecting the ESC's TX to the flight controller's RX6 and configuring UART6 for ESC telemetry.
- Motor Direction Testing: Before flight, users are advised to test motor direction by clicking "I understand the risks" in the Motors tab and using the "Master" slider. Motor steering can be adjusted in BLHeliSuite32 if needed.
- Voltage and Current Parameter Setting: The manual explains how to configure battery voltage and current monitoring in the Power & Battery tab. This includes setting the Voltage Meter Source (Onboard ADC), Current Meter Source (Onboard ADC), Minimum/Maximum/Warning Cell Voltages, and Battery Capacity. Calibration values for Voltage Meter (Scale, Divider Value, Multiplier Value) and Amperage Meter (Scale, Offset) are also provided.
- Receiver Setup: Detailed instructions are given for setting up SBUS, PPM, and DSMX receivers. This involves selecting the correct "Serial-based receiver" or "PPM RX input" in the Receiver tab and ensuring the corresponding UART is enabled for Serial Rx.
- VTX Smart Audio Configuration: The VTX connection diagram is provided, and users are guided to enable the VTX serial port (UART3) and select the appropriate VTX protocol (e.g., VTX (TBS SmartAudio) or VTX (IRC Tramp)).
- OSD Adjustment: The Betaflight OSD allows users to display flight information (battery voltage, mAh consumed, etc.) and configure drone settings in the field. The manual explains how to access the OSD menu using stick commands (throttle centered, yaw left, pitch forward) and navigate through sub-menus like "Features" (for VTX configuration), "Profile" (for PIDs and rates), and "Scr Layout" (for OSD element placement).
- GPS Parameter Setting: For GPS functionality, users connect the GPS module (SDA, SCL, 5V, GND, TX, RX) and enable UART4 for GPS in the Ports tab.
- Receiver Signal Check: Users can verify the remote control output signal in the Receiver tab, ensuring all channels (Roll, Pitch, Yaw, Throttle, AUX) respond correctly to transmitter inputs.
- Flight Mode Startup Mode Selection: The Modes tab allows users to assign flight modes (e.g., ARM, ANGLE) to switches on their remote control by defining channel ranges.
- LED Settings: The manual covers configuring LED strips. Users enable LED support in the Configuration tab, then use the LED Strip tab to set up multi-color RGB LED strips, including wire ordering and function buttons for color switching and blinking modes (Steady, Fast Flash, Breathing Light, Colorful Slow Flash). LED control via CH5 (AUX1) of the transmitter is also mentioned.
Maintenance Features:
- Troubleshooting: The manual includes a troubleshooting section for common issues.
- OSD Garbled Characters: If OSD characters are garbled, users are advised to open Betaflight, go to the OSD tab, and click "Font Manager" to "Upload Font."
- No "BBB" Sound on Battery Plug-in: If the drone doesn't pass the self-test with the expected "BBB" sound (only one sound), users should check if the ESC agreement is correct.
- Aircraft Keeps Spinning: If the aircraft spins continuously, users should check if the propeller is correct and if the motor direction is correct.
- Safety Precautions: The manual emphasizes critical safety warnings:
- Polarity: Always check polarity carefully before connecting power to prevent damage.
- Power Disconnection: Disconnect power before connecting, plugging, or unplugging any components.
- Flight Controller Stability: Failure to adhere to cautions may compromise flight controller stability or even damage the device.
- After-Sales Support: Information on after-sales service is provided:
- Quality Problems: Free repair service for quality issues upon return to the factory.
- Damage Due to Improper Operation: Repair service may be provided under inspection for damage caused by improper operation.
- Contact Information: Domestic customers should contact after-sales personnel, while overseas customers should refer to the official website for support.