EasyManuals Logo

HIKVISION DS-2CD864-EI3 Installation Manual

HIKVISION DS-2CD864-EI3
131 pages
To Next Page IconTo Next Page
To Previous Page IconTo Previous Page
Page #11 background imageLoading...
Page #11 background image
Installation Manual of Network Camera
10
No.
Description
12
IN, G: Alarm Input Interface
13
1A, 1B: Alarm Output Interface
14
Grounding
15
RESET: Reset Button
Press RESET about 10s when the camera is powering on or rebooting to restore the default settings,
including the user name, password, IP address, port No., etc.
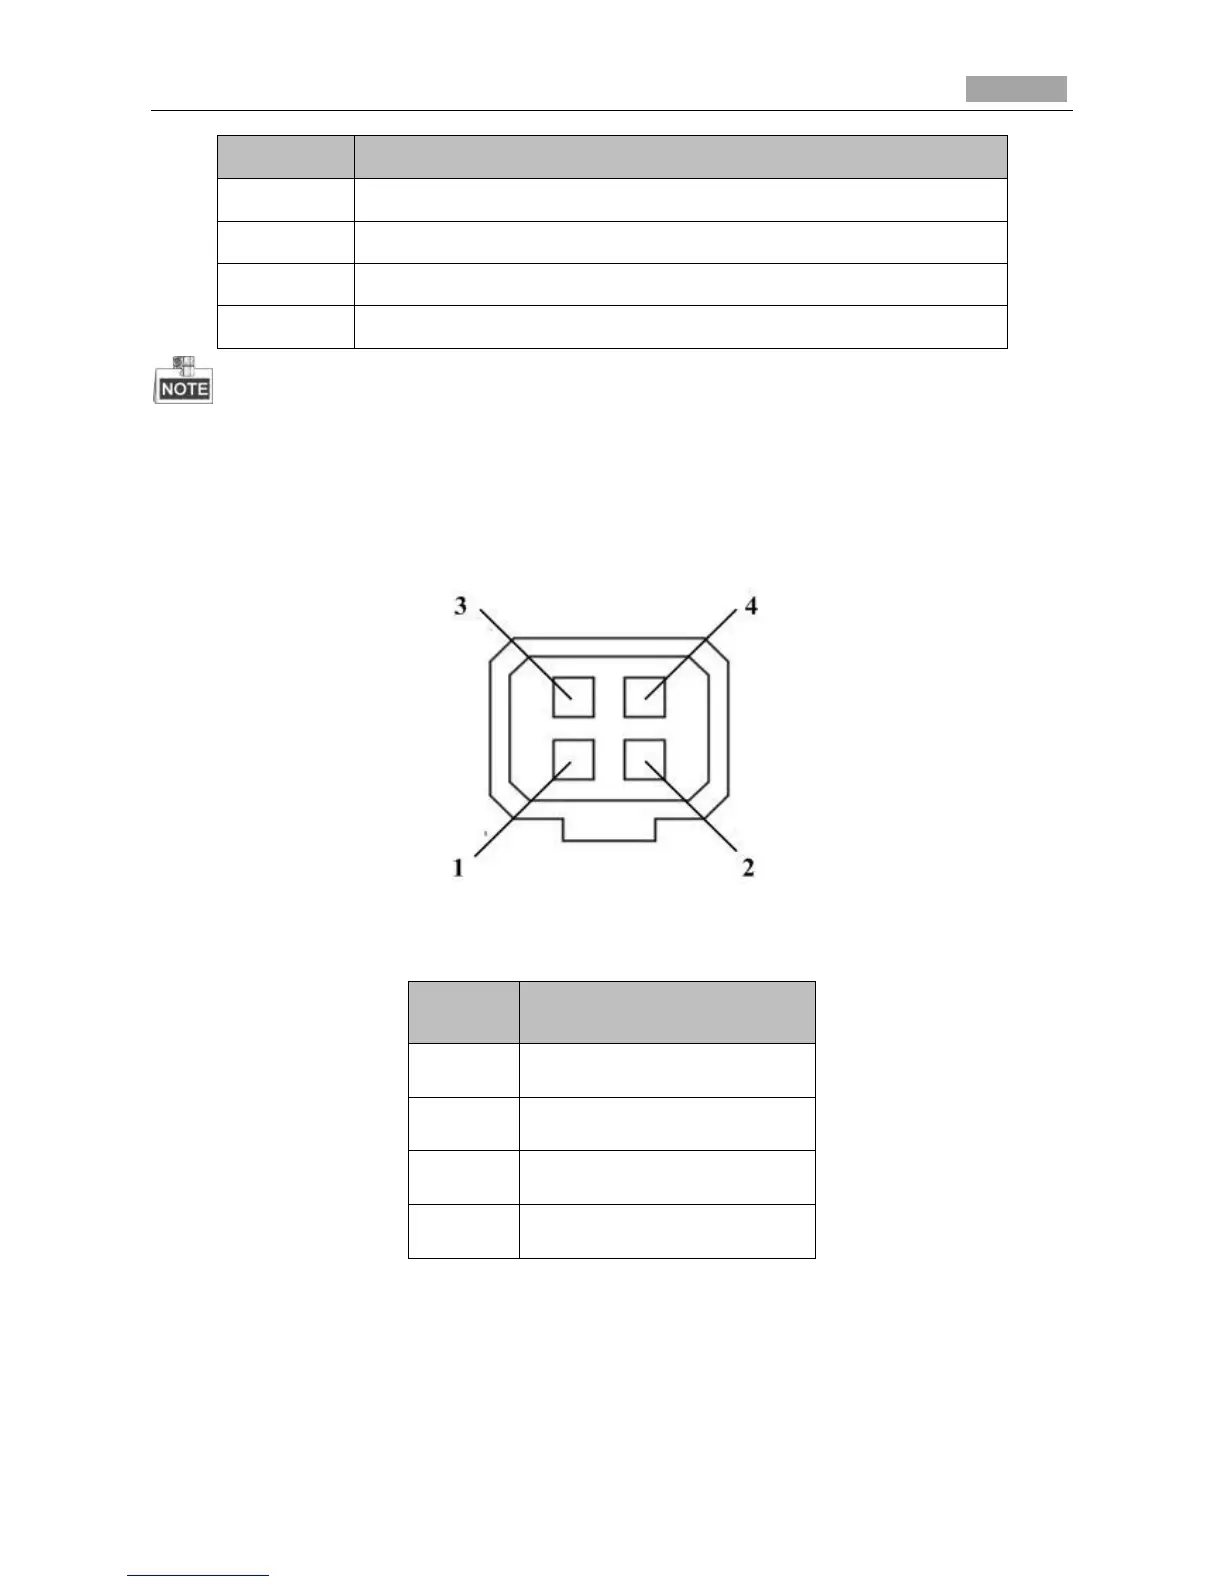
The type of auto-iris interface is shown as below figure:
Figure 2-2 Auto-iris Interface
Table 2-2 Pins
No.
DC-driven
1
Damp-
2
Damp+
3
Drive+
4
Drive-
Power, Video and GND pins are used when the auto-iris is driven by video; And Damp+, Damp-,
Drive+ and Drive- pins are used when the auto-iris is driven by DC.
Lo-Call 1890 866 900
www.cctvireland.ie
shop@cctvireland.ie

Table of Contents

Other manuals for HIKVISION DS-2CD864-EI3

Questions and Answers:

Question and Answer IconNeed help?

Do you have a question about the HIKVISION DS-2CD864-EI3 and is the answer not in the manual?

HIKVISION DS-2CD864-EI3 Specifications

General IconGeneral
BrandHIKVISION
ModelDS-2CD864-EI3
CategorySecurity Camera
LanguageEnglish

Related product manuals