Do you have a question about the HIKVISION DS-2CD2132-I and is the answer not in the manual?
Details FCC compliance and conditions for digital devices.
Explains CE marking and directives for product compliance in the EU.
Guides connecting and configuring the camera within a Local Area Network.
Illustrates physical cable connections for network cameras in a LAN setup.
Step-by-step guide to discover and modify the camera's IP address.
Explains how to connect and configure the camera for Wide Area Network access.
Details setting up a camera using a static IP address for WAN access.
Describes connecting a camera via a dynamic IP address for WAN access.
Instructions for accessing the camera's interface using a web browser.
Guide to accessing the camera using dedicated client software.
Detailed steps for using the iVMS-4200 software for camera management.
Steps to set up Wi-Fi connections in managed and ad-hoc network modes.
Explains using Wi-Fi Protected Setup (WPS) for simplified wireless connection.
How to configure IP settings for the wireless network interface.
Overview of the live view interface, its components, and functions.
Instructions on how to initiate and view live video streams.
Guide to manually capturing still images or recording video.
How to control the camera's pan, tilt, and zoom functions.
Description of the PTZ control panel interface and its buttons.
Instructions for setting and recalling specific camera positions.
How to adjust stream types and image sizes for live viewing.
Settings for live view, recorded files, and captured pictures saving paths.
How to set time synchronization and Daylight Saving Time (DST).
Covers various network configuration options.
Detailed configuration of TCP/IP settings for IPv4 and IPv6.
How to set up HTTP, RTSP, HTTPS, and SDK ports.
Steps to configure PPPoE settings for network connection.
Guide to setting up Dynamic DNS for network access.
How to configure SNMP for camera monitoring.
Steps for securing network connection using IEEE 802.1X authentication.
How to configure Quality of Service (QoS) to manage network traffic priority.
Steps to configure FTP for uploading captured pictures.
How to enable Universal Plug and Play (UPnP) for network compatibility.
Covers video and audio parameter configurations.
Detailed settings for stream type, resolution, bitrate, encoding, and profile.
How to configure audio encoding, input, and volume settings.
Setting up Region of Interest (ROI) encoding for better compression.
Adjusting various image quality settings.
Adjusting brightness, contrast, saturation, sharpness, and other display parameters.
Customizing camera name, date, and time overlays on the video feed.
Adding custom text overlays to the live video display.
How to mask specific areas of the video to protect privacy.
Overlaying a custom picture onto the camera's video feed.
Configuring the camera to respond to alarm events.
Setting up motion detection areas, sensitivity, and arming schedules.
Configuring the camera to detect tampering with the lens.
Setting up external alarm inputs and linking them to camera actions.
Configuring alarm outputs to trigger external devices or signals.
Configuring actions for system exceptions like HDD full or network disconnect.
Setting up email notifications for alarm events.
Configuring scheduled and event-triggered snapshots.
Configuring face detection capabilities and associated actions.
Configuring wireless alarms, PIR alarms, and remote control alarms.
How to arm or disarm the camera for security functions.
Steps to add and initialize Network-Attached Storage (NAS) devices for recording.
Setting up schedules for automatic video recording based on time or events.
How to create, modify, and delete user accounts with specific permissions.
Securing live stream data by enabling or disabling RTSP authentication.
Enabling or disabling anonymous access to the camera's interface.
Configuring rules to allow or deny access based on IP addresses.
Accessing details about the camera's model, firmware, and hardware configuration.
Covers camera maintenance procedures.
Instructions for restarting the network camera.
Guide to resetting camera parameters to their factory default values.
How to import or export camera configuration settings.
Steps to perform firmware upgrades for the camera system.
Configuration of the RS-232 serial port.
Configuring RS-485 serial port parameters for PTZ control.
Instructions for SADP software to automatically discover online devices.
Steps to edit network parameters like IP address and port using SADP software.
Procedure to restore the default password using a serial code.
Guide to choosing the correct WAN connection type on a router.
How to configure LAN IP address and subnet mask settings on a router.
Instructions for setting up port forwarding rules in a router for camera access.
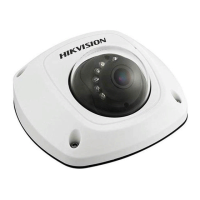
| Model | DS-2CD2132-I |
|---|---|
| Image Sensor | 1/3" Progressive Scan CMOS |
| Wide Dynamic Range | Digital WDR |
| Digital Noise Reduction | 3D DNR |
| Video Compression | H.264/MJPEG |
| Max. Image Resolution | 2048 x 1536 |
| Ingress Protection | IP66 |
| IR Range | Up to 30m |
| Resolution | 3MP |
| Lens | 2.8mm/4mm/6mm |
| Min. Illumination | 0.01 Lux @ (F1.2, AGC ON), 0 Lux with IR |
| Day & Night | IR cut filter |
| Bit Rate | 32 Kbps ~ 16 Mbps |
| Image Settings | Saturation, Brightness, Contrast adjustable by client software or web browser |
| Network Storage | NAS |
| Protocols | HTTP, HTTPS, TCP/IP, UDP, RTP, RTSP, SMTP, FTP, DHCP, DNS, DDNS, NTP, UPnP, IGMP, IPv4/IPv6 |
| Security | User Authentication, IP address filtering |
| Interface | 1 RJ45 10M/100M Ethernet |
| Operating Conditions | -30 °C ~ 60 °C (-22 °F ~ 140 °F), Humidity 95% or less (non-condensing) |
| Power Supply | DC 12V ± 25%, PoE (802.3af) |
| Weight | 0.5 kg |