Do you have a question about the HIKVISION DS-2CD21 Series and is the answer not in the manual?
Details compliance with FCC rules and conditions for device operation.
Outlines CE marking, Low Voltage, EMC, and RoHS directives compliance.
Critical safety precautions to prevent serious injury or death from device misuse.
Precautions to prevent potential injury or material damage if cautions are neglected.
Connect and configure the network camera within a Local Area Network (LAN).
Illustrates cable connection methods for network cameras and computers.
Steps to find and modify the network camera's IP address for access.
Connect and configure the network camera to a Wide Area Network (WAN).
Instructions for connecting the camera to a WAN using a static IP address.
Connect and configure the camera to a WAN using a dynamic IP address.
Configure DDNS for network access using a domain name provider.
Set up DDNS using an IP Server for private domain name resolution.
Login procedure and interface details for accessing the camera via a web browser.
Guide to installing and using the iVMS-4200 client software for camera management.
Steps to connect the camera to a wireless network in managed or ad-hoc modes.
Simplified wireless connection setup using the WPS feature.
Configure IP address, subnet mask, and default gateway for wireless connections.
Overview and description of the live view interface elements and controls.
Procedure to initiate live view of the camera feed from the toolbar.
Controls for pan, tilt, zoom, and lens adjustments of the camera.
Interface for controlling camera PTZ movements and lens functions.
How to define and recall specific camera positions (presets).
Configure and activate patrol sequences for the camera.
Set local parameters for live view, recorded files, and captured pictures.
Configure time synchronization and Daylight Saving Time (DST) settings.
Configure network parameters like TCP/IP, ports, PPPoE, DDNS, and SNMP.
Set up IP address, subnet mask, and default gateway for IPv4 and IPv6.
Set HTTP, RTSP, HTTPS, and server port numbers for camera access.
Configure PPPoE settings for network connection, requiring ISP-provided credentials.
Configure Dynamic DNS (DDNS) for network access using various providers.
Configure SNMP for camera status monitoring and remote management.
Secure camera data and user authentication using IEEE 802.1X standard.
Optimize network performance by prioritizing data sending with QoS settings.
Enable UPnP™ for seamless network device compatibility and simplified network implementation.
Configure email notifications for detected alarm events like motion detection.
Configure NAT for port mapping, either automatically or manually.
Configure FTP server settings for uploading captured pictures.
Manage devices via EZVIZ Cloud P2P platform for remote access.
Configure HTTPS settings to secure communication and protect against Man-in-the-middle attacks.
Configure video and audio parameters, including stream types, resolution, and encoding.
Adjust video stream settings like resolution, bitrate, frame rate, and encoding.
Configure audio encoding, input, volume, and noise filter settings.
Optimize video quality by allocating more resources to specific regions of interest.
Enable dual-VCA retrieval cooperation with NVR for playback.
Adjust image quality settings like brightness, contrast, and sharpness.
Set image quality parameters including brightness, contrast, saturation, and sharpness.
Customize camera name and time displayed on the screen (On-Screen Display).
Add custom text overlays to the live video feed.
Cover specific areas of the live video to prevent unauthorized viewing or recording.
Overlay a custom picture, such as a logo, onto the camera's image.
Configure alarm events like motion detection and set linkage actions.
Set up motion detection areas and sensitivity to trigger alarm actions.
Configure the camera to trigger alarms when the lens is covered or obstructed.
Configure alarm input channels, types, and arming schedules.
Configure alarm output channels, delay times, and schedules.
Manage camera exceptions like HDD full, network disconnection, or IP conflicts.
Enable and configure face detection features for identifying individuals in video feeds.
Detect abnormal audio events like sudden sound changes or input exceptions.
Set up detection zones for people or objects crossing a defined line.
Define intrusion areas to trigger alarms when specific zones are entered.
Detect image blur caused by lens defocus and trigger alarm actions.
Detect changes in the surveillance environment, like camera rotation or tampering.
Configure Video Content Analysis (VCA) features like behavior analysis and face capture.
Analyze suspicious behavior and trigger linkage methods when alarms are detected.
Capture faces and extract character information like age, gender, and accessories.
Analyze visitor times and dwell times using graphical heat map representations.
Calculate the number of people entering or leaving a configured area.
Configure network-attached storage (NAS) for storing recorded files and logs.
Configure scheduled recording parameters, including pre-record and post-record times.
Configure scheduled and event-triggered snapshots, including FTP upload.
Configure the area and parameters for counting people entering or leaving.
View and export people counting statistics reports (daily, weekly, monthly, annual).
Navigate and view recorded video files stored on network disks or SD cards.
Search and filter log files for operations, alarms, and exceptions.
Create, modify, and delete user accounts with different permission levels.
Secure live view stream data using RTSP and Web authentication methods.
Enable or disable anonymous access, allowing visits without user name or password.
Control access by allowing or forbidding specific IP addresses.
Enable Telnet and SSH for secure remote login and data communication.
View detailed device information such as model, serial number, and firmware version.
Perform maintenance tasks like rebooting, restoring defaults, and managing configuration files.
Procedure to restart the network camera device.
Reset the camera's settings to factory defaults.
Save and load camera configuration settings for batch configuration or backup.
Update the camera's firmware to the latest version.
Configure RS-232 port parameters for device management or transparent channel communication.
Configure RS-485 serial port parameters for PTZ control.
Configure hardware services like IR LED, Auto Back Focus, and Auto Defog.
Introduction to SADP software for searching and modifying network device parameters.
Select WAN connection type (e.g., PPPoE, Static IP) on the router.
| Image Sensor | 1/3" Progressive Scan CMOS |
|---|---|
| IR Range | Up to 30 m |
| Digital Noise Reduction | 3D DNR |
| Operating Conditions | Humidity 95% or less (non-condensing) |
| Impact Protection | IK10 |
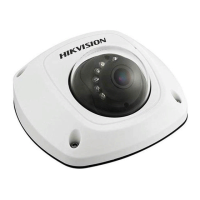
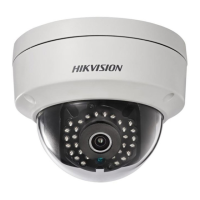
| Camera Type | Dome |
| Lens | 4mm@F2.0 (2.8mm, 6mm optional) |
| Angle of View (Horizontal) | 73.1° (4mm lens) |
| Angle of View (Vertical) | 53.4° (4mm lens) |
| Angle of View (Diagonal) | 89.9° (4mm lens) |
| Day & Night | IR cut filter with auto switch |
| Video Compression | H.264 |
| Bit Rate | 32 Kbps to 16 Mbps |
| Image Settings | Saturation, brightness, contrast adjustable |
| Communication Interface | 1 RJ45 10M/100M self-adaptive Ethernet port |
| Protocol | TCP/IP, HTTP, DHCP, DNS, DDNS, RTP, RTSP, PPPoE, SMTP, NTP, UPnP |
| Power Supply | PoE (802.3af) |
| Operating Temperature | -30°C ~ 60°C (-22°F ~ 140°F) |
| Weight | Approx. 520 g (1.1 lb) |
| Min. Illumination | 0 Lux with IR |