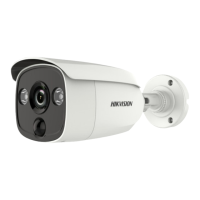
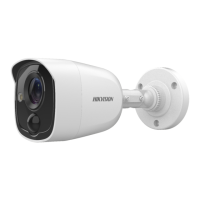
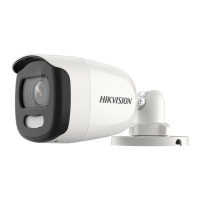
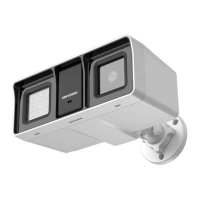
This document describes the HIKVISION TURBO HD PIR Series Bullet Camera with EXT Alarm out, a surveillance device designed for various environments.
Function Description
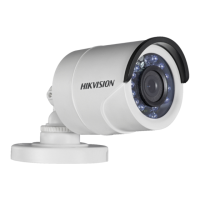
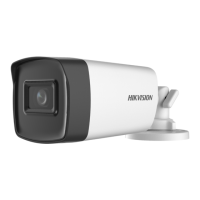
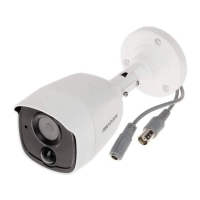
The camera is a bullet-type surveillance camera featuring a high-performance CMOS sensor. It is equipped with an IR cut filter with auto-switch for day and night operation, and SMART IR technology to prevent overexposure in low-light conditions. A key feature is its PIR detection capability, which triggers a strobe light alarm and an external alarm output. The camera supports alarm linkage with a Digital Video Recorder (DVR). It also includes 3-axis adjustment for flexible positioning.
Important Technical Specifications
The manual covers two types of cameras, Type I and Type II, with several models:
- Type I Camera Models: DS-2CE11D0T-PIRLO, DS-2CE11D8T-PIRLO, DS-2CE11H0T-PIRLO, DS-2CE11D0T-PIRLPO, DS-2CE11H0T-PIRLPO
- Type II Camera Models: DS-2CE12D0T-PIRLO, DS-2CE12D8T-PIRLO, DS-2CE12H0T-PIRLO
The camera operates with a DC Voltage input.
For video format, it supports:
- 2MP@25fps
- 2MP@30fps
- 4MP@25fps (available for H0T series)
- 4MP@30fps (available for H0T series)
- 5MP@20fps (available for H0T series)
The operating temperature range is specified as -40°C to 60°C.
Usage Features
The camera offers a comprehensive On-Screen Display (OSD) menu with configurable parameters for image adjustment and alarm settings.
Exposure Settings:
- EXPOSURE MODE: GLOBAL (normal exposure), BLC (Backlight Compensation), HLC (Highlight Compensation), WDR (Wide Dynamic Range).
- GLOBAL: Adjusts lighting distribution and variations.
- BLC: Compensates light to the foreground object, potentially overexposing the background.
- HLC: Reduces brightness of strong spots to improve overall image.
- WDR: Provides clear images in challenging backlight conditions by balancing brightness across the image.
- AGC (Auto Gain Control): Optimizes image clarity in poor light conditions, with levels settable to HIGH, MEDIUM, or LOW. Note that noise may be amplified when AGC is on.
- SLOW SHUTTER: Increases exposure time for greater light sensitivity in low lux conditions, with settings from OFF to x16.
Day/Night Settings:
- MODE: COLOR (image always colored), B/W (image always black and white), AUTO (automatic switch).
- IR LIGHT: Can be turned ON/OFF.
- SMART IR: Adjusts IR light intensity to prevent overexposure, with MODE 1 (ideal for low illumination, potential delay) or MODE 2 (normal mode) and an adjustable value from 0 to 3.
- D-N THRESHOLD (Day to Night Threshold): Controls sensitivity for switching from day to night mode (1 to 9).
- N-D THRESHOLD (Night to Day Threshold): Controls sensitivity for switching from night to day mode (1 to 9).
Video Settings:
- IMAGE MODE: STD (Standard) or HIGH-SAT (High Saturation) for image saturation.
- WHITE BALANCE: AUTO (automatic adjustment) or MANUAL (R-GAIN/B-GAIN adjustment).
- BRIGHTNESS: Adjustable from 1 to 9.
- CONTRAST: Enhances color and light differences, adjustable from 1 to 9.
- SHARPNESS: Determines detail reproduction, adjustable from 1 to 9.
- SATURATION: Adjusts color saturation, adjustable from 1 to 9.
- 3 DNR (3D Digital Noise Reduction): Reduces noise between and within frames for clearer video.
- MIRROR: OFF, H (horizontal flip), V (vertical flip), or HV (horizontal and vertical flip).
Functions:
- WHITE LIGHT: AUTO or OFF.
- ALARM MODE: SOLID (white light turns on) or FLASHING (white light flashes) when PIR detects an alarm. Note: If WHITE LIGHT is AUTO, only FLASHING is available for ALARM MODE.
- TIME SETTINGS: Sets the duration for the solid alarm mode (5s, 10s, 15s, 30s, or 60s).
- PIR LEVEL: Adjusts PIR module sensitivity.
- PIR DET MODE: OUTDOOR or INDOOR.
- MOTION DET: Can be turned ON/OFF.
- PRIVACY: Can be turned ON/OFF.
Installation
The manual provides detailed instructions for ceiling/wall mounting, both with and without a junction box, for both Type I and Type II cameras.
- Mounting without Junction Box: Involves using a drill template, drilling screw holes and an optional cable hole, attaching the bracket, and securing the camera with supplied screws. Cables can be routed through the cable hole or a side opening.
- Mounting with Junction Box: Requires purchasing a junction box separately. Steps include using a drill template for the junction box, taking apart the junction box, aligning camera screw holes with the junction box cover, installing the camera on the cover, attaching the junction box body to the ceiling/wall, routing cables, and combining the junction box cover with its body.
- 3-axis Adjustment: Allows for precise positioning of the camera (pan, tilt, and rotation) to achieve an optimum surveillance angle. Screws (P, T, R) are loosened for adjustment and tightened afterward.
Maintenance Features
- Cleaning: Use a clean cloth with a bit of ethanol for gentle wiping.
- Factory Default: Option to reset all settings to factory defaults.
- Troubleshooting: If the product does not function properly, contact the dealer or service center; do not attempt to disassemble the camera yourself.
- Packaging: For delivery, the camera should be packed in its original packing or packing of the same texture.
Safety Instructions
- Electrical Safety: Strict compliance with electrical safety regulations is required. Input voltage must meet SELV and Limited Power Source with 12 VDC according to IEC60950-1. Avoid connecting multiple devices to one power adapter to prevent overheating or fire. Ensure the plug is firmly connected.
- Mounting Safety: Ensure the wall is strong enough to support three times the camera's weight. Use expansion bolts for cement walls and self-tapping screws for wooden walls.
- Environmental Precautions: Do not drop the camera or subject it to physical shock. Avoid touching sensor modules with fingers. Do not place the camera in extreme temperatures (-40°C to 60°C), dusty, or damp locations. Avoid high electromagnetic radiation. Do not aim the camera at the sun or bright places. Protect the sensor from laser beams. Good ventilation is required to avoid heat accumulation. Keep non-waterproof devices away from liquids.
- Device Malfunction: If smoke, odor, or noise occurs, immediately turn off power, unplug the cord, and contact the service center. Do not attempt to disassemble the camera.
- FCC Information: The device complies with part 15 of the FCC Rules. It is a Class A digital device, designed for commercial environments. Operation in a residential area may cause interference.
- EU Conformity Statement: The product is CE marked and complies with Low Voltage Directive 2014/35/EU, EMC Directive 2014/30/EU, and RoHS Directive 2011/65/EU.
- WEEE Directive (2012/19/EU): Products marked with the crossed-out wheeled bin symbol should not be disposed of as unsorted municipal waste. Proper recycling involves returning the product to a supplier or designated collection points.
- Battery Directive (2006/66/EC): If the product contains a battery, it should not be disposed of as unsorted municipal waste. Batteries may be marked with Cd, Pb, or Hg. Proper recycling involves returning the battery to a supplier or collection point.
- Industry Canada ICES-003 Compliance: The device meets CAN ICES-3 (A)/NMB-3(A) standards.
- Warning: As a Class A product, it may cause radio interference in a domestic environment, requiring the user to take adequate measures.