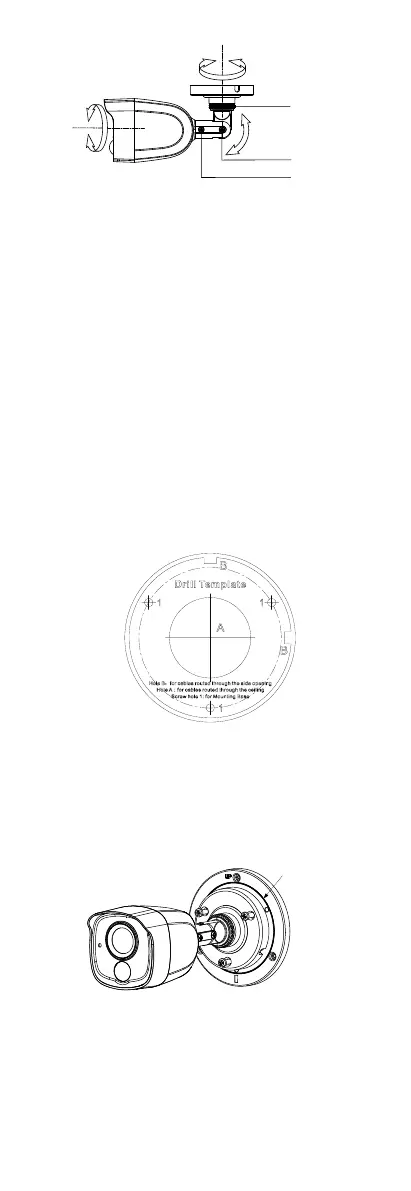
Figure 2-3 3-axis Adjustment
1). Loosen the P screw to adjust the pan position [0°
to 360°]. Tighten the screw after completing the
adjustment.
2). Loosen the T screw to adjust the tilt position [0°
to 180°]. Tighten the screw after completing the
adjustment.
3). Loosen the R screw and rotate the camera [0° to
360°]. Tighten the screw after completing the
adjustment.
2.1.2 Ceiling/Wall Mounting with Junction Box
Before you start:
You need to purchase a junction box separately.
Steps:
1. Paste the drill template on the ceiling/wall.
2. Drill screw holes and the cable hole in the
ceiling/wall according to the holes of the drill
template.
Figure 2-4 Drill Template of Junction Box
3. Take apart the junction box, and align the screw
holes of the camera with those on the Junction box’
cover.
4. Install the camera on the junction box’s cover with
supplied screws.
Figure 2-5 Install the Camera on the Junction Box’s
Cover
5. Attach the junction box body to the ceiling/wall by
aligning the screw holes of the junction box.
6. Secure the junction box’s body on the ceiling/wall
with supplied screws.
 Loading...