2
DRUM ASSEMBLY
3 To trim the sanding pad fix a piece of fine grit
floor sander abrasive (120 grit) face up to a solid
flat board that is large enough to stand on and
operate the edger. Place the board on a flat even
floor and the edger on top of the board with the
pad over the abrasive. Do not fit an abrasive
disc.
CAUTION - make sure that the Clamp
Bolt (Ref.59) is secure and properly
tightened
4 Connect the edger to the power supply, stand on
the board and tip the edger back and switch
'ON'. Carefully lower the edger so that the
sanding pad comes into contact with the
abrasive. Move the edger from side to side
across the abrasive under its own weight for a
few seconds. Tip the edger back and switch
'OFF’
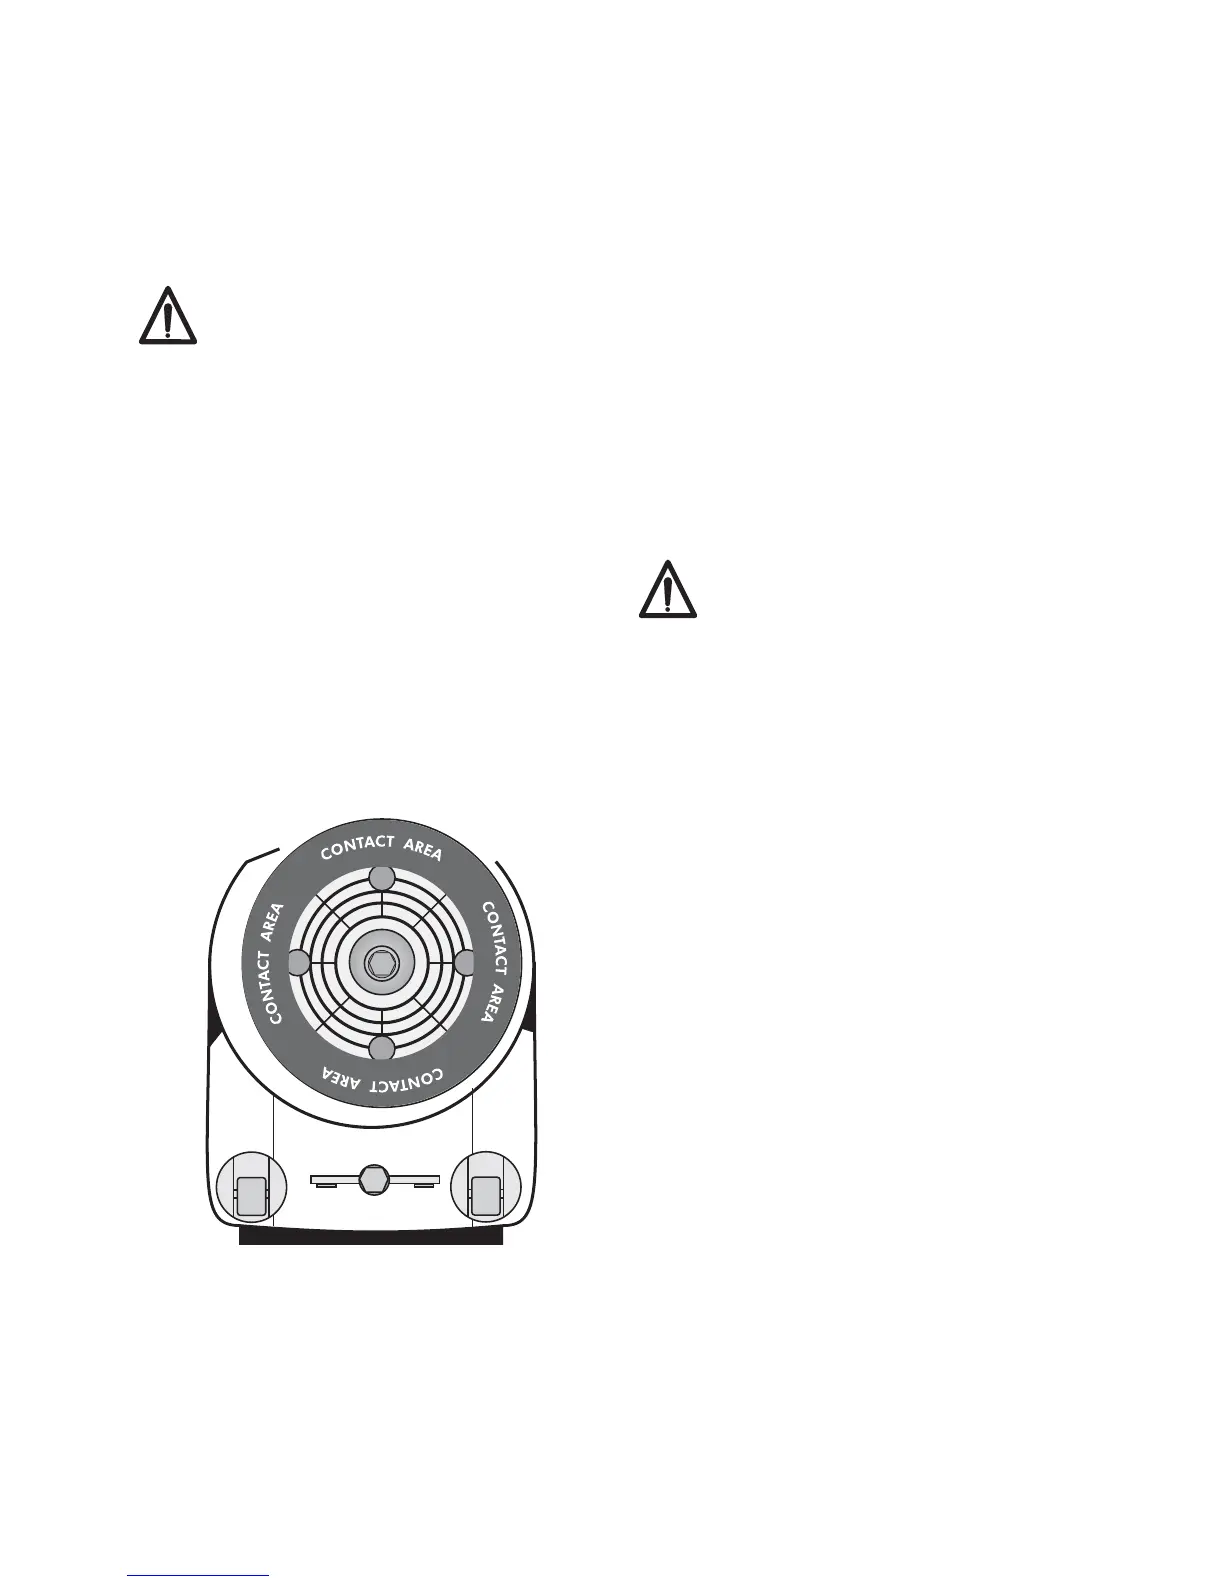
5 Disconnect from the power supply and check the
condition of the sanding pad. You should witness
an even surface with no high or low spots around
the whole surface of the sanding pad in the
contact area as shown in the diagram below.
Adjusting the Castors
The castors are set to achieve the correct contact area
across the sanding pad as illustrated in the diagrams
above.
1 To check the castor setting place a clean sheet of
glass across the two castors and the sanding
pad. Inserting a 0.005" feeler gauge (or a sheet
of paper) between the glass and the sanding
pad. Check the correct contact area is achieved
(see diagram above - Sanding Pad Static Contact
Area)
An alternative method is to lightly dampen the
rubber sanding pad and then place the glass
sheet across the two castors and sanding pad.
Apply light pressure to the glass sheet, which will
witness the dampened area of the sanding pad
in contact with the glass.
WARNING - use toughened glass only
with a minium thickness of 6mm (¼”)
with rounded/polished edges. Take care
when handling glass. Always use suitable
gloves, eye protection and protective
clothing.
2 To adjust the castors loosen the two castor lock
nuts using the special tool Part No. 011720 and
5mm ball allen key. Adjust the castors and check
the contact area on the sanding pad. When the
contact area is correct tighten the two castor lock
nuts securely. Use a suitable thread lock
compound. Finally check the contact area is still
correct after tightening the castor lock nuts.
3 Trim the sanding pad as detailed above.
Sanding Pad Trimmed Contact Area
Note: Do not hold the edger in place, always keep it
moving across the abrasive sheet. Do not over trim
the sanding pad or you will reduce it's life. Do not lift
or force the edger while trimming the pad, allow the
edger to move under it's own weight. The sanding
pad minimum tread depth is 4mm ( 5/32“) .
 Loading...