Assembly of the recoil starter
1.
If
necessary,
put
a new spiral spring on the rope disk.
New springs
normally are secured against bounding
up
by
pieces
of
w;re. Take
off
the
wire
only
aftur
putting
the spring
into
the rope disk.
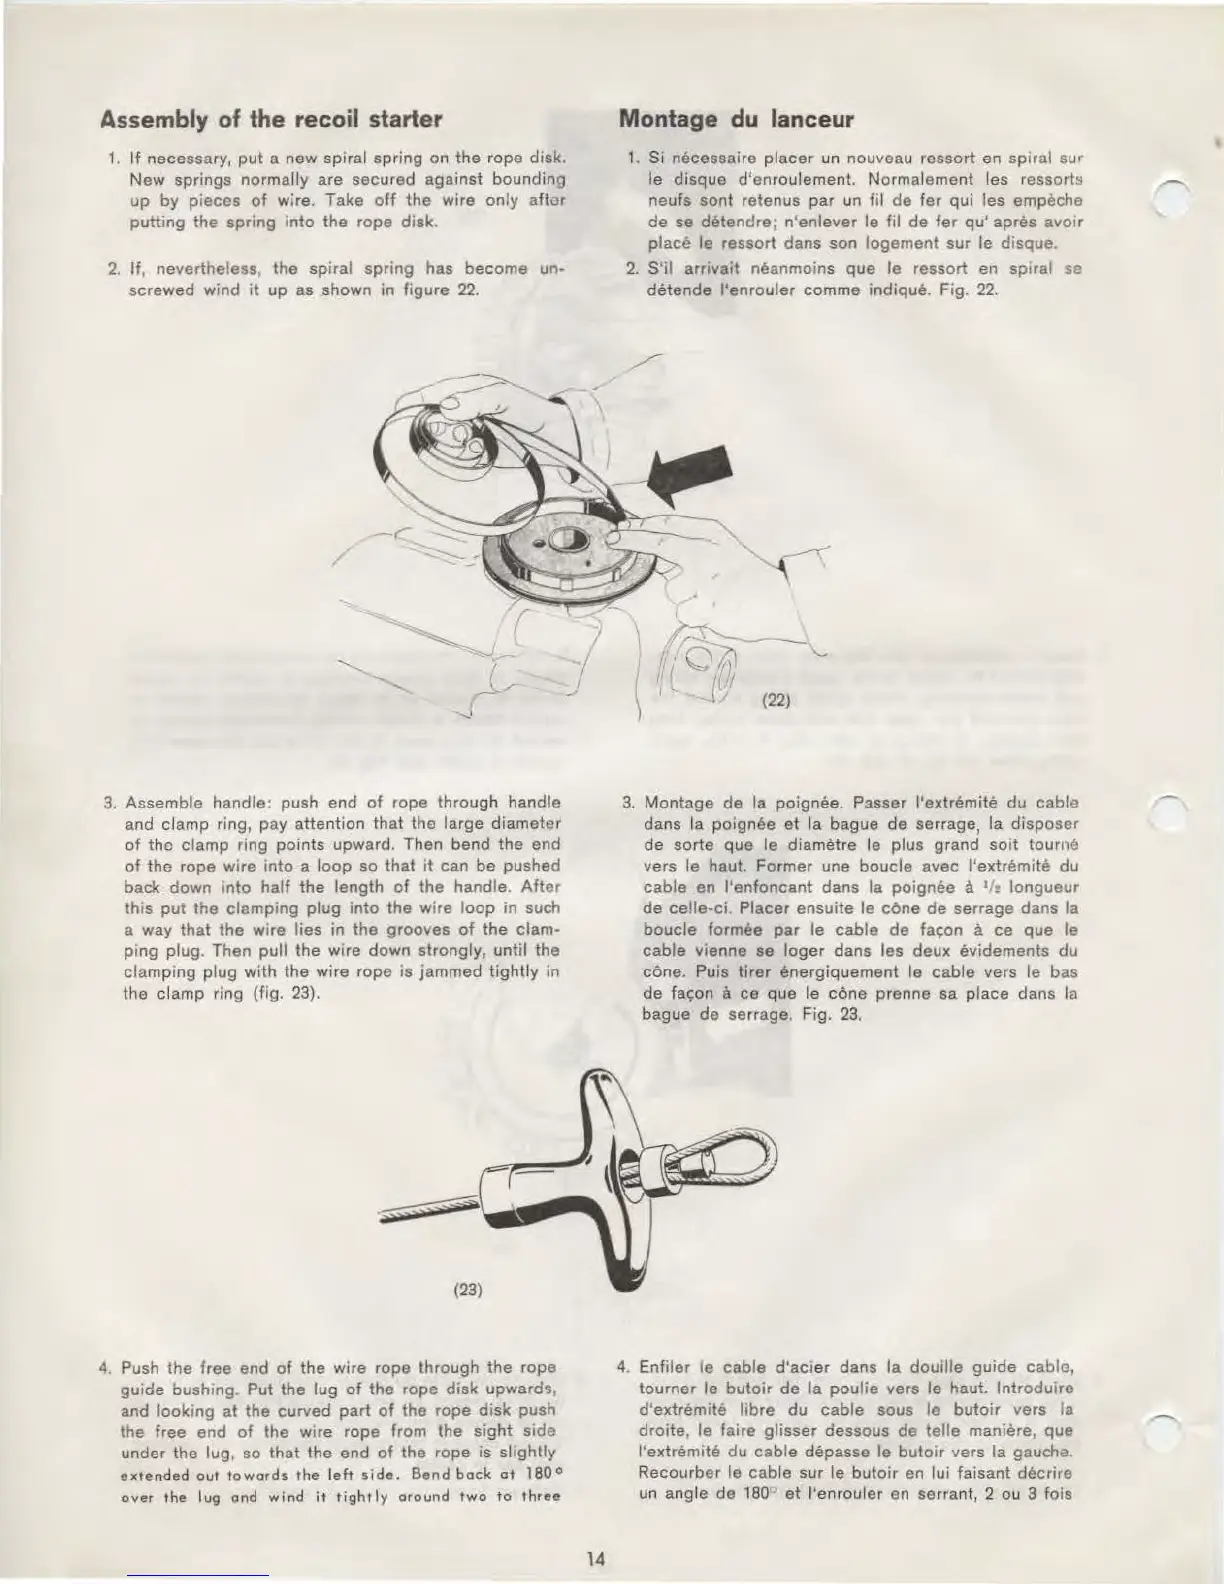
2.
If, nevertheless, the spiral spring has become un-
screwed wind
it
up
as
shown in figure
22.
-1
3.
Assemble handle: push end
of
rope through handle
and clamp ring, pay attention
that
the large
diameter
of
the clamp ring
points
upward. Then bend the end
of
the rope
wire
into a
loop
so
that
it
can be pushed
back
down
into
half
the
length
of
the
handle.
After
this
put
the clamping plug
into
the wtre
loop
in such
a way that
the
wire
lies in the grooves
of
the clam-
ping plug. Then pull the wire
down
strongly, until the
clamping plug
with
the
wire
rope is jammed
tightly
in
the
clamp
ring (fig.
23).
4.
Push the free end
of
the
wire
rope through the rope
guide bushing. Put the
lug
of
the rope
disk
upwards,
and
looking
at
the curved
part
of
the rope
disk
push
the free end
of
the
wire
rope from the sight side
under the lug, so
that
the end
of
the rope is
slightly
extended
out
towards
the
left
side.
Bend
bock
ot
180°
over
the
lug
and
wind
it
tightly
around
two
to
three
I
-"
14
Montage
du
lanceur
1.
Si necessaire
placer
un nouveau rossort en spiral sur
le
disque d'enroulement. Normalement les ressorts
neufs sont retenus
par
un fil
de
fer
qui
les
empeche
de se detendre; n'enlever
le
fil de
fer
qu'
apres avoir
place
le
ressort dans son logement sur le disque.
2.
S'il arrivait neanmoins
que
le ressort en spiral
so
detende
l'enrouler
comme indique. Fig.
22.
3.
Montage
de Ia poignee. P3sser l'extremite du cable
dans
Ia poignee
et
Ia bague de serrage, Ia
disposer
de
sorte que le diametre le plus grand
soil
tourne
vers le haut. Former une boucle avec l'extremite du
cable
en
l'enfoncant
dans Ia poignee a
1
/!
longueur
de
ce!le-ci. Placer ensuite le
cone
de
serrage dans Ia
boucle formes
par
le
cable
de
fa~on
a
ce
que
le
cable
vienna se
loger
dans les deux evidements du
cone. Puis
tirer
energiquement le
cable
vers le bas
de
fa~on
a
ce
que
le
cone
prenne sa
place
dans Ia
bague de serrage. Fig.
23.
4.
Enfiler le cable
d'acier
dans Ia
douille
guide
cable,
tourner
le
butoir
de Ia
poulie
vers le haut.
lntroduire
d'extremite
libre
du
cable
sous le
butoir
vers Ia
droite,
le
faire
glisser
dessous
de
telle
maniere, que
l'extremite du
cable
depasse le
butoir
vers Ia gauche.
Recourber le
cable
sur le
butoir
en lui faisant decrire
un angle de
180>
et
l'enrouler en serrant, 2
ou
3 fois
 Loading...