This document describes an LED Backlight TV, providing a comprehensive user manual for its operation, features, and maintenance.
Function Description
The LED Backlight TV is designed to provide a rich entertainment experience, offering a variety of functions including live television, video-on-demand (VOD), media playback, and access to various applications. It supports digital television content viewing and recording, and allows for mirroring content from compatible devices. The TV is equipped with an intuitive menu system for easy navigation and customization of settings.
Usage Features
Turning the TV On or Off:
To power on the TV, simply plug the AC power cord into a socket outlet. Once connected, press the power button on the remote control to toggle the TV on or off. It's important to note that when in standby mode, the TV still consumes some power. For a complete power disconnection, the mains plug should be removed from the socket. The TV also features an automatic standby mode if no input signal is received for several minutes.
The TV allows users to select from various input sources depending on the connected video device. To do this, press the "INPUT" button on the remote, navigate through the list of sources using the arrow buttons, and confirm the selection with the "OK" button.
Live TV:
Upon selecting DTV as the input, if no channels have been saved previously, the TV will prompt for a channel search. Users can specify the tune mode as Antenna or Cable. Channel settings can also be adjusted through the "Full setting menu" under "Channel." After the initial channel tuning, the screen will display operating tips for Live TV, including how to access the channel list, PVR/T.Shift, and channel information.
The remote control offers shortcuts for Live TV: "OK" calls out the Channel List, "V" calls out PVR/T.Shift, "Call out Channel List" displays channel information, and "BACK" shows recent channels.
EPG (Electronic Program Guide):
The EPG provides a convenient way to check TV programs for up to 7 days in advance, specifically for digital channels. It also facilitates programming recordings of favorite shows and setting reminders for programs of interest, with automatic channel switching at scheduled times. The availability and amount of program information depend on the broadcaster. To access the EPG, press the "EPG" button on the remote.
Within the EPG, users can select a current program and press "OK" to watch it in full-screen mode. The arrow buttons allow navigation through channels and programs based on the time schedule. Pressing "OK" on a selected program offers options for PVR or Reminder. Users can set start/stop times and repeat options (Once, Everyday, Weekly) for reminders and recordings. Reminders are only available for programs not yet aired. A storage device must be connected for recording, and the TV will record even in standby mode.
"CH+/CH-" buttons move the program listing page up/down. The "RED" button displays scheduled reminders and recordings. The "GREEN" button selects a day. The "YELLOW" button jumps to the Channel List Selection, and the "BLUE" button shows detailed information of the selected program.
PVR/T.Shift:
The PVR (Personal Video Recorder) function allows users to record digital television content for later viewing, exclusively in DTV source. The storage disk must be formatted as FAT32 or NTFS. This function requires a connected data storage device. Recording can be initiated via the EPG or by pressing the "V" button to select PVR or T.Shift. Pressing the "■" button stops the recording, and the recorded file can be played back in Media.
T.Shift (Time Shift) enables watching a live broadcast (DTV only) with a delay by temporarily recording the program onto a hard disk. A hard disk with at least 1G storage capacity is required. The "T.shift" button on the remote displays the menu, "II" pauses the live broadcast, ">" plays, "<<" watches in reverse, and ">>" watches in advance rapidly. The "■" button exits the function and returns to the current broadcast.
When connecting a hard disk, ensure its mains adapter is connected to the power supply. USB 1.1 or 2.0 devices requiring more than 500mA or 5V may not be supported. The maximum supported current for USB 3.0 is 1A. The maximum supported storage space for a hard disk is 1T. For DTV program video streaming, the USB storage device's transfer rate must be at least 5MB/s. PVR is not supported for analogue channels or channels locked with Channel Lock or scrambled channels.
The TV's menu system is accessed by pressing the menu button. From there, users can navigate through full menu settings using the ">" button. Within each menu, the "^/v" buttons select items, "OK" enters submenus, "< / >" adjusts values, and "BACK" returns to the previous menu. The "EXIT" button closes the menu.
This menu optimizes the TV's output picture quality.
- Picture Mode: Configures picture settings with options like Standard, Dynamic, Natural, Theater, Game, Sport.
- Brightness: Adjusts the brightness level for lighter or darker images.
- Contrast: Increases or decreases how bright images appear.
- Color: Adjusts the color intensity for a more vibrant image.
- Aspect Ratio: Stretches or zooms the picture with settings like Normal, Zoom, Wide, Cinema, 1:1 PIXEX MAP, Panoramic, Direct, or Auto.
- BackLight: Some models feature Dynamic Backlight Control (Off, High, Low). Local dimming models have a Local Dimming menu (On, Off). This option sets the overall screen brightness.
3D Settings (if supported):
This section allows changing 3D mode settings. Compatible 3D content and glasses are required.
- 3D Mode: Selects a preset 3D MODE: Off/Auto/2D to 3D/Side by Side/Top and Bottom/Line by Line/Vertical Stripe/Checker Board/Frame Sequential. When watching 2D video, 3D switch should be Off. For Frame Packing 3D signal, image resolution matches incoming signal. For Side to Side, Top and Bottom, image is full screen in half resolution.
- L-R Switch: For SG (Shutter Glasses) 3D, this matches left and right switching with glasses to correct stereoscopic impression.
- View Point: Adjusts the viewpoint distance.
- Depth: Modulates image depth by parallax correspondence to increase or decrease stereoscopic effect.
- 3D to 2D: Displays all 3D format signals in 2D format when On.
Users should be aware of potential eye strain or dizziness when watching 3D for extended periods and should take breaks if needed. Children under 6 years old should not watch 3D video.
Advanced Picture Settings:
- Display: Adjusts advanced picture settings in the component source.
- Overscan: Changes video size to slightly crop displayed image edges.
- Tint: Adjusts colors from green to magenta for natural skin tones.
- Sharpness: Adjusts image edge sharpness.
- Ultra Smooth Motion: Minimizes afterimages during fast-moving scenes (Off, Low, Middle, High). High setting produces smoother picture, low setting reduces judder.
- Noise Reduction: Improves picture clarity by reducing noise.
- Adaptive Contrast: Automatically darkens dark areas and lightens light areas for more detail.
- Color Temperature: Selects a preset color temperature.
- White Balance: Adjusts red, green, and blue light intensity for true colors.
- Color Tuner: Adjusts Hue, Saturation, and Brightness of color settings.
- Restore Default Picture Settings: Resets all picture settings in the current mode to factory defaults.
Optimizes the TV's audio output.
- Sound Mode: Selects a preset sound mode (Standard, Theater, Music, Speech, Late Night).
- dbx-tv Audio Enhancements: Total Technology provides enhanced audio.
- Total Sonics: Optimizes overall sound quality, increasing bass, clarifying dialog, and widening the sound field.
- Total Surround: Provides surround sound experience with psycho-acoustic processing.
- Total Volume: Maintains consistent loudness levels across programs and channels.
- Advanced Audio Settings:
- Equalizer: Boosts volume at different frequencies.
- Lip Sync: Synchronizes displayed image with audio output.
- Balance: Adjusts left and right speaker strength.
- Digital Audio Out: Selects digital audio output format (RAW for 5.1 Channel Surround Sound, PCM for amplifiers not supporting Dolby Digital).
- Digital Audio Delay: Adjusts digital audio output delay to sync external speaker sound with TV images.
- TV Speaker & ARC: Selects TV speaker or external speaker for sound output.
- Audio Out: Changes how audio is sent through the TV Audio Out port.
- Restore Default Audio Settings: Resets all audio settings in the current mode to factory defaults.
Manages TV channels.
- Tuner Mode: Selects tuner mode (Antenna or Cable) for channel scanning.
- Auto Scan: Automatically scans for channels.
- DTV Manual Scan: Allows manual fine-tuning adjustments for DTV channels. Users can select a channel number, then start the search. Signal strength is displayed.
- ATV Manual Scan: Allows manual fine-tuning adjustments for ATV channels if reception is poor. Users can input frequency, select Picture System (Auto, SECAM, PAL, NTSC), and Sound System (B/G, D/K, L, I, L', M).
- Channel Edit: Displays, hides, and renames channels. "YELLOW" button renames selected channels.
Configures TV network settings.
- Network Configuration:
- Internet Connection: Turns Internet connection On or Off.
- Connection Type: Chooses between wired or wireless network.
- Wireless Settings: Configures advanced wireless network settings.
- IP Setting: Configures IP settings.
- Connection Test: Starts a network connection test.
- Network Information: Displays network connection information.
- Anyview Stream: Shares video, music, or other content from compatible devices to the TV.
- TV Name: Allows choosing a name for the TV, which will be visible to devices for data sharing.
Manages general TV system settings.
- Location: Chooses the TV's location.
- Time: Sets current time based on location.
- Time Zone: Selects location time zone.
- Time Format: Sets 12 or 24-hour format.
- Date/Time: Sets Date and Time.
- Daylight Savings: Changes time automatically or manually.
- Power On Timer: Enables Power On Timer (Off, Once, Daily).
- Power Off Timer: Enables Power Off Timer (Off, Once, Daily).
- Sleep Timer: Sets TV to automatically turn off after a specified time (Off, 10-120 Minutes).
- Language: Adjusts default language settings.
- Parental Controls: Blocks children from viewing certain programs. Default password is 0000.
- Locks: Enables or disables all locks.
- Block Time: Blocks channels and programs during specific periods.
- Channel Block: Blocks programs by channels.
- Program Block: Blocks specific programs.
- Input Block: Blocks content from connected devices.
- Change PIN: Changes the PIN for Parental Controls.
- Restore Parental Control Defaults: Resets Parental Control to factory default.
- Application Settings: (For default built-in application models) Adjusts settings for applications.
- HDMI Function: Configures control of CEC-enabled devices with the TV remote.
- CEC&MHL control: Allows HDMI devices to control each other.
- Device Auto Power Off: Automatically turns off HDMI CEC devices when TV is off.
- TV Auto Power On: Allows TV to turn on with CEC-enabled devices.
- Device Connect: Allows CEC-enabled devices to communicate via HDMI cable.
- CEC Device Lists: Views a list of CEC-enabled devices.
- Advanced Settings:
- Menu Timeout: Sets menu display duration (10s, 20s, 30s, 60s, Off).
- User Mode: Sets TV to Home or Store Mode.
- PVR&T.Shift: Sets disk partition and storage space size for PVR/T.shift content.
- PVR time setting: Sets PVR recording time in advance or delay.
- Input Labels: Edits input labels.
- Default LiveTV Source: Selects default input on the remote control Live TV.
- Setup Wizard: Guides through TV setup.
- Power Indicator: Sets Power Indicator light On or Off in standby mode.
Provides information and update options.
- System Info: Views system information.
- Disclaimer: Reads legal disclaimer.
- Auto Firmware Upgrade: Sets TV to automatically receive latest firmware.
- Check Firmware Upgrade: Checks for latest firmware.
- Restore To Factory Default: Restores TV to factory default settings.
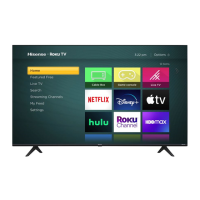
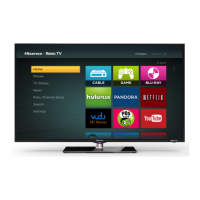
Home Screen Navigation:
The Home screen is the central hub for accessing Live TV, VOD, Media, Apps, and external device inputs. It is accessed by pressing the home button on the remote.
- Indicators and Icons: Top right corner displays current time and icons for Internet connectivity or connected USB devices.
- Input Icons: Right side displays icons for TV, AV, Component, HDMI 1-4. Connected devices are highlighted.
- Bottom Icons: Displays Live TV, VOD, Media, Apps.
VOD (Video-on-Demand):
Accesses pre-installed VOD apps.
Central location for uploading and viewing photos, music, and movies from USB drives or compatible mobile devices.
- Panels: Media screen has Picture, Video, Music, All panels.
- File Formats: Supports AVI, MP4, MKV for videos; JPG, BMP, PNG, GIF for pictures; MP3 for music.
- Viewing Videos: Icons appear at the bottom of the screen to control video playback.
- Browsing Content: Navigate to menu tabs (Music, Video, Picture), select folders, and play content. "EXIT" button closes Media center.
- Viewing Pictures as a Slideshow: Navigate to Pictures tab, click "Start the Slideshow." "OK" button stops/restarts slideshow.
Apps:
Accesses factory-installed and downloadable applications.
- 'Hot Apps' section: Displays popular apps.
- All Apps section: Provides a collective view of all apps.
- Opera TV Store™: Cloud-based apps optimized for TV (Video, Music, Social Networking, Games, News). Requires accepting End-User License Agreement.
- Opera TV Browser: Surfs the Internet and provides quick access to Google™ search engine.
- Navigate to Opera web browser icon, press "OK."
- Navigate to URL bar, press "OK" for on-screen keyboard.
- Type website address or search term.
- Press "Blue" special function button.
- Select forward arrow and press "OK" to load page or start search.
- Installing an App: From Home screen, click Opera TV Store icon, navigate to Search tab, type app name, select app, click Open or Add to Favorites.
- Removing an App: Only downloaded apps can be deleted. From Apps screen, select app, press "Red" button, confirm with "OK."
- Moving App Icons: App icons cannot be moved.
Customizing TV Name:
To identify the TV when connecting devices, go to "Full menu settings > Network > TV Name," select "User Input," press "OK" for keyboard, type name, then power off/on TV.
Anyview Cast:
Mirrors video, audio, or images from Android-based devices to the TV screen.
- From TV Settings, go to "Setup > Network" and turn on "Anyview Stream."
- Press "All Apps" button, select "Anyview Cast" app.
- On Android device, go to "Settings > Display > Cast Screen."
- Find and select TV from device list.
- Wait for "Creating Connection" progress bar to complete.
Maintenance Features
Software Updates:
The TV's software (firmware) can be updated to enhance features and correct issues. It is recommended to keep the TV connected to the Internet for automatic updates.
- Checking for updates automatically: "Auto Firmware Upgrade" is On by default. Turning it Off disables automatic updates. Updates do not interrupt viewing.
- Disabling Auto Firmware Upgrade: Press menu button, go to "About > Auto Firmware Upgrade," and turn Off. Manual checks will then be required.
- Checking for the latest firmware manually: Press menu button, go to "About > Check Firmware Upgrade."
- Manually installing software updates: If an updated package is available on the "Check Firmware Upgrade" screen, select "Download upgrade pack" and follow the steps.
Troubleshooting:
This section provides solutions for common operational issues. If the TV malfunctions, it's advisable to unplug it from the AC socket for 60 seconds or more, then reconnect. This helps restore stable conditions. If problems persist, contact Customer Care.
- No sound or picture: Check power cord, LED light (red indicates power OK).
- No picture/sound from external source: Check correct output/input connections and input mode selection.
- Delay before picture appears on startup: Normal, as TV initializes.
- Normal picture, no sound: Check volume settings, Mute mode.
- Sound but no picture or black/white picture: Unplug/replug TV, check Color setting (50 or higher), try different channels.
- Distorted/wavy sound/picture: Check for interfering electrical appliances, move appliance away, or plug TV into another power outlet.
- Blurry/momentary cut-out sound/picture: Check external antenna direction, position, connection; adjust antenna or fine-tune channel.
- Horizontal/vertical stripe or shaking picture: Check for nearby interfering sources (appliances, electric tools).
- "Clicking" sound from plastic cabinet: Normal, caused by temperature changes expanding/contracting the cabinet.
- Remote control not working: Confirm TV has power, change/install batteries correctly.
- Wi-Fi failure to join local network: Configure wireless router/access point for WPA-PSK security, follow user manual instructions for wireless connection setup.